

Step 18
On each of the tree layers mentioned in the step 17, go to Filter > Blur > Gaussian Blur and set the radius to 6 px. This step is to give some depth to the whole scene.

Step 19
Select all of the tree layers and hit Ctrl+G to make a group for them. Change this group mode to Normal 100% and make a Hue/Saturation adjustment layer within this group. Bring the Saturation values down to -34:

Step 20
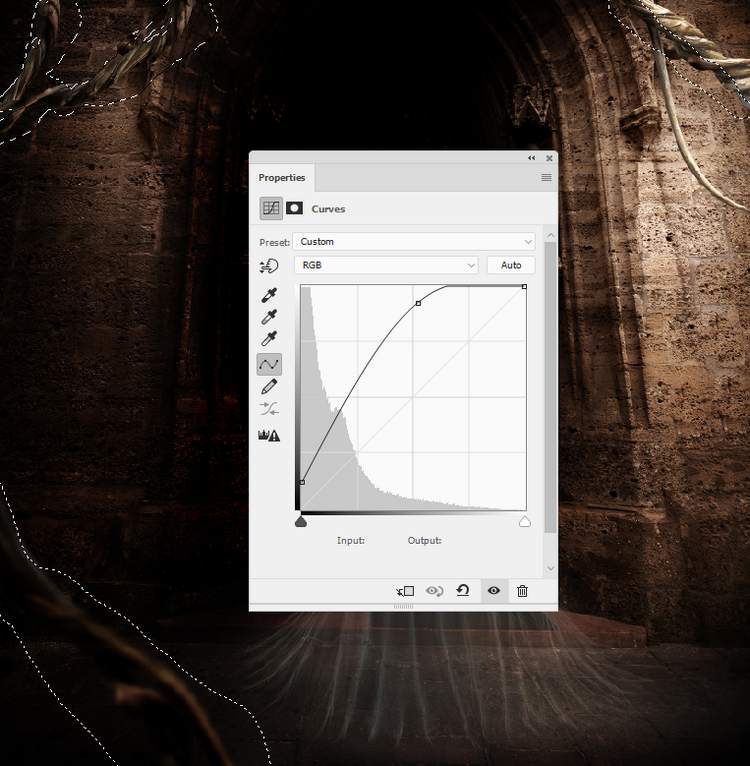
Create a Curves adjustment layer to increase the shadow of the branches. On this layer mask, use a soft black brush to erase the effect on the front or any details you feel too dark .

Step 21
Make another Curves adjustment layer to brighten the front of the branches . The selected areas show where to paint on the layer mask.
Step 22
On each of the tree layers which are on the top left, make a new layer, change the mode to Overlay 100% and fill with 50% gray.

Activate the Dodge and Burn Tool (O) with Midtones Range, Exposure about 15-20% to refine the light and shadow on these branches. You can see how I did it with Normal mode and the result with Overlay mode.

Step 23
Create a new layer below the tree group and use a medium-soft brush with the color #181411, the opacity about 30% to paint shadow for the branches on the wall.
Step 24
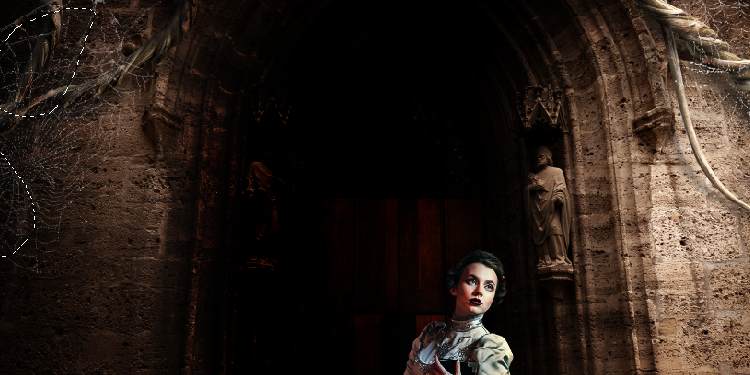
Make a new layer on top of the layers and change the brush to the cobweb ones. Use the color #e9ddd0 to paint different cobwebs on the branches’ area. I’ve used two cobwebs on the top left but feel free to make your own.

Add a mask to the each of the cobweb layers on the top left and use a soft black brush to reduce their visibility.
Step 25
Apply a Gaussian Blur of 6 px to the cobweb layer on the bottom left to fit the softness of this place.

Step 26
Make a group for the cobweb ones and use a Curves adjustment layer to darken the hidden areas. Paint on the rest so they won’t be affected by this adjustment layer.

Step 27
Open the butterflies image. As it has a transparent background so just use the Move Tool to drag butterflies to place them in different positions around the canvas. Use Ctrl+T to vary their size to increase the depth of the whole scene.
Leave a Reply