
Now we would need to erase some parts of it to make this island distinctive. Now activate your Polygonal Lasso tool (L) and follow instructions on the image below:

After that just press Delete to erase the region within the Polygonal Lasso tool’s selection then reduce the Opacity of “island 5” to 60%. Now let’s put the big floating island in our picture. Click on “island 1”, duplicate it, and then rename that layer as “island 6”. We want this island to appear massive because it is near the viewer so let’s increase its size using the Transform tool.
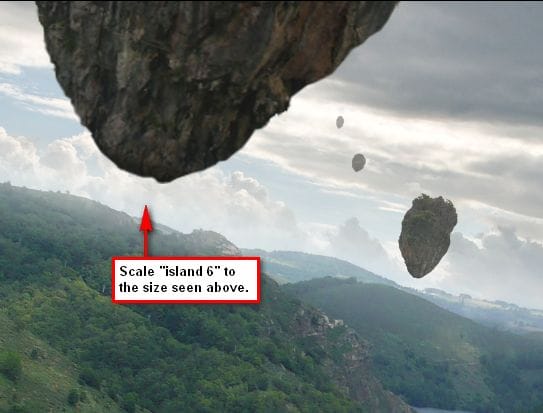
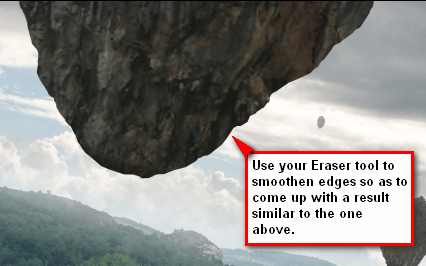
Because it has been resized to a large scale, the island now has gotten blurry. We would need to sharpen that. Click on the “island 6” layer and go to Filter > Sharpen > Sharpen. That doesn’t do much good, so we would need to sharpen it a bit more by using the Activate your Polygonal Lasso Tool (L).

After deleting the selection, you’d notice that it now has gotten too sharp and very uneven. To fix that, let’s use the Eraser tool (E) to fix the unwanted sharpness.
Duplicate “island 1” once again and rename this layer “island 7”. We would need to increase its size again, so activate your transform tool and scale it.
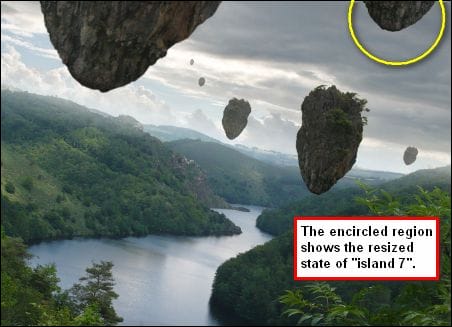
Then change its Opacity to 100%. After that, group all the island layers. Click on Layer > New > Group and it would appear on top of all the layers present in our canvas. Select all the island layers and drag them to the new Group. Rename that Group as “Islands”

Step 4 – Create the ambient light
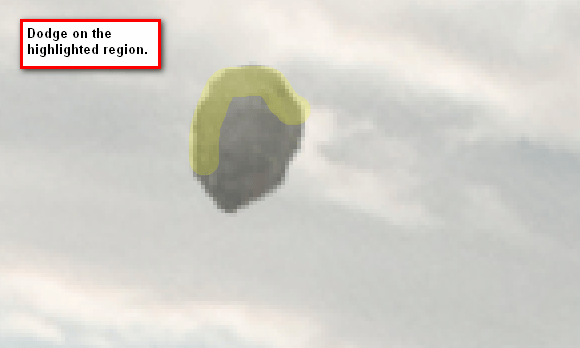
Now it is time we deal with the lights and shadows. Activate your Dodge and Burn tool (O) and click on “island 1”. (Note: To change to the Dodge tool or to the Burn too, simply left-click and hold on the respective button to bring up the menu) Activate the Dodge tool and use these values:
- Brush: 125px
- Range: Midtones
- Exposure: 15%
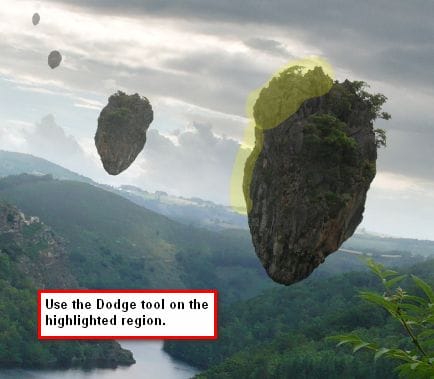
We’ll also need to add in some shadows to “island 1”. Activate your Burn tool and input these values:
- Brush: 200px
- Range: Midtones
- Exposure: 30%

Now let’s edit the light on “island 2”. Click on that layer and use the same Dodge tool values above.

For “island 3”, use the same Dodge values.
The light on the 3 islands should be similar to the image shown below.
4 responses to “Create a Floating Island Scene Similar to James Cameron’s Avatar”
-
Great idea!
-
I couldn’t get the bird brushes to download, but I found the artist’s DeviantArt page and some brushes that are similar.
https://www.deviantart.com/ivadesign/art/bird-brushes-116619710
Thank you for the cool tut!-
There’s a bug on the QBrushes website. You have to click on the download link several times in order for the download button to work.
The link was changed to yours since it is more direct and works correctly. Thank you Su!
-
-
half of files doesn’t work


Leave a Reply