You can see that water come from above, so the splash could be anywhere especially at the bottom of the texts.
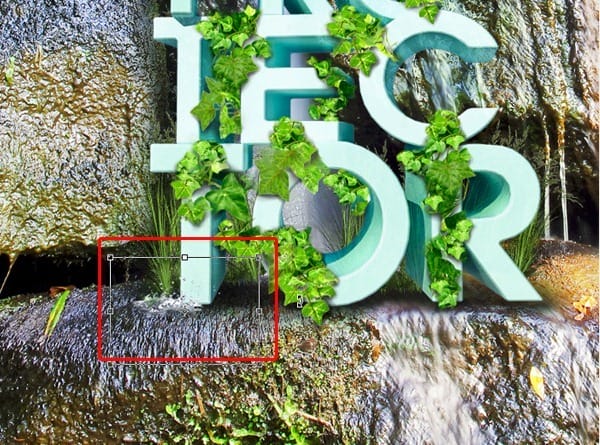
Step 69
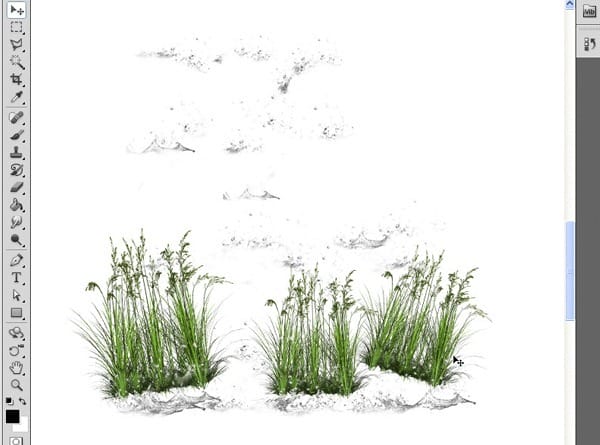
Use Splash 1 and Splash 2 to make various splash type by scale them, rotate them, erase them.
You should be patient in this step, and some imagination as well…
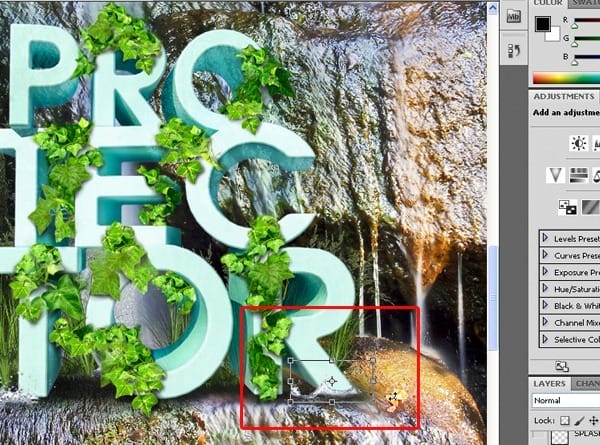
Step 70
I make splashes on the ground , all over the text, just like this.
Make sure you have a good layer management with these splashes layers. You could use 2 methods to manage them like I said above.
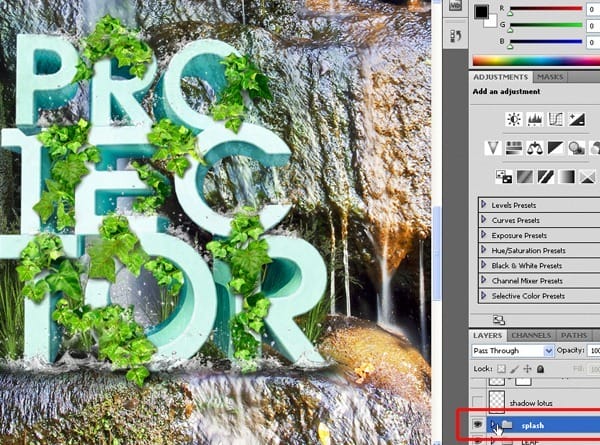
Step 71
If I hide all the layer but splashes layers and brushes layers , you will see like this:
Step 72
We nearly come to an end.
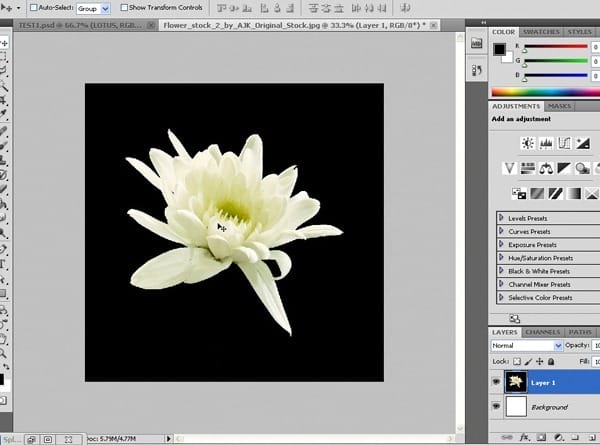
Now for the focal point of the picture: the lotus. Open Flower_stock_2_by_AJK_Original_Stock.jpg file in new window. Ctrl+A > Ctrl+X > Ctrl + V.
The background of this image is quite simple. You can easily delete it by Magic Eraser Tool ; or use Magic Wand Tool to select then press Delete.
Step 73
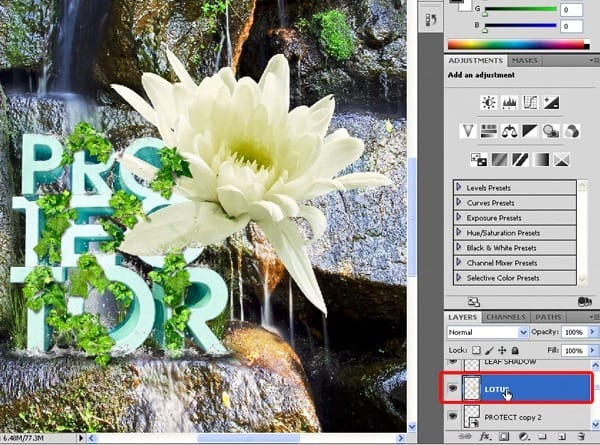
After delete all the background, copy and paste the lotus into our file. Name its layer LOTUS.
Step 74
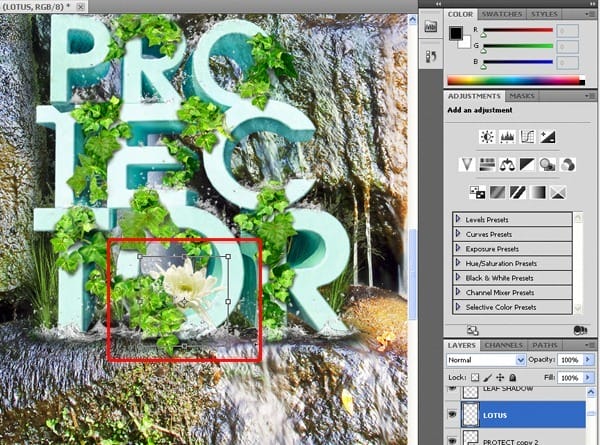
Drag LOTUS layer below of LEAF SHADOW layer, then CTRL + T to transform it to fit the void of “O” letter.
Step 75
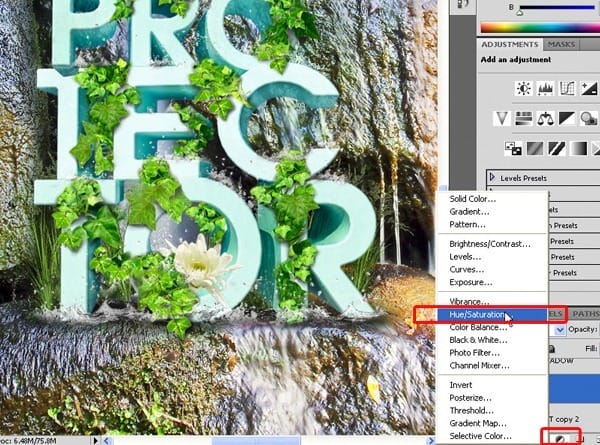
While selecting LOTUS layer, click Create Adjustment Layer button at the bottom right, then choose Hue/Saturation like this.
Step 76
The Hue/Saturation setting :
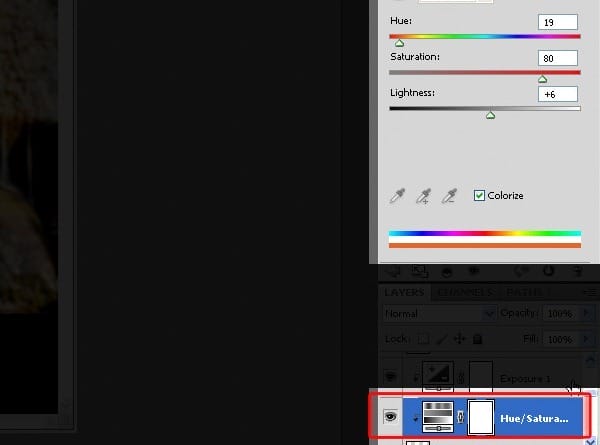
Step 77
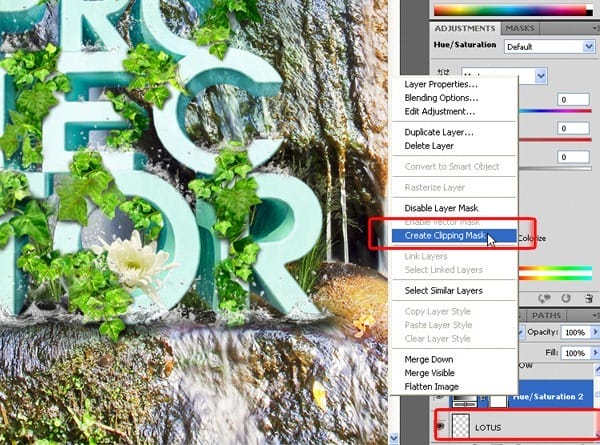
Right click on Hue/Saturation LAYER you’ve just created then choose Create Clipping Mask; then the adjustment layer will apply to only LOTUS layer
Step 78
Create another Adjustment Layer, choose Exposure like below:
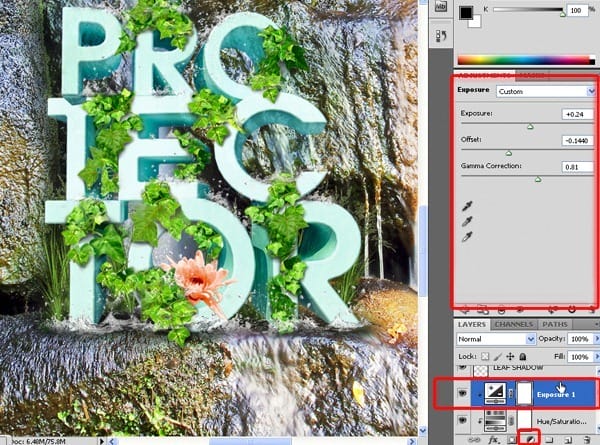
Step 79
Create new layer below LOTUS layer and name it LOTUS SHADOW, set blending mode to Multiply.
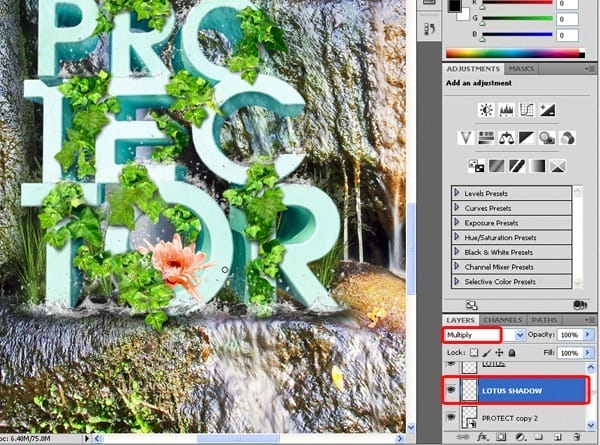
Step 80
Pick Brush Tool , change opacity to 6%, black color, and use your imagination and skills again to draw lotus’s shadow. Please mind how the shadow casts on the edge of “O” letter.
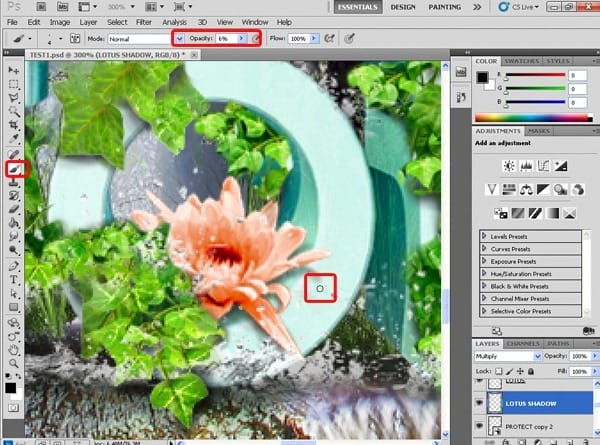
Step 81
Create another layer above Lotus shadow layer, set Multiply for blending mode, choose brush with 11% opacity, and the color is picked from the lotus to make a color blending area around the lotus.
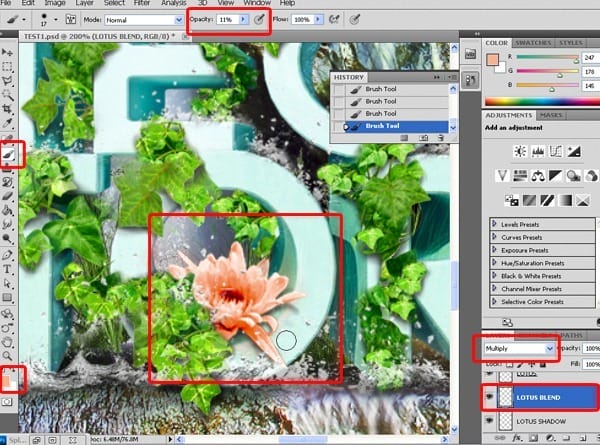
Step 82
The color of the lotus is also influenced by the color of the leaves around it. So create another layer and name it Lotus Blending 2 – Multiply blending mode – opacity 55%. Then pick the color of the leaves and use the brush to draw the blending area on the lotus.
7 responses to “Create a Nature Text Effect Poster in Photoshop”
-
Hello There,
Thanks for taking out your time and create this awesome step by step tutorial of Natural Poster.
Definitely good to use your tips in my new poster design -
How to restore image after fixed?
-
Chomir Ali I want delete sun image what to be made by effect
-
-
Thanks for this tutorials…really helpful
-
niceeee
-
WOW….
-
thanks
-

Leave a Reply