Luminar AI lets you turn your ideas into reality with powerful, intelligent AI. Download the photo editor and see how you can completely transform your photos in a few clicks.
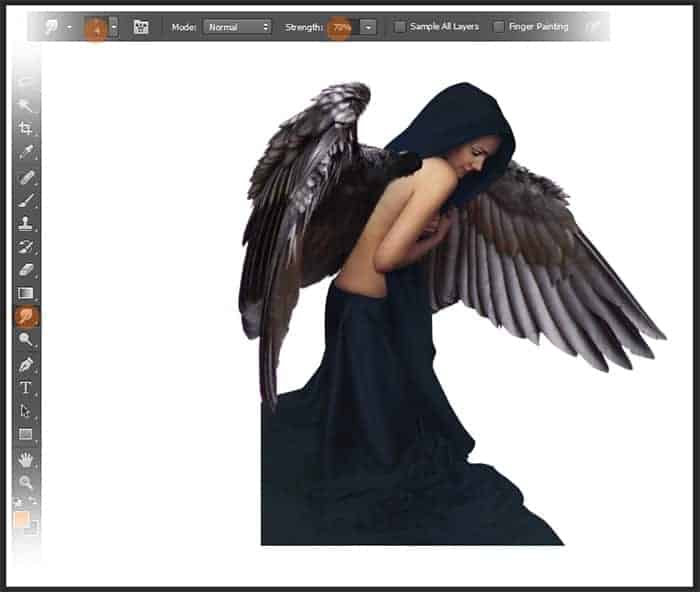
Be active on the wing 1. Now stroke the brush on the edges of the wing to create subtle feathers.
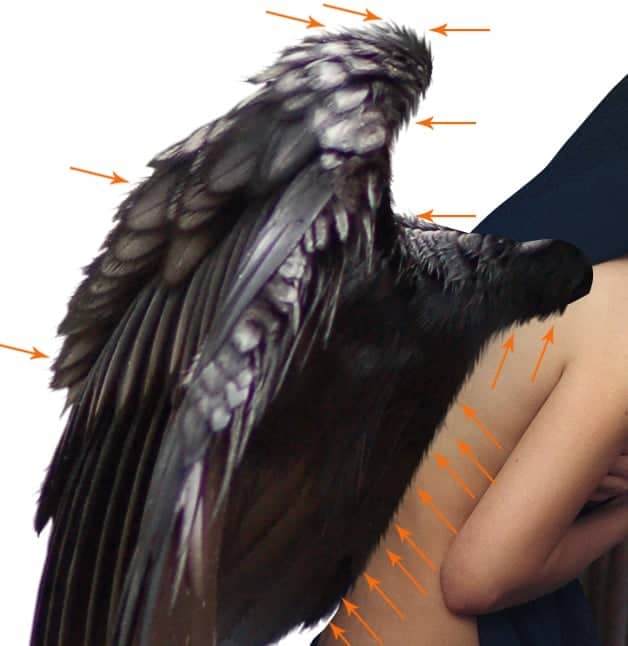
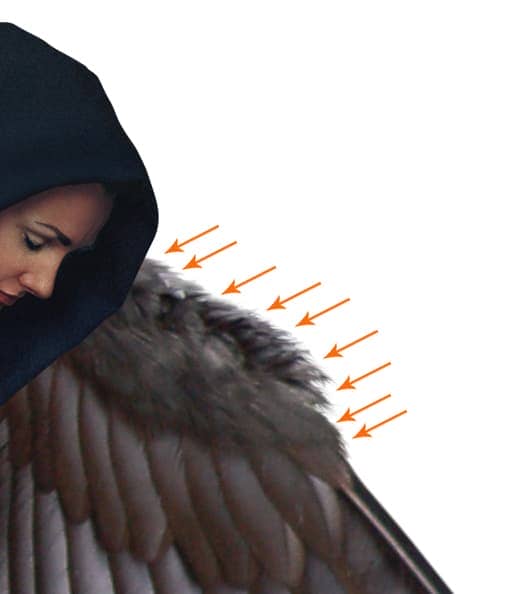
Do the same way to the other wing.
Step 5
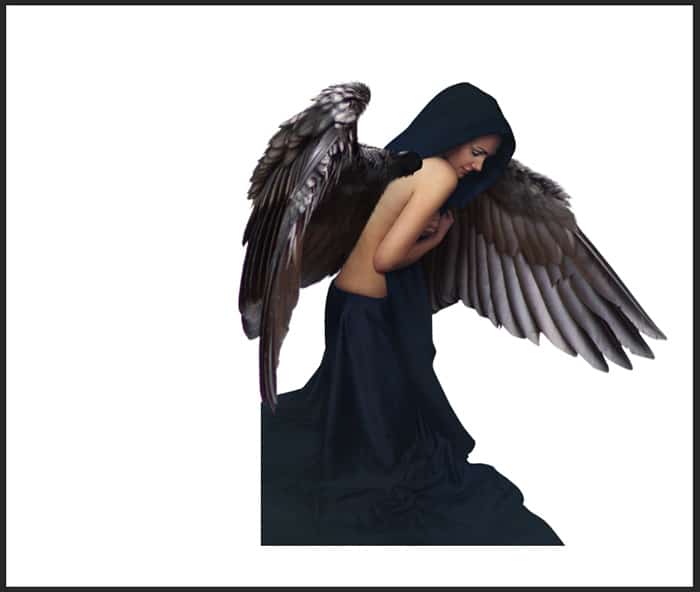
Next, we will add some shading on the wing 2 on the area behind the angel as outlined in orange color.
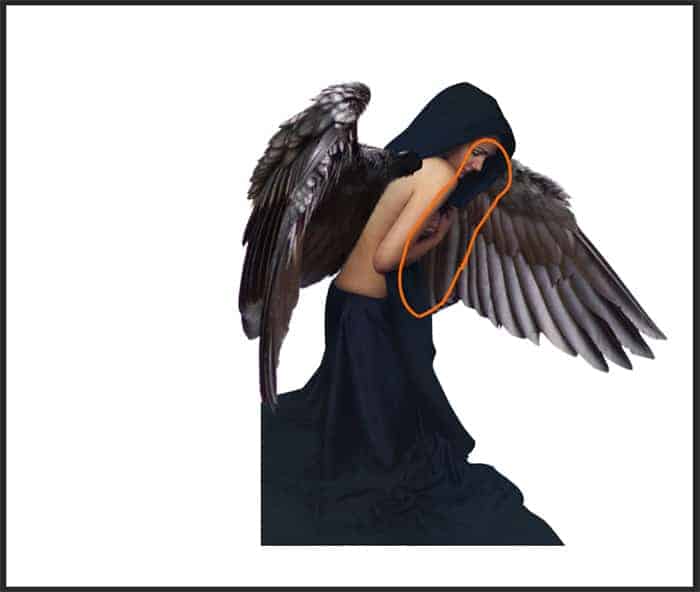
Create a new layer (Shift +Ctrl+N) with a clipping mask above the wing 2 layer. Take a very soft round brush (0% hardness) set to about 12-15% opacity. With black color, stroke the brush to paint some shading.
Step 6
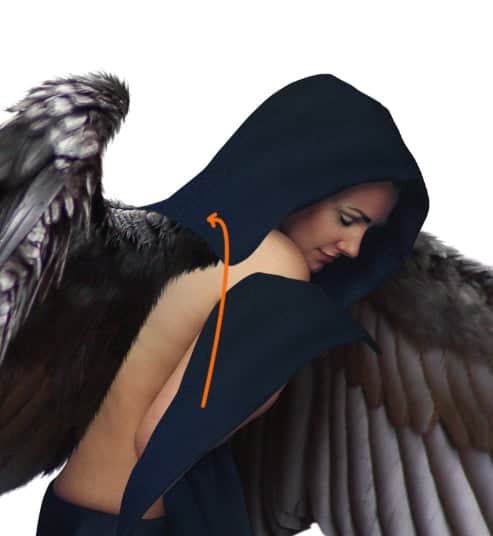
In this step, we will add cloth addition to the angel’s robe to cover the starting point of the wing 1. To do this, create a new layer (Shift+Ctrl+N) above the wing 1 layer. Take the pen tool (P). On this layer, create a shape like the one shown in the screenshot and fill (Shift+F5) the shape with any color we want. The dark blue color is the one given as an example.

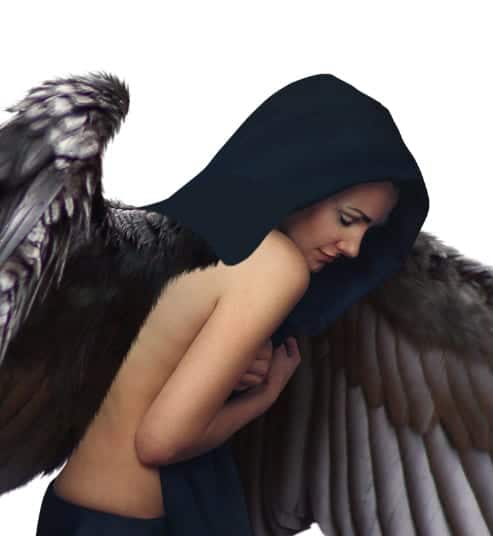
Cut out the robe of the angel into a single layer. We will use this cut out as the texture for the shape created before. Place the cut out above the shape layer and clip it with a clipping mask. This cut out will cover the shape. Move (V) the cut out to the position needed to get the desired result.
Step 7
Now we will add some highlight and shadow to the robe with the addition cloth to define some rumpled lines. To do this, create a new layer above the texture layer. Fill (Shift+F5) this layer with 50% grey (#808080). Take the dodge tool (o). Choose a very soft round small brush set to about 10% exposure with highlight range. On this new layer, stroke the brush on the area around the robe to paint highlight.
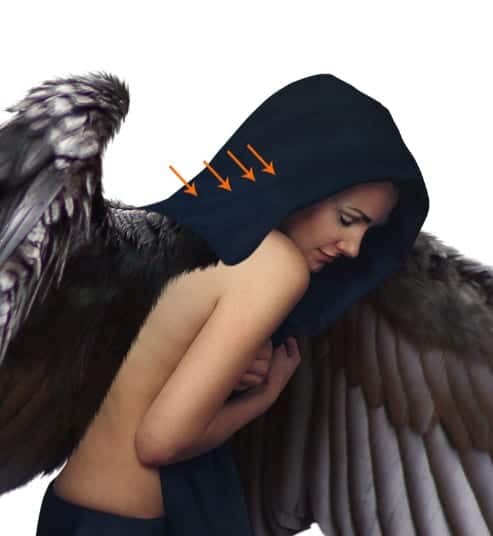
Then, take the burn tool and set to midtones range at about 10% exposure. With a very soft round brush, stroke the tool on areas where needed to paint shadow.

Keep using the combination of dodge and burn tool to paint more highlight and shadow to define more rumpled lines.

Step 8
Proceed to create additional cloth on the lower angel’s cloth. Create a new layer (Shift+Ctrl+N) below the angel layer. Create a shape filled with any color we want. Dark blue is the given example.
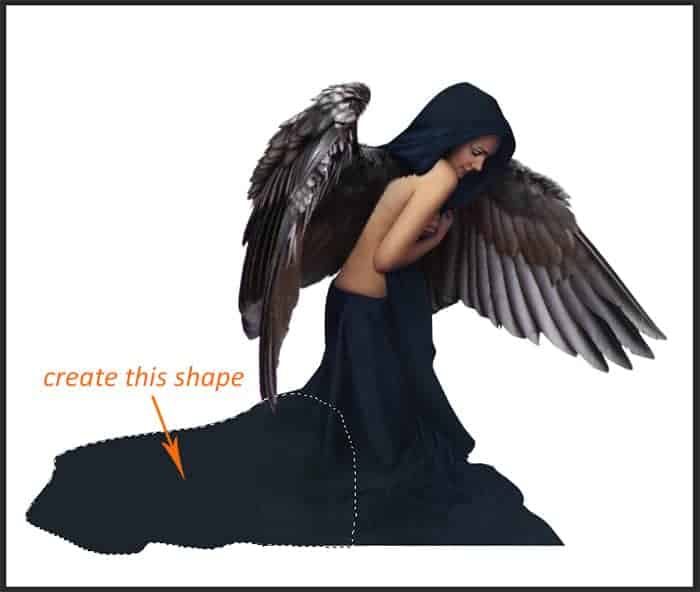
Cut out the lower cloth of the angel into a single layer. Place this layer above the shape with a clipping mask to give it cloth texture.


16 comments on “Create An Emotional Photo Manipulation Of A Sad Angel In Photoshop”
I cant download the psd, link isnt working :(
Thanks for letting us know! PSD link has been fixed
This is amazing! Easy-to-follow steps and I created what seems like a masterpiece! Thank you.
I LOVE THIS! I am going to be giving this tutorial a try.
You have the link incorrect for the rain brush, its: http://elestrial.deviantart.com/art/Rain-35960575 -- Beautiful tutorial.
This is great! And for you to have provided steps showing how it's done....perfect. I'll give this a try, and once I can perfect it, I'll make one for my niece with her image. She's all into angels.
Wow, it amazes me that a person can see a final image and then create it basically from scratch on Photoshop. Nice work.
What am I doing wrong on Step 6. I cannot for the life of me do that step. I create a new layer, use the pen tool to create the shape, shift f5 to fil. Does wonderful, looks nice, but when I do the step to cut out the robe. Nightmare city. I can't get it done. What am I doing wrong???
awesome indeed
Brilliant Work Kindly re-uploaded PSD File its showing error. Thanks this work is really very helpful for me.
Thanks for letting us know! The PSD link has been fixed
thanks.
very good.thanks.
Very nice, enjoyed this guide.
bellissimo tutorial complimenti
Would it be ok to share your image on my photography facebook site if I credit you and link to your site?