
Step 28
Finally, we will add overall adjustment layer to the whole scene. Go to layer > new adjustment layer > curves.


Mask on areas highlighted in red.

Here is the result so far….

Step 29
Now we will add some wet effect on the angel’s skin. Go select the angel folder to be active on it. Hit Ctrl+E to merge the folder into a single layer. Then, go to layer > smart object > convert to smart object. Give this smart layer a smart filter by going to filter > filter gallery. In the filter gallery, open artistic > plastic wrap.
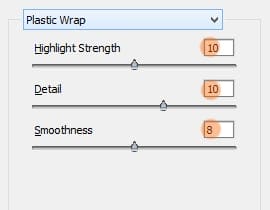


Mask this filter effect on areas marked in red highlight.

Here is the result:


Step 30
To give an impression of despair in the scene, we will add scattering feathers around.

Give the feathers some motion blur (filter > blur > motion blur).


Step 31
It is up to our preference that we can reduce the opacity of the color layer previously created in step 15 to 30%. To give the scene a bit shaper look, we can add an unsharp mask filter (filter > sharpen > unsharp mask). Prior to giving the scene the filter, we should merge all the visible layers. While we are active on the topmost layer, hit Shift+Ctrl+Alt+E to merge them into a single layer.

This is the result will be because of the reduction.

Or this is the result without the reduction of the color.
It’s done…
Final Result

Optional

Download the PSD
Sad Angel.zip | 87.9 MB
Tutorial by Dek Wid

Thank you for following this tutorial. I hope you learn something new today. Happy photoshopping.
– Dek Wid
16 responses to “Create An Emotional Photo Manipulation Of A Sad Angel In Photoshop”
-

I cant download the psd, link isnt working :(
-
Thanks for letting us know! PSD link has been fixed
-
-
This is amazing! Easy-to-follow steps and I created what seems like a masterpiece! Thank you.
-
I LOVE THIS! I am going to be giving this tutorial a try.
-
You have the link incorrect for the rain brush, its: http://elestrial.deviantart.com/art/Rain-35960575 — Beautiful tutorial.
-
This is great! And for you to have provided steps showing how it’s done….perfect. I’ll give this a try, and once I can perfect it, I’ll make one for my niece with her image. She’s all into angels.
-
Wow, it amazes me that a person can see a final image and then create it basically from scratch on Photoshop. Nice work.
-
What am I doing wrong on Step 6. I cannot for the life of me do that step. I create a new layer, use the pen tool to create the shape, shift f5 to fil. Does wonderful, looks nice, but when I do the step to cut out the robe. Nightmare city. I can’t get it done. What am I doing wrong???
-
awesome indeed
-
Brilliant Work Kindly re-uploaded PSD File its showing error. Thanks this work is really very helpful for me.
-
Thanks for letting us know! The PSD link has been fixed
-
-
thanks.
-
very good.thanks.
-
Very nice, enjoyed this guide.
-
bellissimo tutorial complimenti
-
Would it be ok to share your image on my photography facebook site if I credit you and link to your site?
Leave a Reply