Turn any photo into a dot grid artwork with these Photoshop actions. You'll get great results with dots that change size. They get larger in brighter areas and smaller in darker areas. Free download available.
Step 11
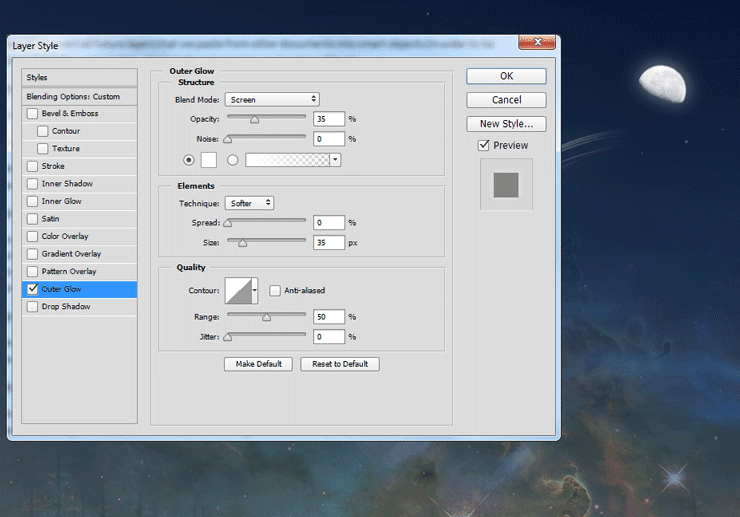
Import “Christmas” brushes. Look out in the Brush Presets panel for the reindeers brush and draw some white reindeers over the ribbon. Add the standard Outer Glow effect (double click the reindeers layer to enter Advanced Blending window).
Step 12
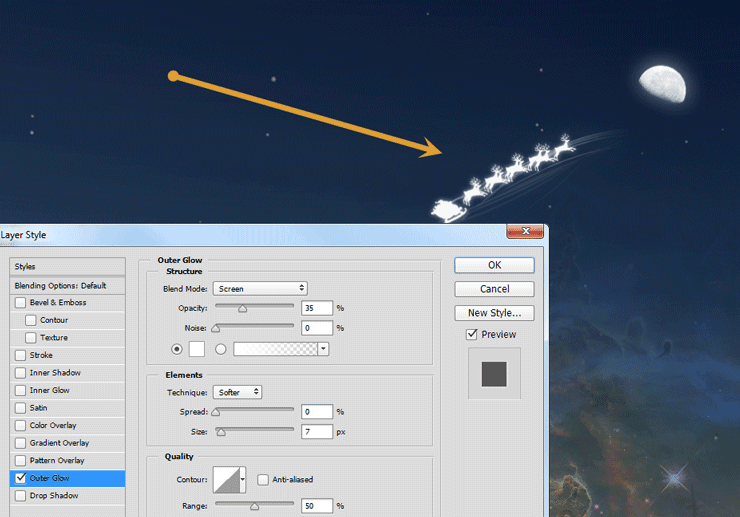
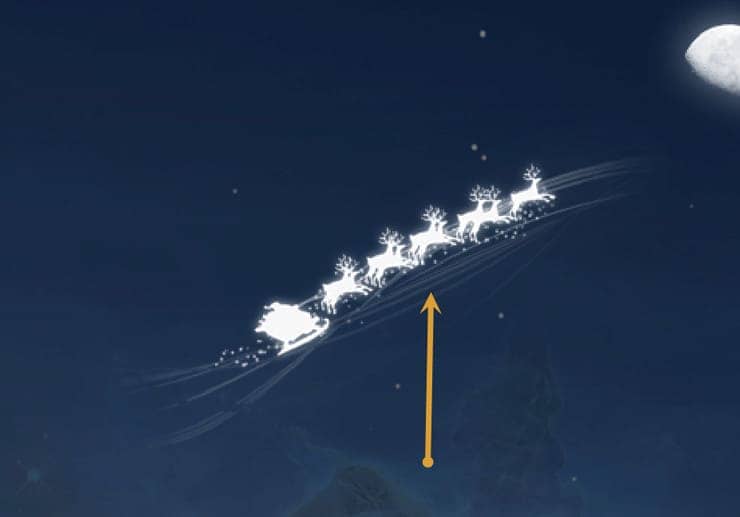
Import “Fantasy Light” brushes. In the Brush Presets panel select the Glam brush. Create some sparks along the ribbon and below the reindeers.
Step 13
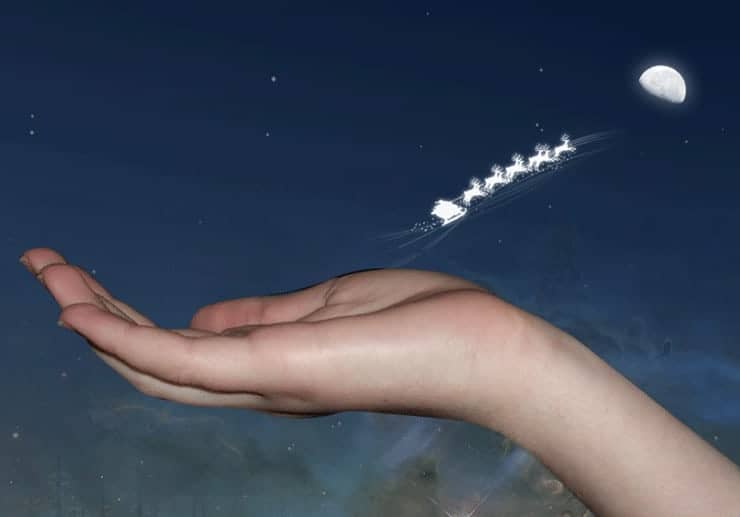
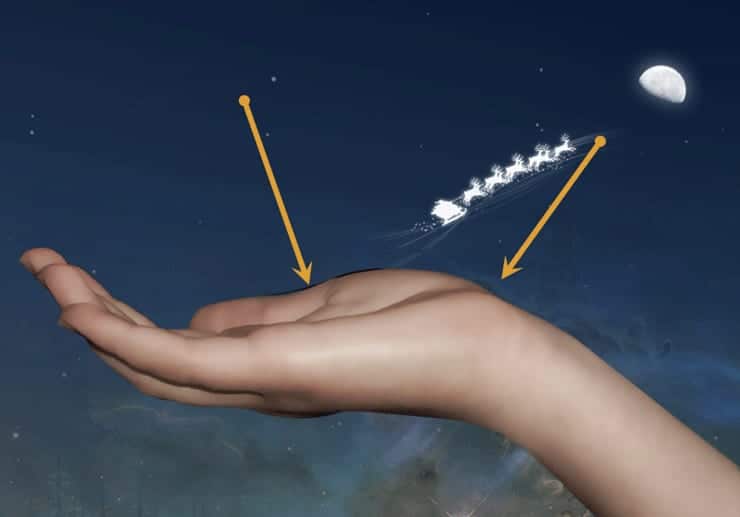
Open the file “Hand”. Use the Pen Toolto make a selection of the hand. Copy the selection and paste it in our scene. Place the hand like indicated in the image below.
Step 14
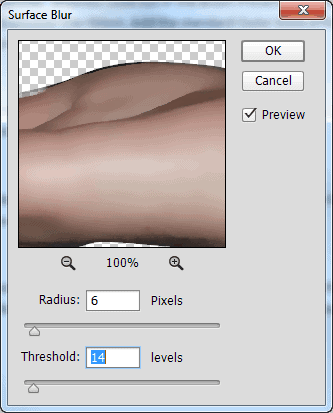
The hand looks way too detailed for our purposes so let’s correct that. Apply a Surface Blur (Filter > Blur > Surface Blur) to the hand in order to make it look smooth and clean.
Step 15
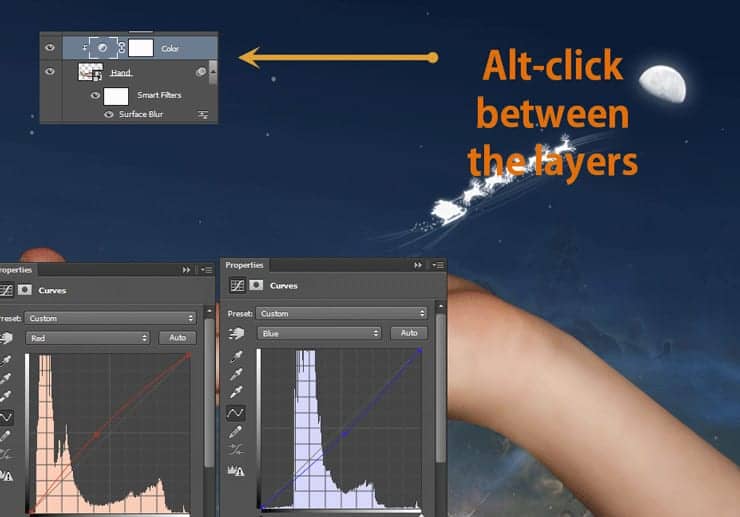
Create a Curves Adjustment Layer (Layer > New Adjustment Layer > Curves) with the settings indicated below. Alt-click between the curves and the hand layer in order to limit the curves effect only to the hand. This process is called clipping a layer to another. If we were to create another adjustment layer and also press Alt-click between the newly created adjustment layer and the curves layer we would also limit the effect of the newly created layer to the hand only. This is what we will do in the following steps.
Step 16
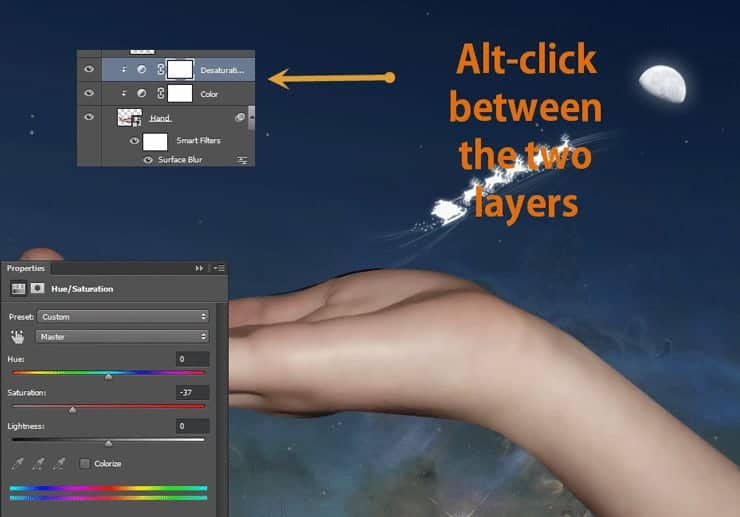
Create a Hue/Saturation Adjustment Layer (Layer > New Adjustment Layer > Hue/Saturation) and use the settings shown below. Clip the Hue/Saturation layer to the hand layer.
Step 17
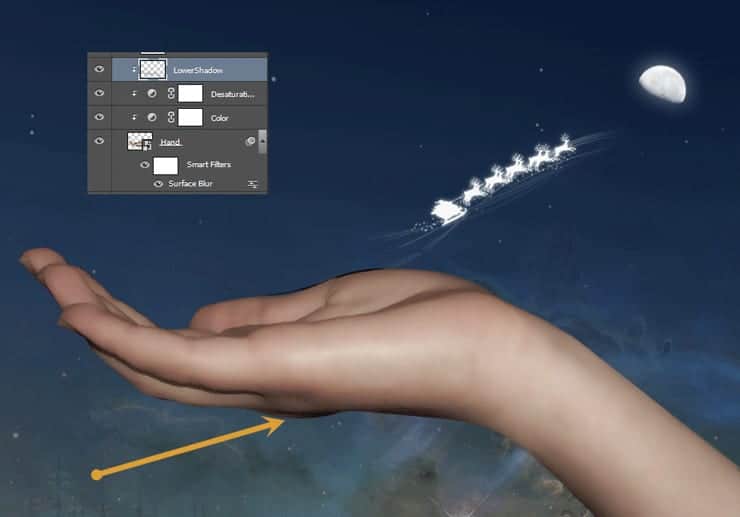
Make a new layer (Ctrl + Shift + Alt + N) and clip it to the hand layer. Change the blending mode to Overlay. Choose the standard Photoshop round soft brush and lower the Opacity to 10%. Paint with black on the bottom of the hand.
Step 18
Make another new layer and also clip it to the hand layer. After you change the blending mode to Overlay use the same round soft brush to paint with white on the top of the hand.
Step 20
Create a Curves Adjustment Layer and clip it to the hand layer. Use the settings shown below in order to create a lighten effect. Fill the layer mask with black and paint with white over the top of hand in the layer mask in order to reveal the effect there.



10 comments on “How to Create a Magical Christmas Snow Globe in Photoshop”
linn
can u update the images? none of the links are working and showing the right images.
Some of the original images don't exist anymore and so we've updated them to use alternative images. Unfortunately, this happens a lot with free images. You can still follow the tutorial using similar images and get the same composition.
GREAT tutorial!
this is briliant. at first i thought it was difficult to follow when it turn out very easy
At first it seemed to be a difficult tutorial, but infact is not.
Too much going on?
This is lovely. It looks like a lot of work, but it's worth it! I might do something like this for next year's Christmas cards. Thank you for sharing. :)
luke
At first I thought this was going to be hard to follow, but the resource list was a real big help. Thanks for posting!