Make skin look perfect in one-click with these AI-powered Photoshop actions.
Step 35
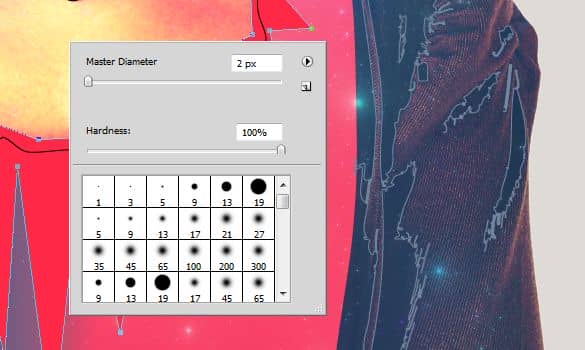
Pick the Brush Tool. Set the size to 2px and hardness to 100%.
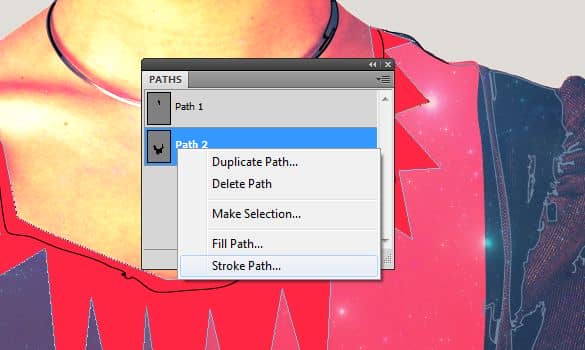
Create a new layer just above the shape layer. Back on the Paths palette right click on the path we just created. Choose Stroke Path.
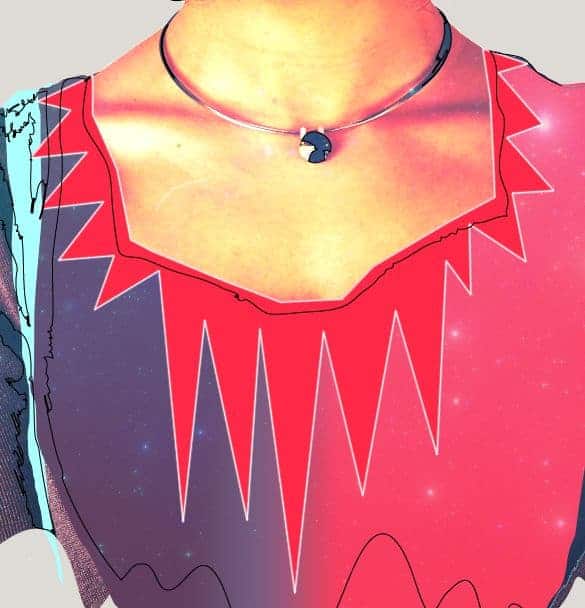
Here we go! this is what we needed, a stroke.
Step 36
I want to use only a part of it. Select the unwanted and delete it.
Step 37
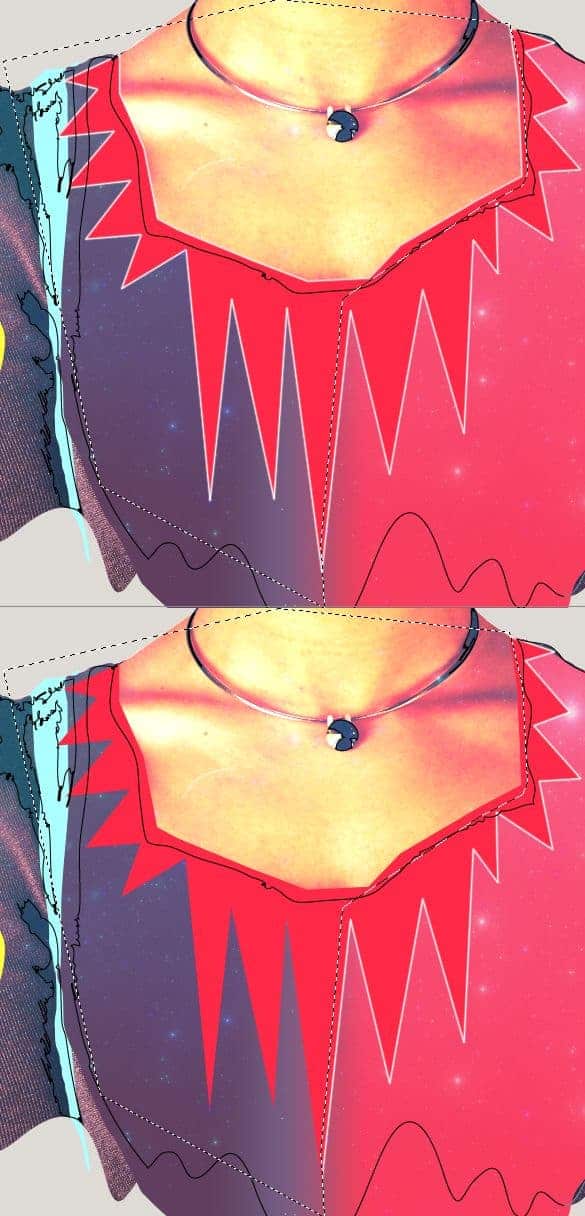
Create this shape on her neck with Pen Tool.
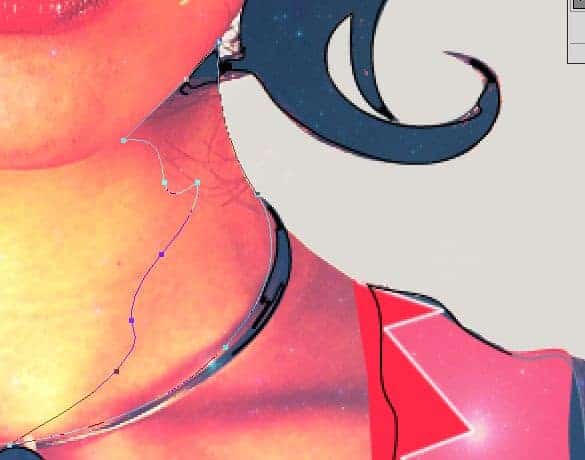
Convert the path into selection. Select the Brush Tool. Set the color to #545064. Create a new layer and paint inside the edge of the selection. Leave the bottom unpainted, that will make the selection transparent one side and gradually mixing into the image below.
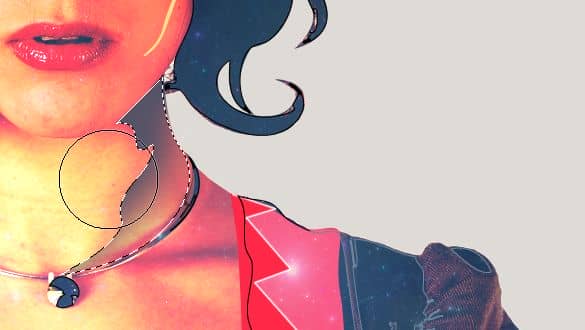
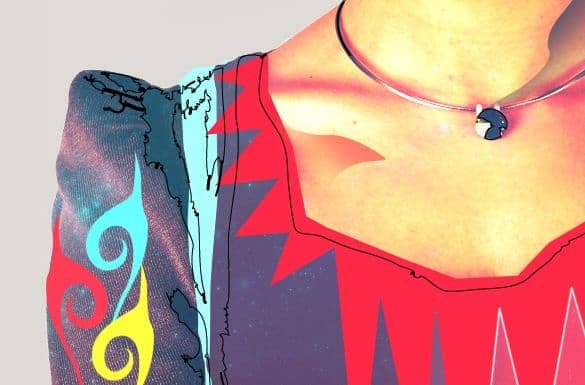
Created another shape using the same method as above.
Step 38
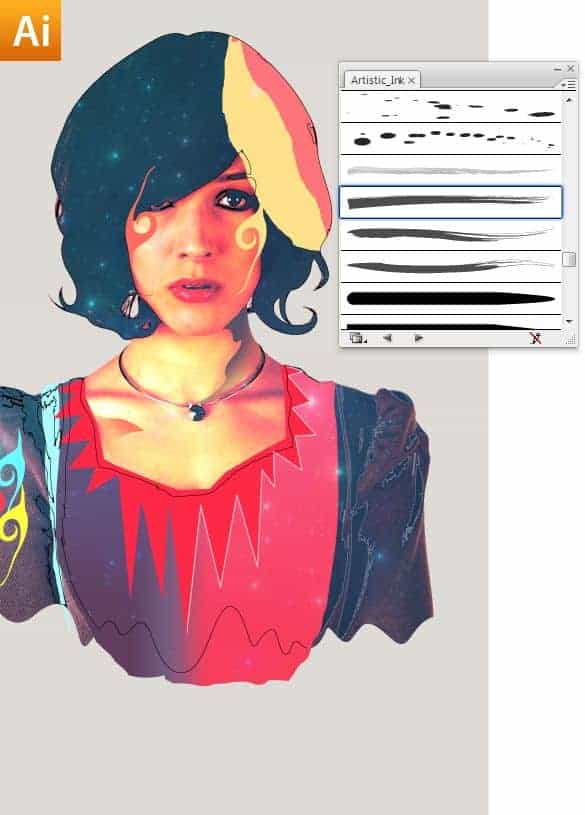
Now we are going to draw some hair for our model in Illustrator. All by our self. To do this we need to take the image into Illustrator so that we can draw the hair on top of the image precisely where we want. The simple way you can do this is by selecting the whole document (Ctrl + A), then Ctrl + Alt + C (Copy merged). Now head back to Illustrator. and press Ctrl + V to paste the image. Next Load the brushes we need to draw the hair. Go to Menu > Window > Brush Libraries > Artistic > Artistic_Ink.
Step 39
Select the Brush Tool from the Tool bar, select art brush and draw the hair.
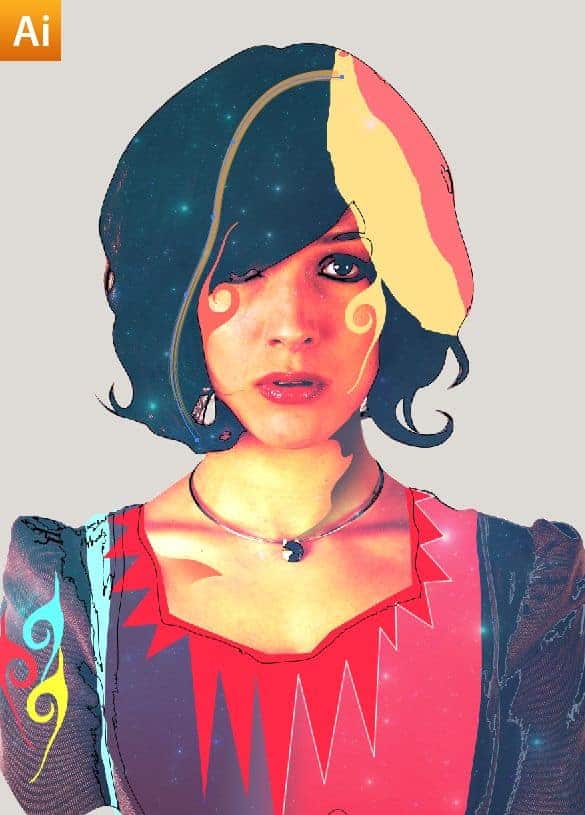
Don't worry about the precision. You can Edit those paths using the Direct Selection Tool later.
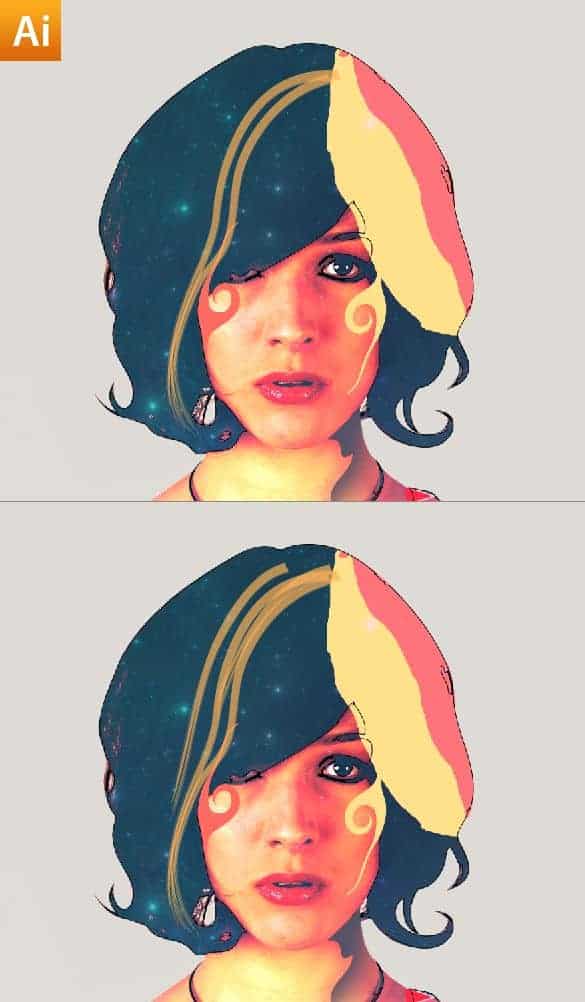
Keep on adding more strokes until you finish.
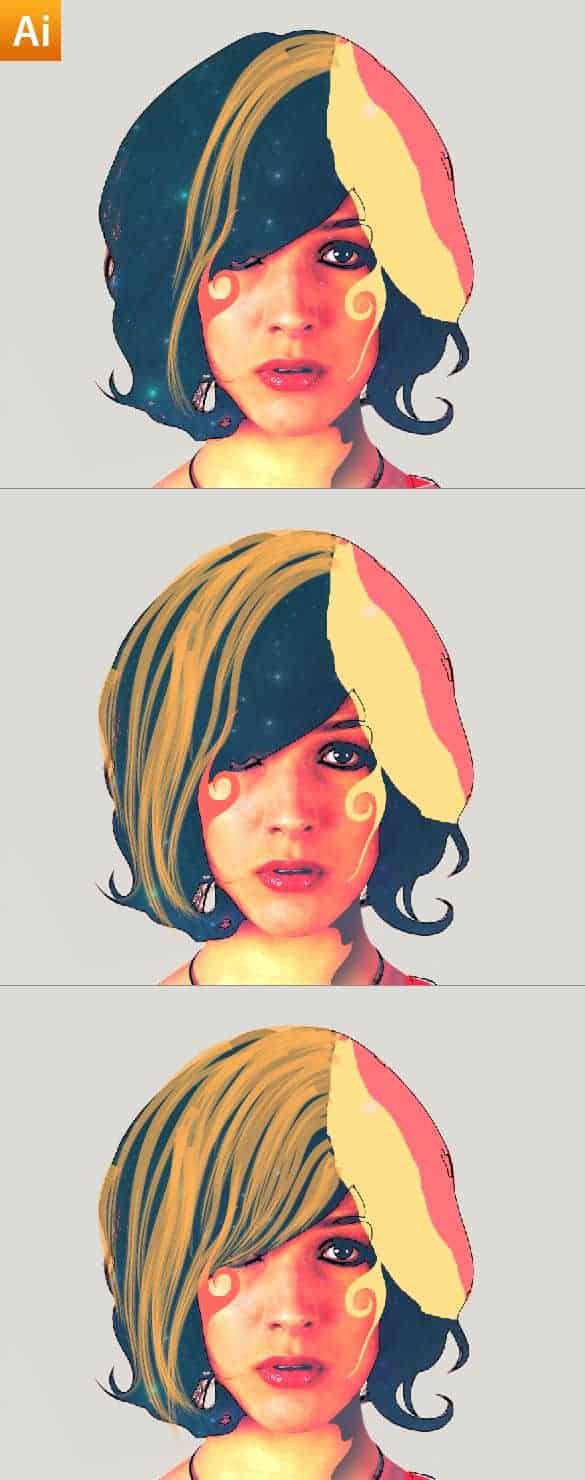
If you want to modify the paths enter the wireframe mode (Ctrl + Y). Select and modify the paths using the Direct Selection Tool.
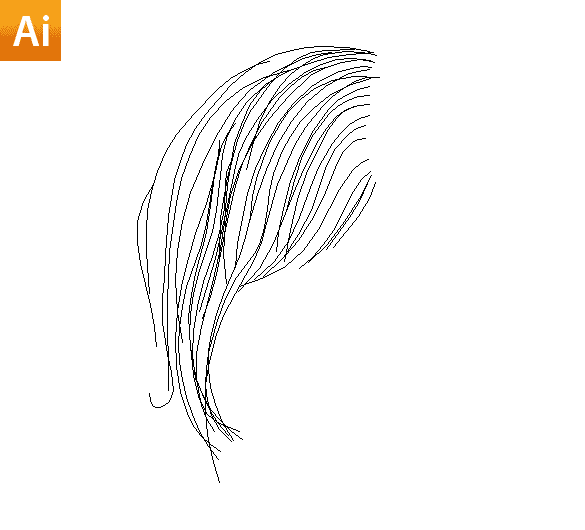
Step 40
Copy and paste the hair into our Photoshop document. Clip the hair to the model layer.
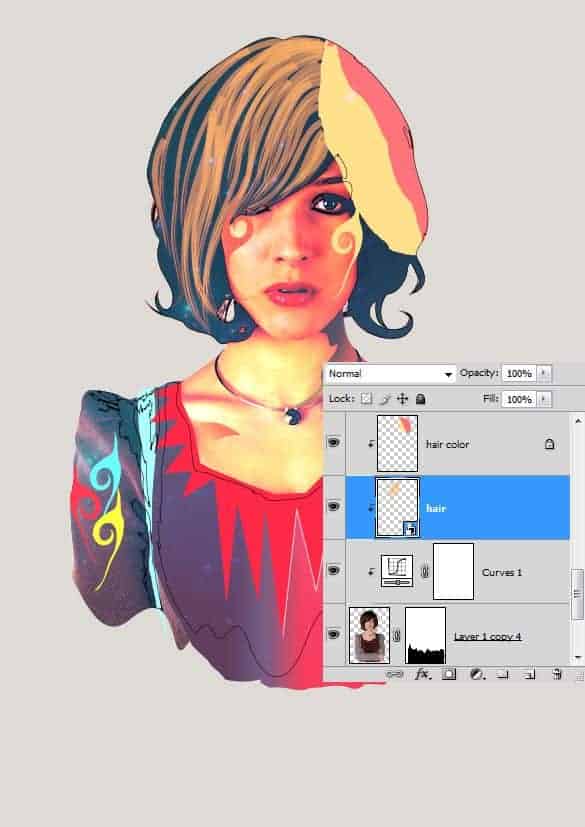
Step 41
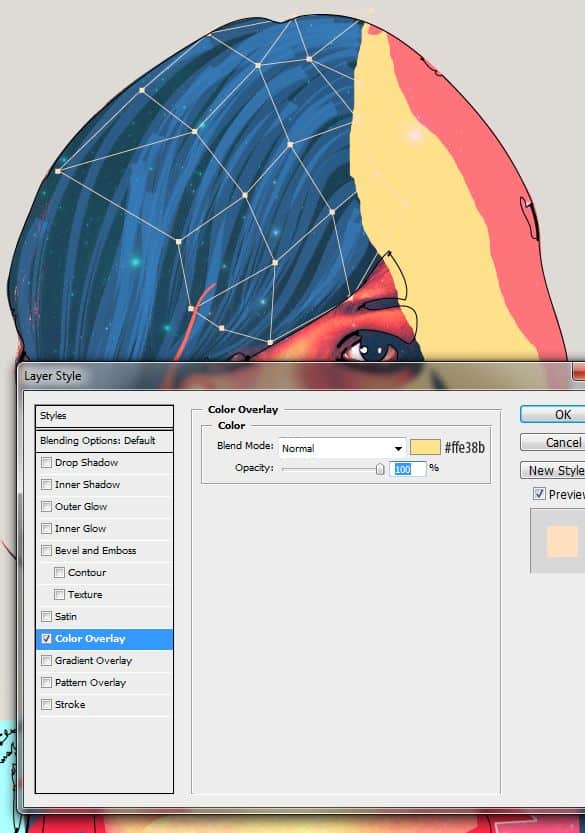
I want to change the color. Apply Color Overlay using the Layer Styles dialog box.
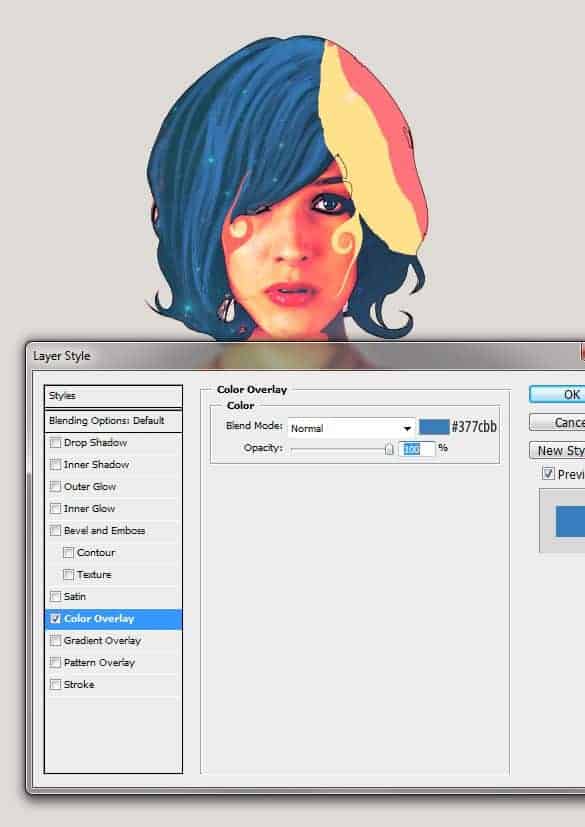
Step 42
Once again head back to Illustrator. We already have our image pasted there. Create a similar mesh on top of the image using the Rectangle Tool and the Line tool.
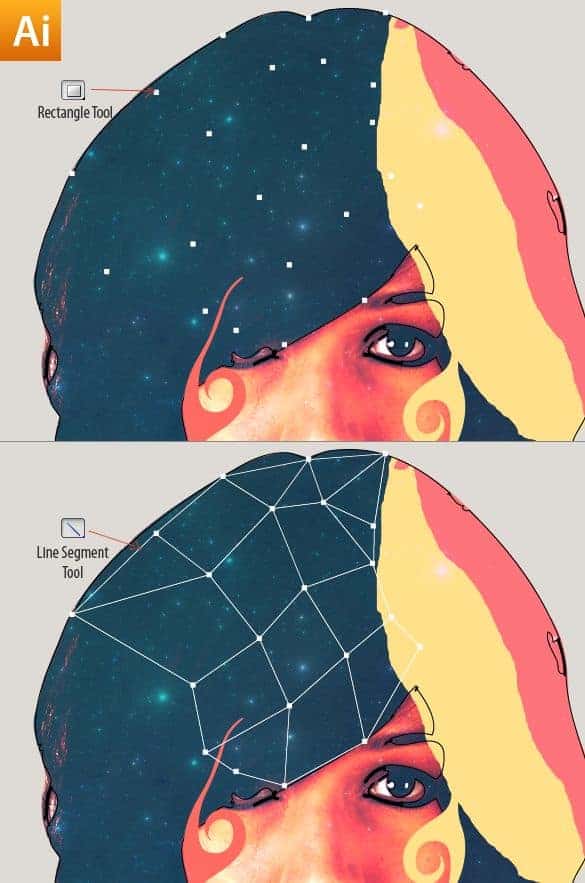
Step 43
Bring into the main file.
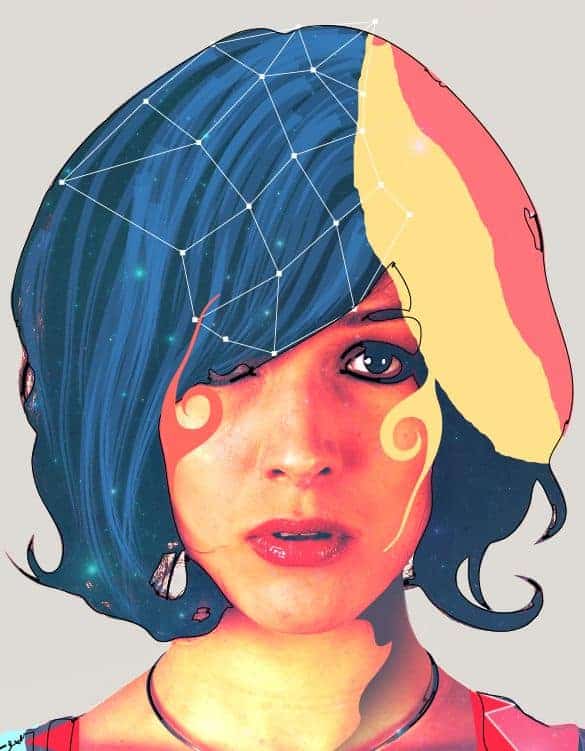
Step 44
Apply Color Overlay.
Step 45
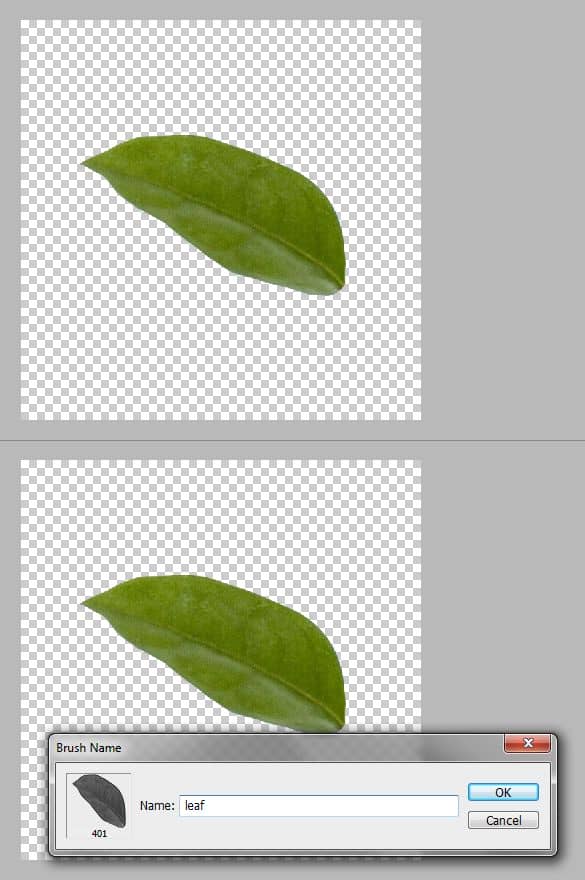
We are going to create a leaf particle brush. Here I have an isolated leaf. You may like to come up with your own thing. Once you have it separated into a new layer go to Menu > Edit > Define Brush Preset
We need to tweak various parameters to get our particle brush working. Find the Brushes Palette under Menu > Window > Brushes. And set these parameters.
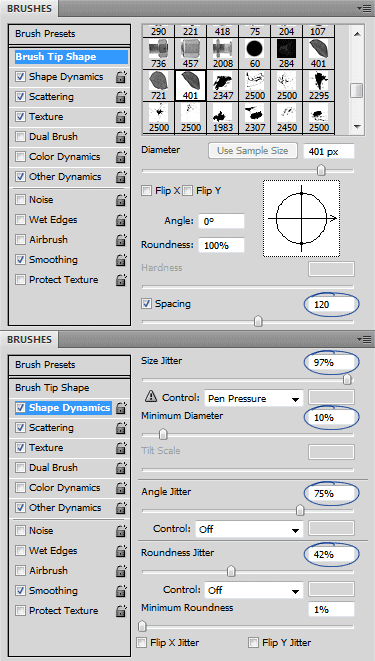
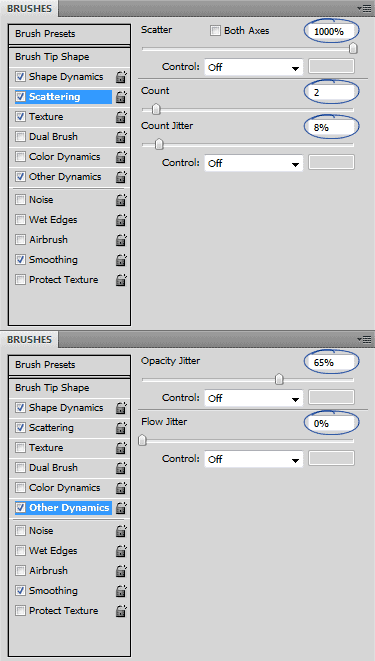
Now paint some particle using our brush. Keep it subtle. Change the brush color to vary the color of the particles.
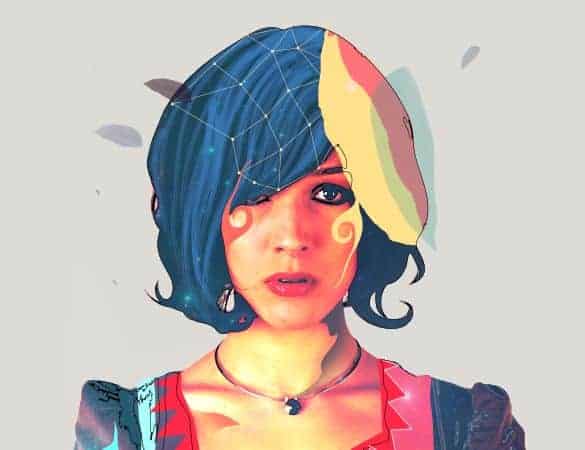
Step 46
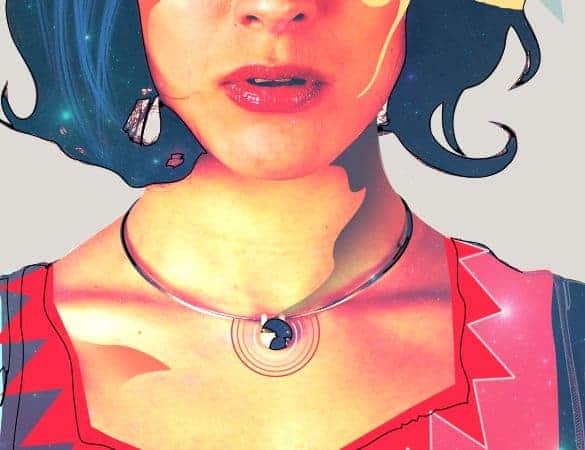
We continue to add more shapes to our design. We are going to create a simple blend in Illustrator. We already have our design pasted there. So draw these two circles around her necklace pendent with the Ellipse Tool (L).
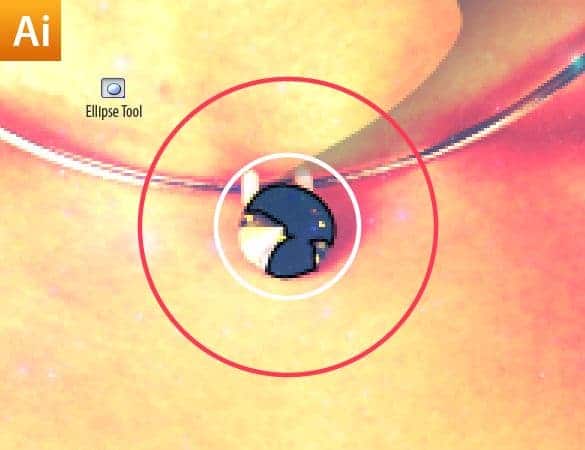
Step 47
Select the Scissors Tool and cut the circles where they intersect the necklace.
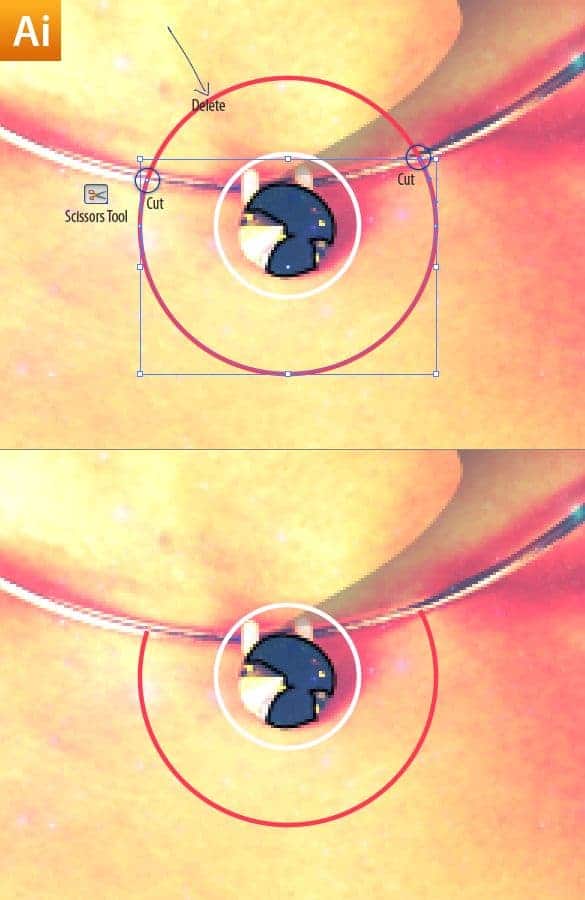
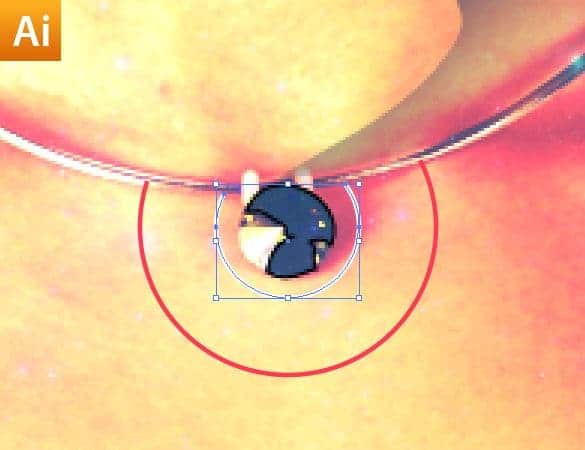
Step 48
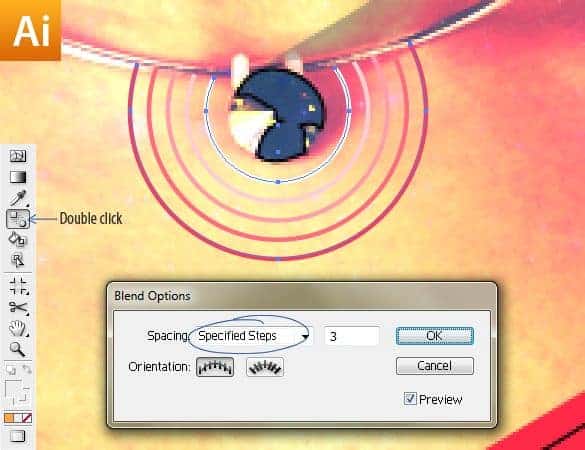
Select both the circles, press Ctrl + Alt + B. Double click on the Blend Tool to edit the blend count.
Step 49
Paste into Photoshop.
Step 50
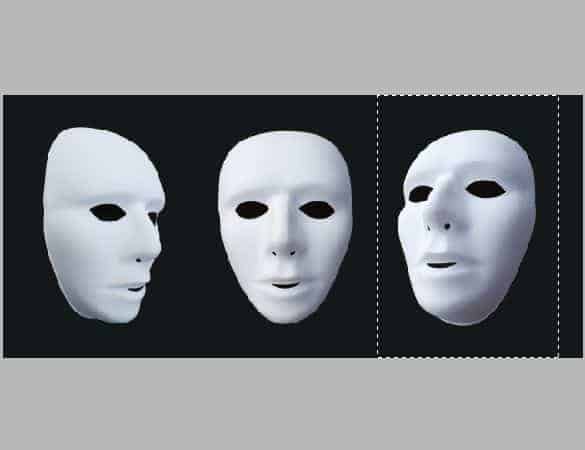
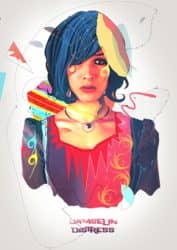
We have almost finished with the model. Let's move on the background and spice it up. Open up the masks image in Photoshop. Copy the mask on the right side.

41 comments on “Create a Colorful Retro Poster in Photoshop and Illustrator”
What a fantastic tutorial
i really liked it practical skills worth knowing
yo
Some good techniques I just learned here - thank you! I just wish Photoshop had some of Illustrators features so I don't need to go back and forth. I can copy and paste the illustrator elements into Photoshop CC but the problem is to get Illustrator, you need the full Adobe Creative Cloud subscription. Most of my students can only afford the Lightroom and Photoshop plan.
Nice artwork!
Nice tutorial but sad how you have to use adobe illustrator for that trace contours thing
What is the canvas size for step 1?
1169x1654 pixels
Although you can use any canvas size you like, it's best to use something similar while following the tutorial.
WELL DONE!! Great tutorial Niranth!
who else really gets this ?
totally right couldnt agree more
<3 Cool post ?
I agree Amazing info ?
Yup
Worlds best tips fan
nice
<3 Sweet reply
tnx
Really nice stuff!
Agreed Awesome !
Can we do the same in Inkscape and Gimp?
Really covered a lot of different techniques and new shortcuts. It's cool seeing such seemingly "random creativity" captured and explained step by step.
I also appreciated seeing vector art combining with textures in photoshop. Merges the gap for me that I have in my head.
thank you!
You should add some bookmark or like buttons!!
this is hard as fuck
Where can you find the original pictures to do this? I tried on a random picture and i got lost.
Awesome Post. Lighting is most beautiful.Thanks for sharing such informative post its help me to know deeply Photoshop work step by step.
What a fantastic tutorial! :)
Thank you very much!!!!!!!!!!!
I hate illustrator i was doing geat up until the hair i surrender...
Oh great explanation. I have ready mate unique retro poster
im trying to do this, but i have illustrator cs6 and i cant do it :x
What version its this?
cs5?
Anny help?
Que versão é usada no ilustrator?
eu tenho o cs6 e não consigo :/
This Tutorials is very helpful for me.
Waow this is cool!
Thank you for this amazing tutorial!!
Nice Work , See My Work Too ;)
Way to challenging... yup I give up! I Rhymed!
Where Can I Download PSD file?
Fascinating!!! Got to give this a try. :)
What a fantastic tutorial!
This is my copy :)
https://www.box.com/s/frz9gp0hi3mpkzs9f0b7
Nice Tutorial .. I'm loving it. Thanks