As I said, light goes from right-top. We have to show it. Create adjustments layer and choose brightness/contrast:

Then mask it.
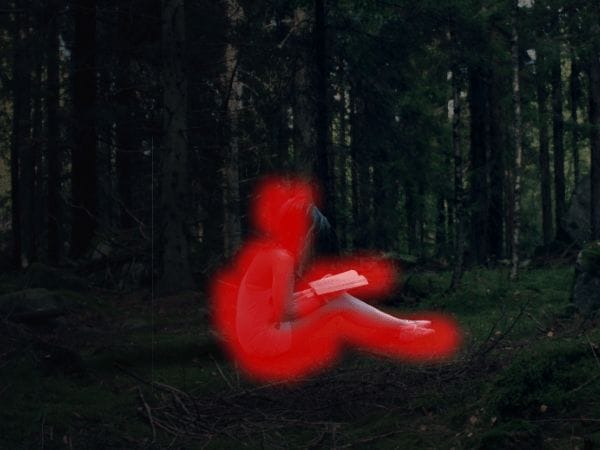
Step 15 – playing with wings
We’ll start from shadows. Draw it as shown. Gently, please:

Step 16
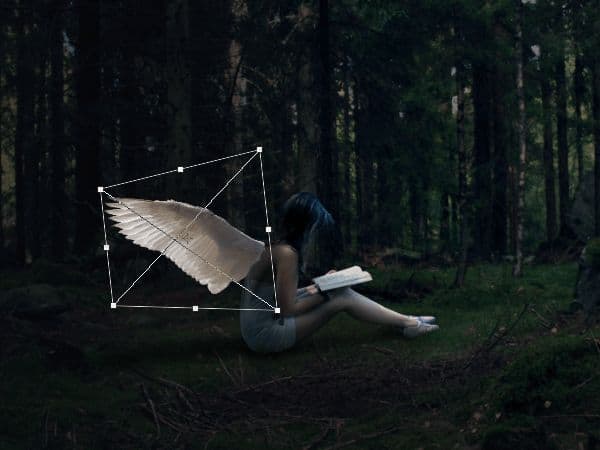
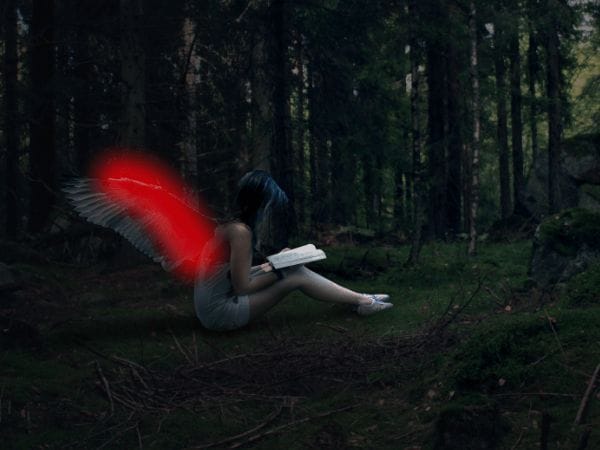
Paste wings, as shown. Try different combinations for the best look:
Step 17
This wing will be behind, so it have to be darker and with less contrast. But now we will create a night colors. Add adjustments layer and choose color balance:

Add adjustments layer, choose brightness/contrast:

Add again adjustments layer, choose brightness/contrast:
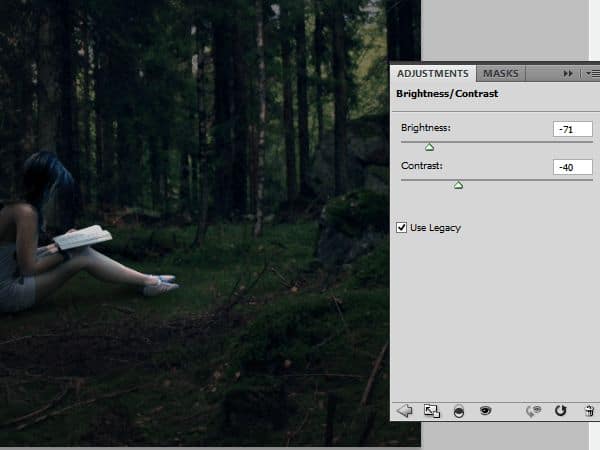
Mask it as shown below
For better looks add once more brightness/contrast layer:

Step 18 – second wing
Now paste second wing

Add adjustment layer, brightness/contrast:

Then add adjustment layer with color balance. Set it as below:

For realistic looking, add brightness/contrast adjustments layer:
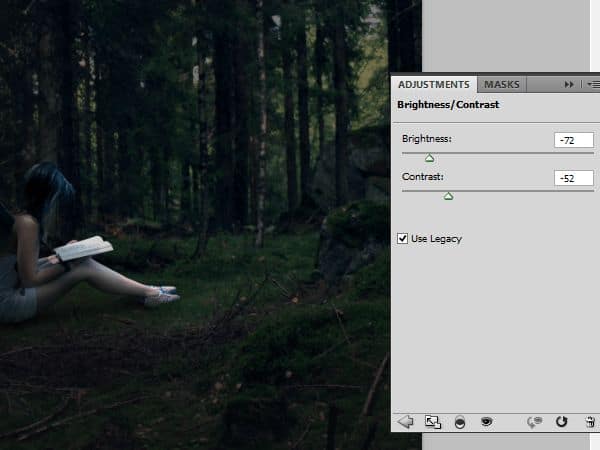
Mask it as below

Now lights. Add brightness/contrast adjustments layer:

And mask it!

Step 19
Ok, bored enough? But here starts magic! Choose grass brush and pick colors #0a100d and #101518. Draw it on new layer on the edge of body shape model:

Step 20
Now on the floor, draw with big, white, soft brush some lights (40% opacity). Follow red strokes. Turn blending mode to Soft Light:

Step 21
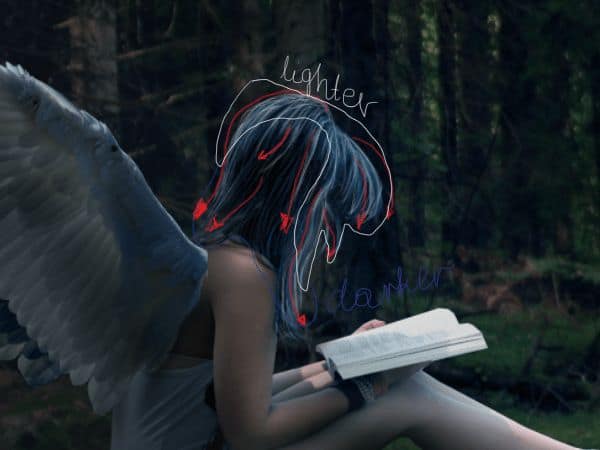
Now we’ll add hair for our model. Add new layer. Pick really small brush (ex. 2-4px) and draw it. Follow red arrows. For choosing colors my “map” will help you:
Step 22
Now you have to add some blue reflections on model. Draw it on new layer with 1px soft brush #83b8e4 color. Again, red arrows will help you. Draw it really gently :):

Step 23 – world around her
Next step is adding lights to the woods. For this on new layer. Draw with soft, round brush color #83b8e4 on trees. But! Only by one side. Light goes from top-right corners, so it will fall from this side on woods;

Change opacity to 30%

Step 24
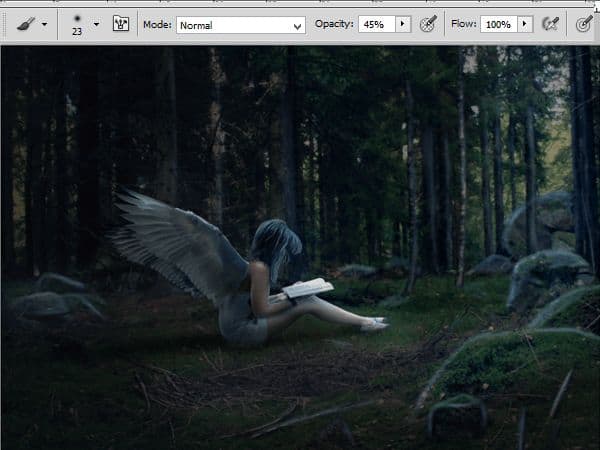
Add new layer and pick soft round brush, 23 px wide. Change opacity of brush to 45%. Draw with it on edges of rocks and woods. Than change opacity to screen. Change layer opacity to 65%:
Step 25
On new layer draw with 2-4px wide, soft round brush light strokes on branches:

Red arrows always helpful. Remember about light source!
32 responses to “Create a Mystical Night Forest Scene with an Angel”
-
Świetny praca. Dzięki
-
resources non found
-
I can’t see the wings nor the corner leaves 2. I get a “oops’ message
-
beautiful results… merci
-
I don’t understand Step 14
“Paste wings, as shown. Try different combinations for the best look:”
How do you paste and get the box in the picture?
-
Ctrl+V
-
-
wow amazing thanks!!
-
Thank you, wonderfull
-
Very cool. The final colors are amazing.
-
Really great tutorial . May you let me know do you use pen tab for this tutorial ??
-
This is one awesome collection. One of my favorites I have seen in a long time. Thanks for sharing.
-
I fail to advance beyond the first few steps of this tutorial. Grammar could be improved but is not that much of an issue. What bothers me is how many steps are skips, and how vague the description of every step is. Show more of what you’re doing, show more of your screen. We really need to see what you do in order to better understand.
-
kinda difficult.i couldnt get the photo of model
-
It was quite great!
-
Why are you make video ? people is learning easy.Thank
-
Really beautiful, amazing effects thank you.
-
Amazing :D
-
thanks for share with us this post.very important post and nice work.keep more post sharing here like this ..
-
nice tutorial, ty
-
This tutorial absolutely sucks. First off his/her english is bad.. that’s not a problem. But you are doing things that some people don’t know how to get too and you’re skipping steps.
-
Looks like I need to practice a bit more with poser before I can do this one. Awesome results you have though.
-
An awesome and unction work
-
I don’t understand Step 4. How did you get the mask? I can’t seem to do that. I am using PS CS6.
-
yeah i didnt get it either and seems to miss things out expecting you to know which is hard..
-
-
I stopped in the grass brush part..
i have no grass brush -
This is beautiful
-
very good
-
Magnificent!! Very good tut!!
-
Thank u=)
-
awesome tutorial frnd :) thankssssss
-
Awesome post i like it.
-
can you please send me the psd file of your work to follow the steps. Thanks :)
-


Leave a Reply