Step 26 – foreground
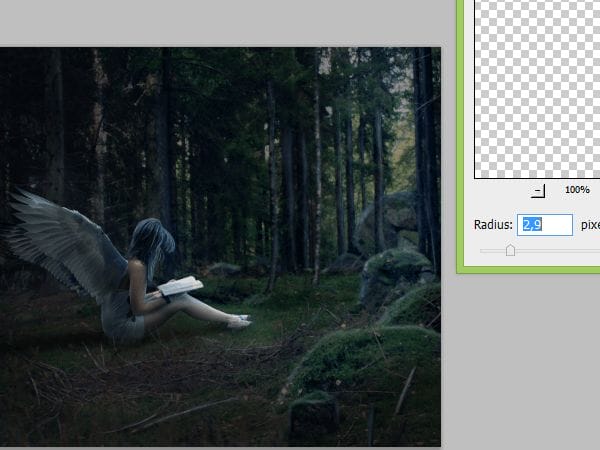
For the deep use Grass 01 png and paste it as shown below:

Then blur it. Filter > Blur > Gaussian blur:

Step 27
Paste Corner leaves stock. Blur it. Filter > Gaussian blur (on the top in filters menu):

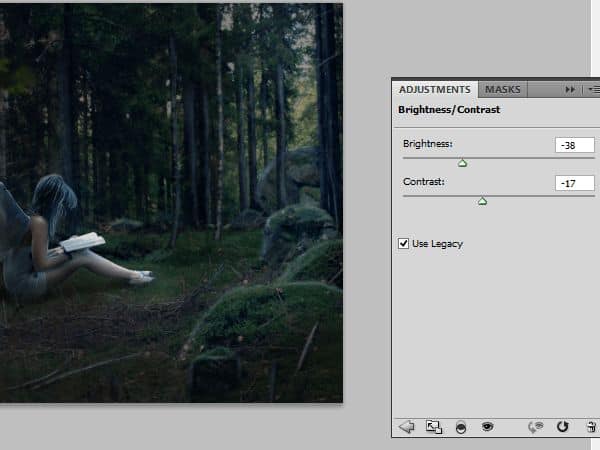
Now, we will back to adjustments layers :). Add new adjustments layer > brightness/contrast:

Again add adjustments layer, choose hue/saturation:

Then add adjustments layer with color balance:

Step 28 – final touches
Create new layer. Fill it with #7da7d9 color. Change opacity to 60%, change blending mode to Soft Light:

Then add adjustments layer. Choose brightness/contrasts:

Step 29
You have to blend wings with model. Add new layer. Choose #73686d color and, where her skin mixing with wing, draw with soft, round brush (20px) a dot. Then change color to #3e536e and draw on the edge of wing:

Step 30
We’ll create feathers. Add new layer. Choose #87acca, soft round brush (max. 2px). Draw as shown:

Step 31
Now you have to draw light source. Add layer. Choose #7da6d7 color and pick soft round brush, 22 px wide. Be crazy, but natural! :) :

Choose Right Mouse Button light source layer. Convert it to Smart Object. Choose Filter > Blur > Gaussian blur:

Step 32
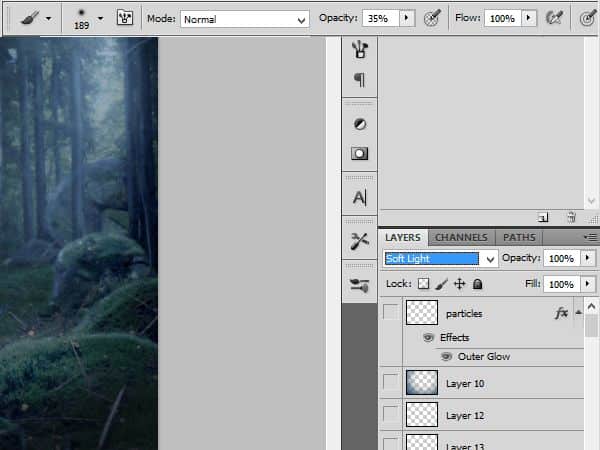
Add new layer. Choose white rounded brush, big size. Change brush opacity to 35% and draw light reflections:

Change blending mode to Soft Light.

Step 33
Create new layer. Fill it with #00497e. Change opacity 70%, and mode to Multiply:

Choose Elliptical Marquee Tool. Set feather to 120px or more, if you want. Place marquee to top-right corner. Delete the selected content (delete):

Results:

Step 34
You will create particles. Add new layer. Choose Rough Round Bristles brush, white, with default settings. Draw on wings, model’s hair, feet and book:

Choose this layer by Right Mouse Button, pick Blending options from menu:

Check Outer glow. Change color to #0096ff. Now all is ready to show! :)

Final Results
![final-results[1] final-results[1]](https://cdn.photoshoptutorials.ws/wp-content/uploads/2013/12/finalresults1-1.jpg?strip=all&lossy=1&webp=82&avif=82&w=1920&ssl=1)
Download the PSD
Tutorial by Monika Nowakowska
32 responses to “Create a Mystical Night Forest Scene with an Angel”
-
Świetny praca. Dzięki
-
resources non found
-
I can’t see the wings nor the corner leaves 2. I get a “oops’ message
-
beautiful results… merci
-
I don’t understand Step 14
“Paste wings, as shown. Try different combinations for the best look:”
How do you paste and get the box in the picture?
-
Ctrl+V
-
-
wow amazing thanks!!
-
Thank you, wonderfull
-
Very cool. The final colors are amazing.
-
Really great tutorial . May you let me know do you use pen tab for this tutorial ??
-
This is one awesome collection. One of my favorites I have seen in a long time. Thanks for sharing.
-
I fail to advance beyond the first few steps of this tutorial. Grammar could be improved but is not that much of an issue. What bothers me is how many steps are skips, and how vague the description of every step is. Show more of what you’re doing, show more of your screen. We really need to see what you do in order to better understand.
-
kinda difficult.i couldnt get the photo of model
-
It was quite great!
-
Why are you make video ? people is learning easy.Thank
-
Really beautiful, amazing effects thank you.
-
Amazing :D
-
thanks for share with us this post.very important post and nice work.keep more post sharing here like this ..
-
nice tutorial, ty
-
This tutorial absolutely sucks. First off his/her english is bad.. that’s not a problem. But you are doing things that some people don’t know how to get too and you’re skipping steps.
-
Looks like I need to practice a bit more with poser before I can do this one. Awesome results you have though.
-
An awesome and unction work
-
I don’t understand Step 4. How did you get the mask? I can’t seem to do that. I am using PS CS6.
-
yeah i didnt get it either and seems to miss things out expecting you to know which is hard..
-
-
I stopped in the grass brush part..
i have no grass brush -
This is beautiful
-
very good
-
Magnificent!! Very good tut!!
-
Thank u=)
-
awesome tutorial frnd :) thankssssss
-
Awesome post i like it.
-
can you please send me the psd file of your work to follow the steps. Thanks :)
-


 Thank you for following this template! I hope this wasn’t THAT boring. I am freelance artist from Poland. Personally I am woman with horns :). If u want to know me – go to my
Leave a Reply