
Step 23
Make a group for the rocks and change the mode to Normal 100%. I used Brightness/Contrast to brighten the rocks:


Step 24
I used Levels with the same purpose:
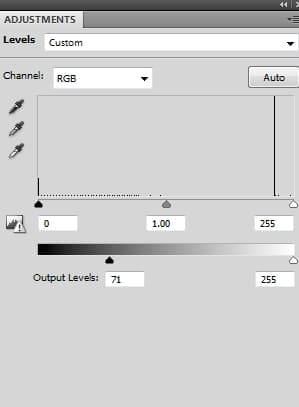
On this layer mask use a soft black brush to erase the parts I don’t want to be affected by this adjustment layer:

Step 25
Make a new layer on the top. Use a hard black brush, size about 2-5 px to spot around the rocks to make some tiny particles:

Step 26
To make a glowing effect around the man, create a new layer, use a soft brush with the color #f3f3f3 to paint around him. Change this layer mode to Soft Light 100%:
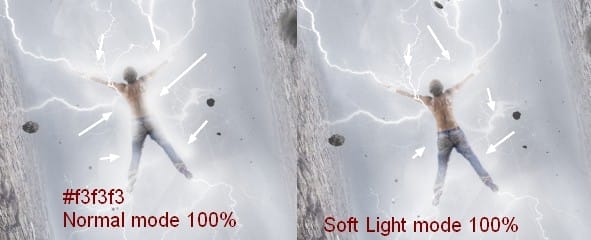
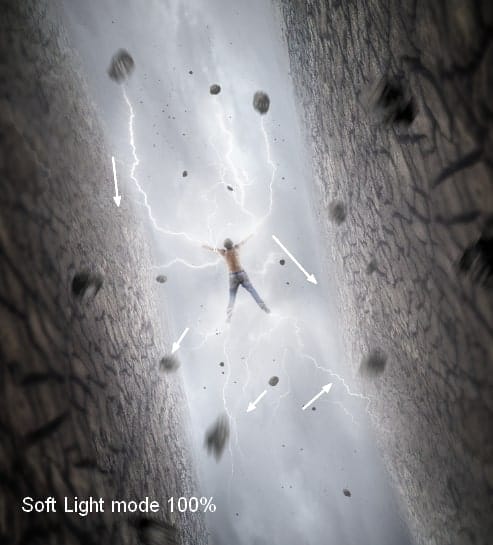
Make a new layer, use the same brush to paint more light around the man and the sky. Change this layer mode to Soft Light 100%:

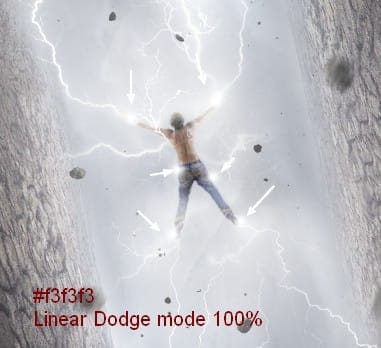
On a new layer use the same brush to paint some dots of light around the arms, legs. Change this layer mode to Linear Dodge 100%:
Step 27
It’s time for coloring the scene. Make a Gradient Map adjustment layer on the top:

Change this layer mode to Soft Light 100%:
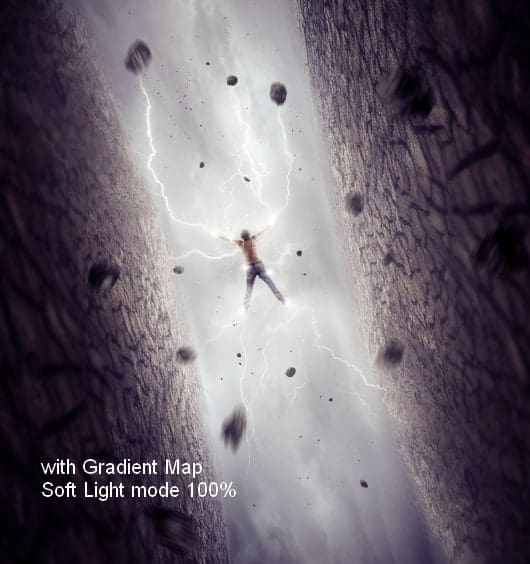
Step 28
I used Color Balance to change the color a little:


Step 29
I used two Photo Filter adjustment layers for the scene:


Step 30
I used Levels to increase the dreamy mood for the scene:
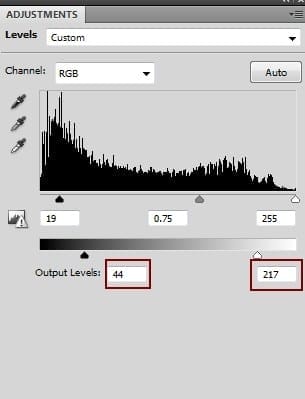
On this layer mask use a soft black brush with a low opacity (10-30%) to reduce this effect in the sky, around the man, on the grounds:

Final Results

Tutorial by Jenny Le
9 responses to “How to Create a Dreamlike Scene of a Man with White Lights in Photoshop”
-
Thank you I learned a lot from following this tutorial!
-
Wow, this is great! Awesome job, love the final result!
-
Useful lesson. I love all your lessons
-
Love you bro…! you’re awesome.., awesome piece of art
-
very nice, and very helpfull
here is my version
https://farm9.staticflickr.com/8774/17060403910_a0491b5ffd_b.jpg -
Nice tutorial. I followed this tutorial and put my own spin to it. http://fav.me/d8pusfn
-
Dolan
-
i like memes
-
nice


Leave a Reply