Make skin look perfect in one-click with these AI-powered Photoshop actions.
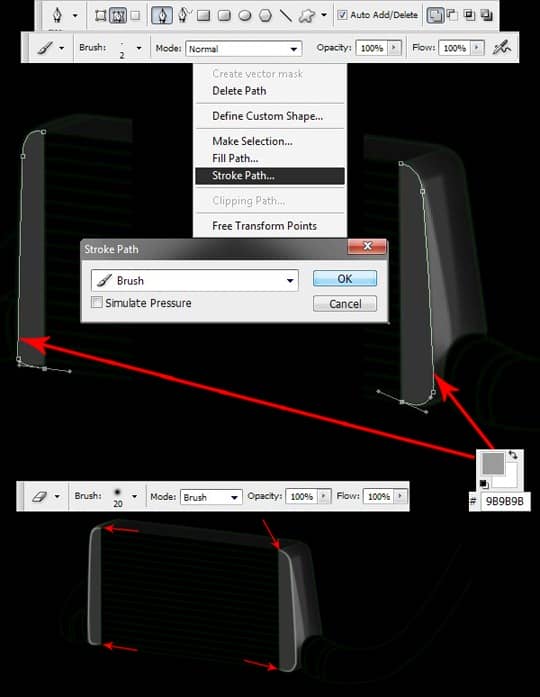
Step 6
Create again a new layer, and repeat the process, but with pure white colour #FFFFFF. This time, erase much more the paths.
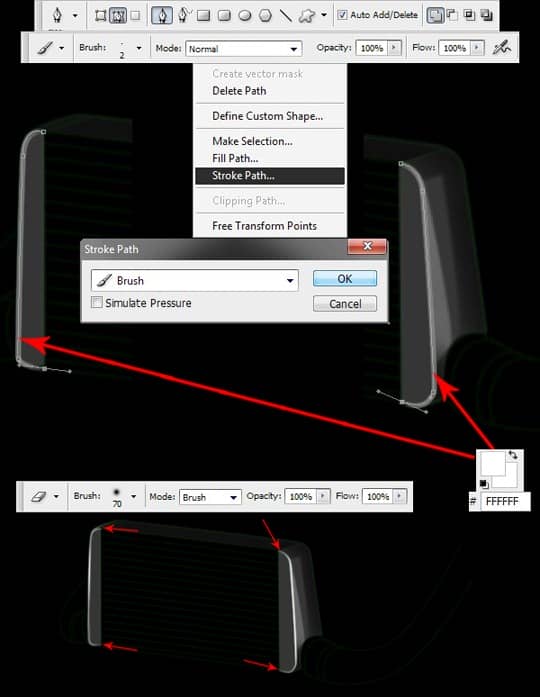
Step 7
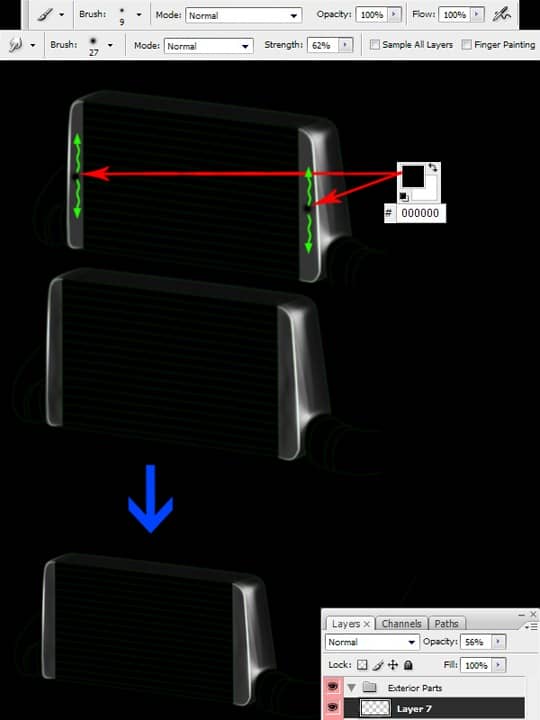
Make a new layer, choose Brush Tool (B) and with a brush of 9px and white colour #FFFFFF, make a point like that, on the top of part. Then, using Smudge Tool (R), smudge it like I did. After that, do exactly the same process, but this time, with a 5px brush and lower on the part, next to the pipe.
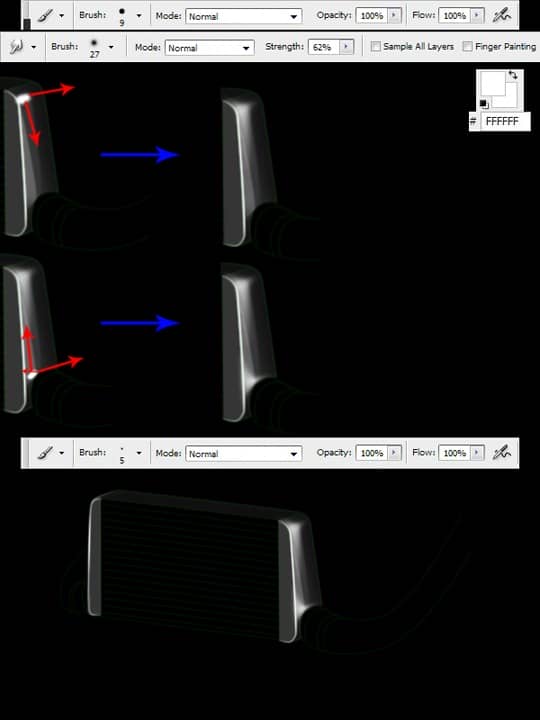
Step 8
Make a new layer, and using Brush Tool and black colour #000000, make 2 points, in front side of the exterior parts, and smudge them, with Smudge Tool. Then set the layer's opacity to 56%.
Step 9
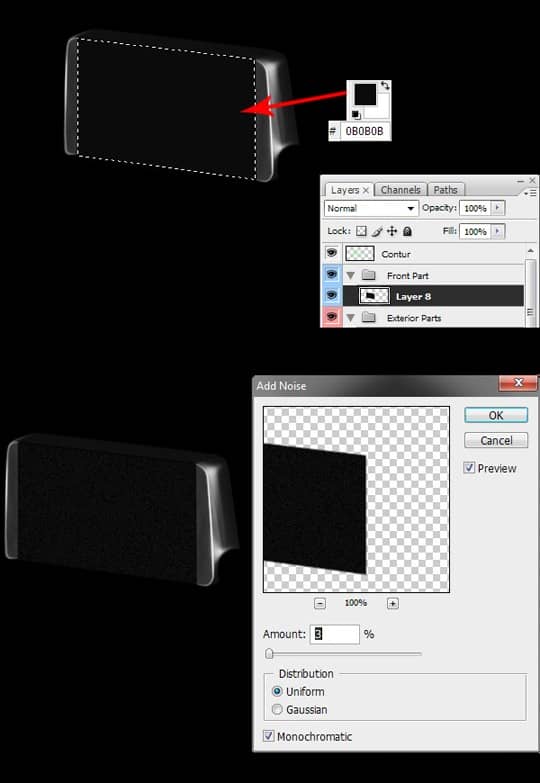
Create a new Group, and a new layer. Make a selection, to the main part of intercooler, and fill it with #0B0B0B colour. Then go to Filter > Noise > Add noise.
Step 10
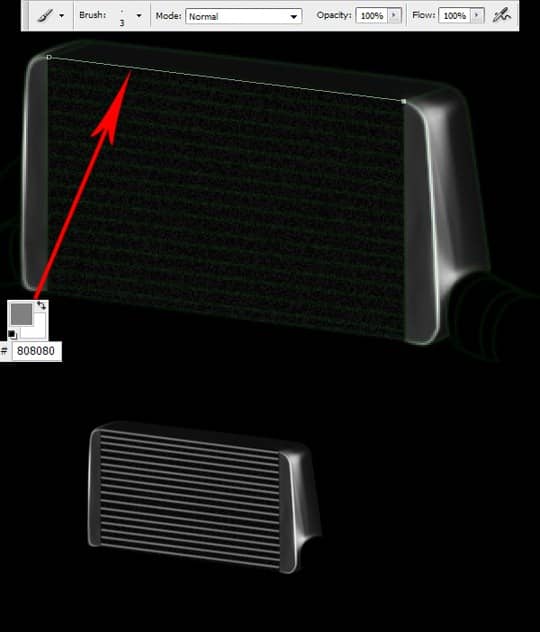
Create a new layer, and having the Brush Tool at 3px size, take Pen Tool, and following the initial shape, make a line path. Then stroke it with #808080 colour. Duplicate the layer how many times is need, to fill the intercooler, with these lines. But, always follow the initial shape.
Step 11
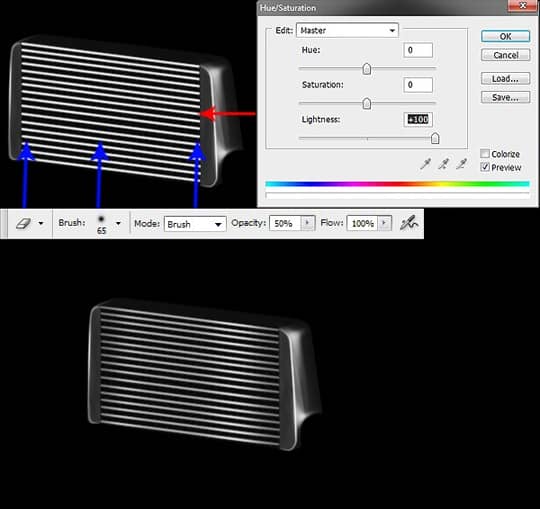
Duplicate the layer with the lines, and go to Image > Adjustments> Hue/ Saturation and set the Lightness +100. Then take the Erase Tool, set it opacity at 50% and erase in the center, and in the borders of lines.
Step 12
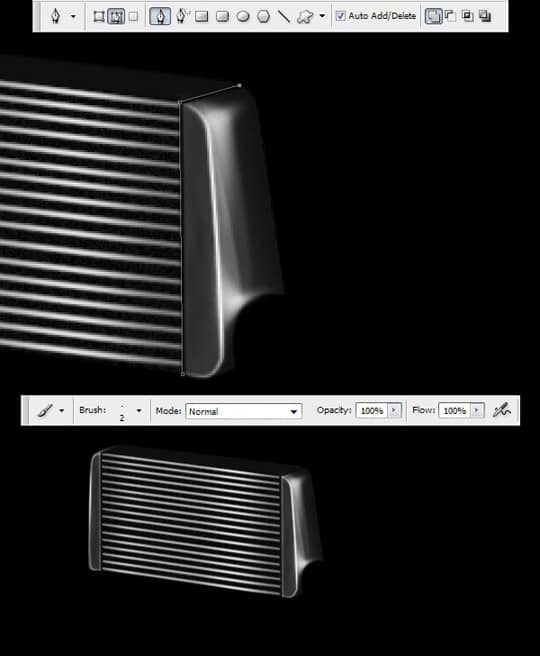
Make a new layer, make a path, following the shape, to separate the exterior parts of the main intercooler. First on the right side or on the left. So, take Pen Tool, make a path, and then, having the Brush Tool at 2px size and black colour, stroke it. Immediately, make a new layer and using the same path, stroke it with white colour. Then, move the last layer, with white colour next to the black, but external. Set the layer's mode to Overlay. Take Erase Tool, and a big brush, 65px size, and erase a bit the top of this layer, there where are the shadows. After that, do the same procedure to the other side.
Step 13
Make a path like that with pen tool, and then right click on the image, and choos Make Selection. Make the selection with 1.5 feather. Make a new layer and fill the selection with a big brush about 65px, and white colour. It should look like this.
