Download Lightroom presets and LUTs, absolutely free. Use the presets to add creativity and style to your photos.
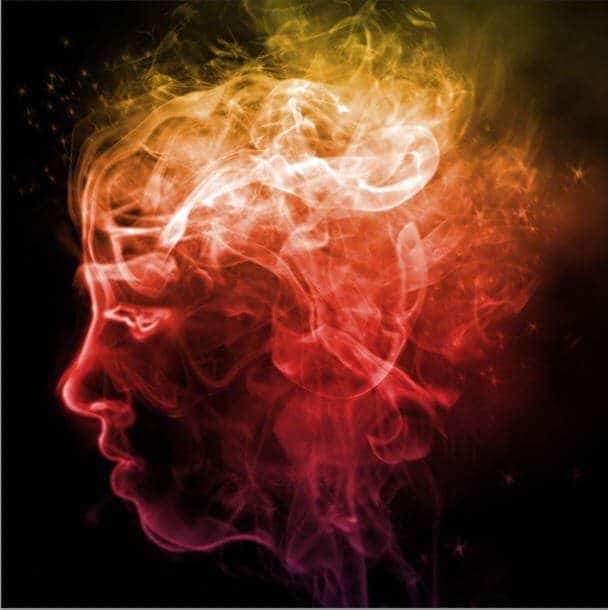
I was so impressed the day I saw this "smoke art" photo effect. I decided to recreate it using Photoshop and ended up with the result shown below. Seems complicated? Keep on reading and you'll be surprised how easy it is to do, thanks to the Smoke Brushes from Photoshop Tutorials.
Preview of Final Result
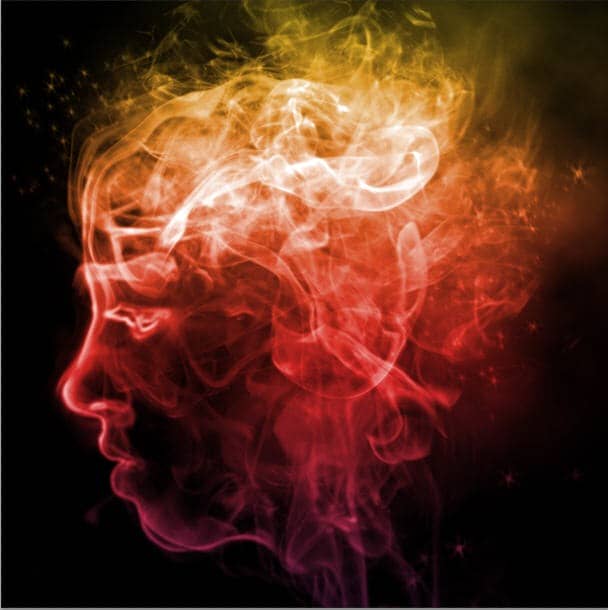
Smoke Portrait Photoshop Tutorial
Before we start, notice that this tutorial was written using Windows OS, so for Mac users simply alter Ctrl with CMD, and Alt with the Opt key.
Tutorial Details
- Program: Adobe Photoshop CS or newer version
- Difficulty: Medium
- Estimated Completion Time: 1 to 2 hours
Resources:
Step 1 - Extracting the Model
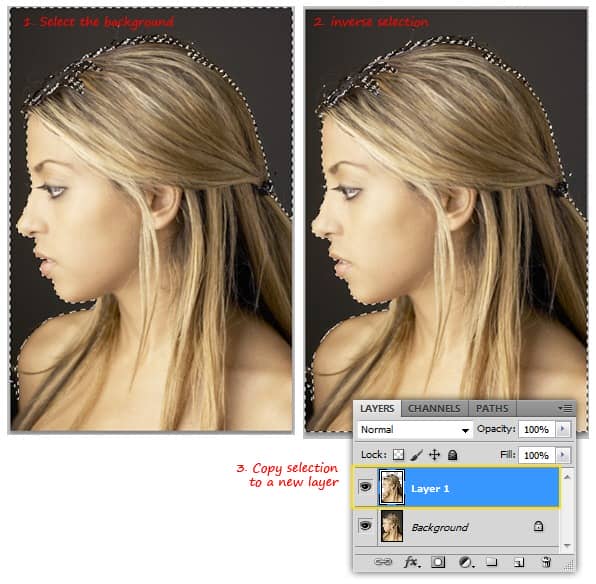
Open the stock model image in Photoshop and use the Magic Wand tool to select the background. Go to Select > Inverse (Ctrl+I) to invert the selection, then duplicate the selected area by pressing Ctrl+J. In the Layers panel, you will see a new duplicated layer.
Note: This stock photo belongs to katanaz-stock. Please do not redistribute or sell this image without permission! Thanks.
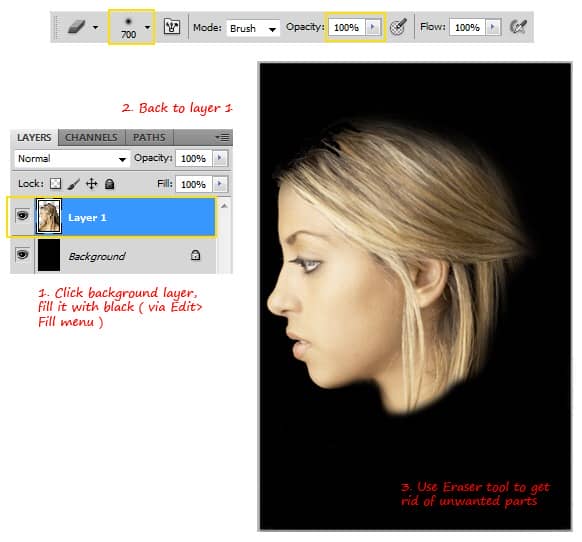
Click on the Background layer, and fill it with black. Go back to Layer 1 and erase the extra parts of the image using the Eraser tool until you have just the head left. Make sure you pick a soft round brush with 100% opacity when erasing the image.
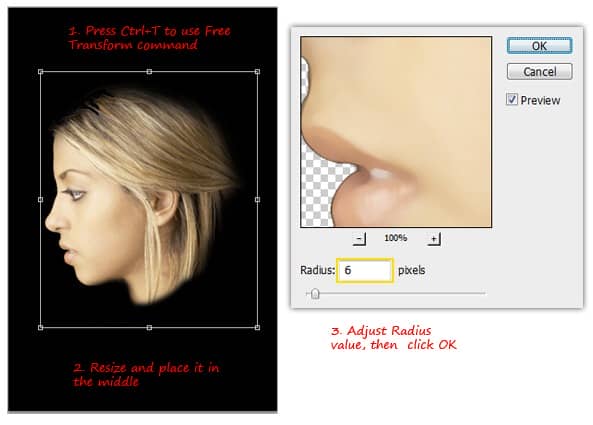
Resize the head to make it smaller, and then place it in the middle of the canvas. Now soften the image by using the Median command on the Filter menu. Choose Noise > Median. Adjust the Radius value to around 5 to 7px. Click OK when you're done.
Step 2 - Creating Smoke Guide Lines
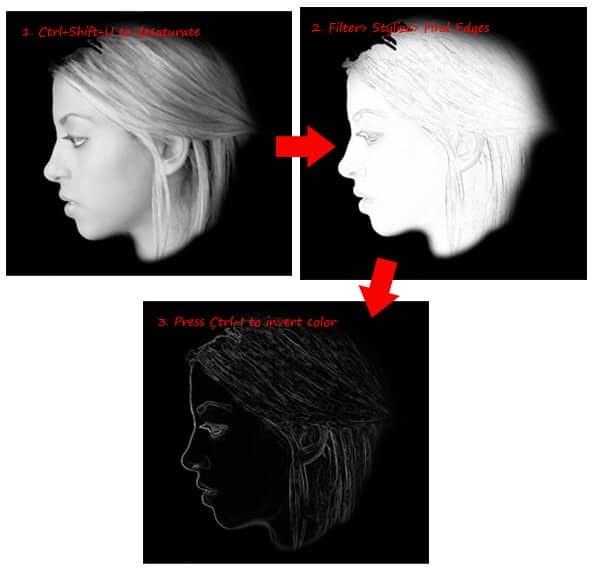
Desaturate this layer by going to Image > Adjustment > Desaturate, or simply press Ctrl+Shift+U. Then use Filter > Stylize > Find Edges to create a sketched line effect. What we will need is the opposite, so invert the color by pressing Ctrl+I and the line color will turn white. That’s it! Now the image can be used as a guide to create smoke art.
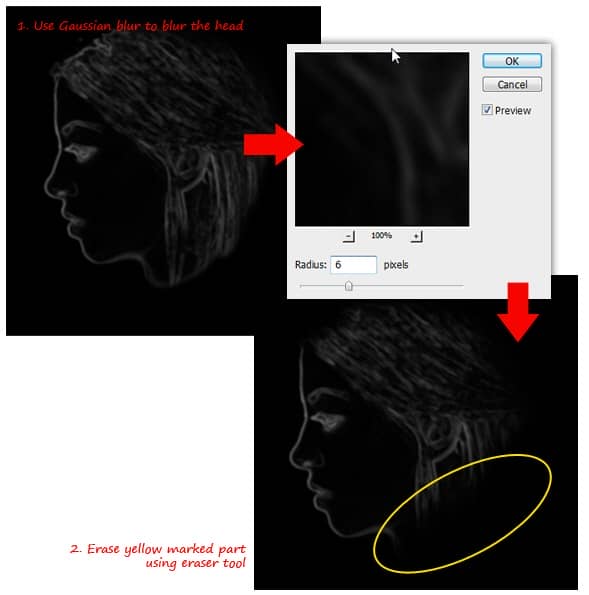
Make the head blurry by selecting Filter > Blur > Gaussian Blur. Adjust the Radius value to around 6px, click OK to apply Gaussian Blur Filter. Remove the unwanted areas (marked with the yellow circle shown below) in the neck and hair by using the Eraser Tool.
Still using the same layer, press Ctrl+L to shown the Levels dialog. Adjust the shadow, midtones and highlight values to increase the image contrast so that the black area gets darker and white area gets brighter. See image below for a quick guide. When finished with Levels, click OK to apply the change.


13 comments on “Smoke Portrait”
Can I get a download link?
the brushes can't download for free,how can i get it?
Click on the "Free Download" link
pls finish tut i need no what to do?1!?!
sir, very fine your works...........i like this.
sorif,
Nice work
this is amazing! Thanks so much for sharing
Thanks soo much the wonderful knowledge shared
what is the next step to take bcoz we don't understand
what's the next ??
-_-
go to next page!!
poda pulle
its amazing