
Step 3 – Adding Smoke
Pick the Brush Tool and click the Menu buttonfrom the preset brush picker and select Load Brushes. Locate where you saved the smoke brush and select it by clicking the Load button.
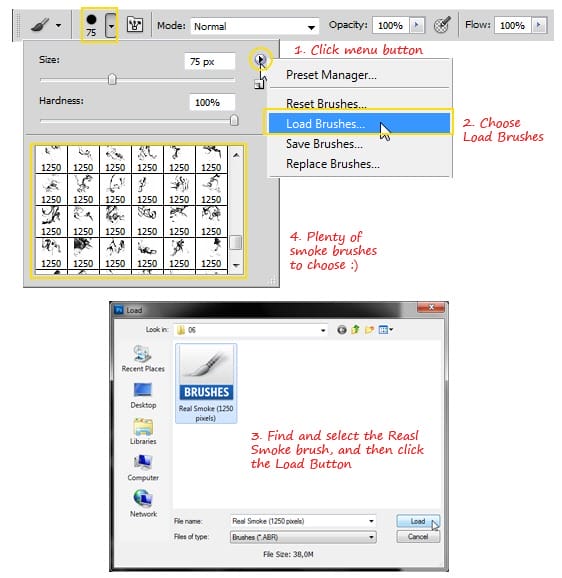
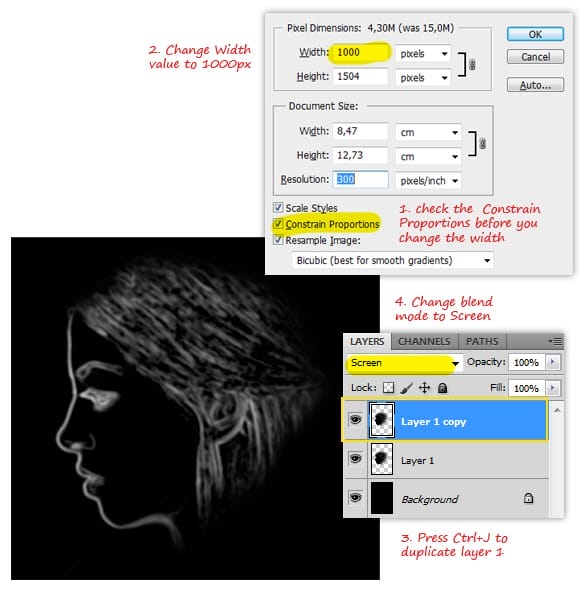
This smoke brush has plenty of smoke shapes. Since the default size is 1250px (quite large since the image size is only 1800px), you will need to change the image size to 1000px before using this smoke brush. To do this, go to Image > Image Sizemenu.
Duplicate Layer 1 by pressing Ctrl+J, then change the blend mode to Screen. The white lines are supposed to be brighter right now.
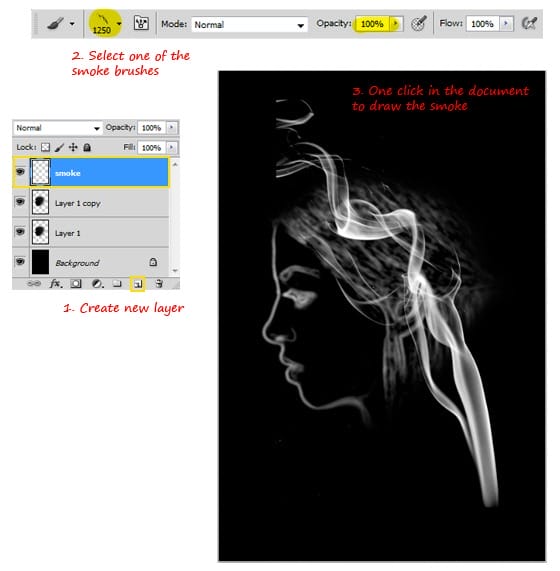
Create a new layer on top (optional: rename it to Smoke1). Still using the Brush tool, choose one of the smoke brushes. Create the smoke shape with one click (make sure the brush Opacity is 100% and the brush color is white).
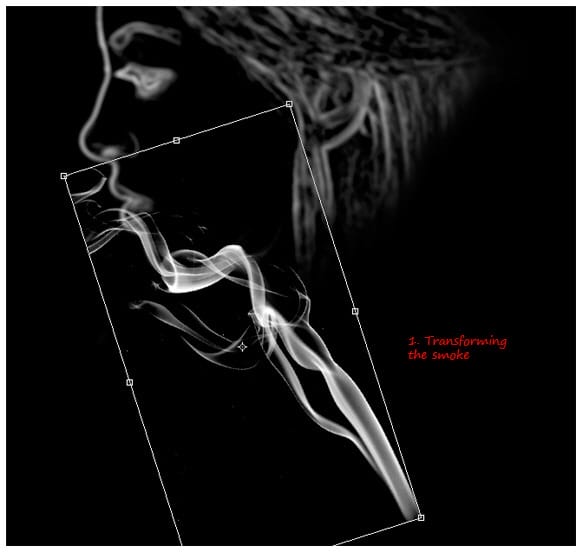
Resize the smoke to make it smaller and reposition it however you like (i.e. the outlining the chin area). Now here is the tricky part. Think about how you need to warp the smoke so that it follows the chin shape. Erasing the unwanted smoke parts is the first step you should do. Use the Soft Round Eraser tool with 50% opacity to do this.
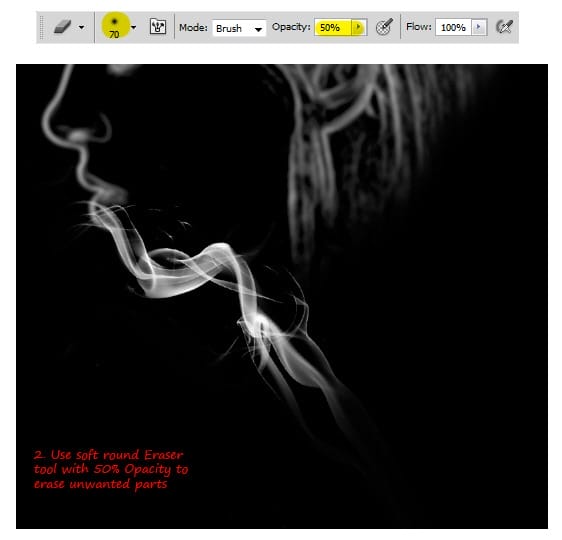
Step 4 – Reshaping the Smoke
To reshape the smoke, choose one of the following steps (or a combination of the two):
Option 1: Use the Smudge Tool with 30% Strength to push and pull the smoke to outline the chin shape. See illustration below for more details. Note: Using the smudge tool will also blur the smoke.
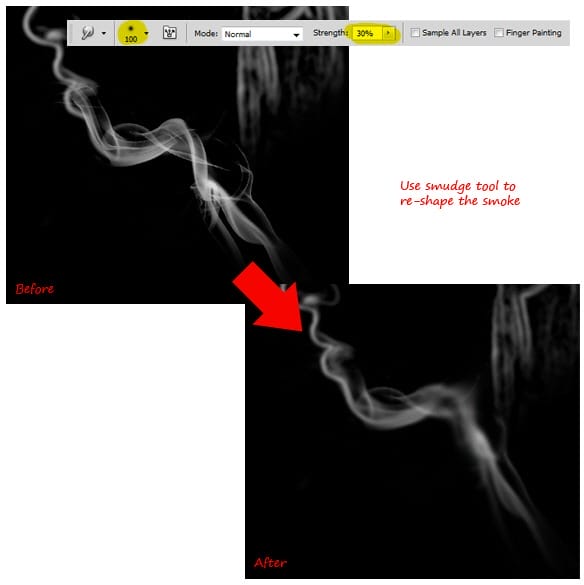
Option 2: Go to Filter > Liquify. Use the Warp Tool to push and pull the smoke to outline the chin shape. Click OK when you’re done. Note: to simplify these steps: Click Show Backdrop ON, use Layer 1, select Behindas Mode, and set Opacity to100%.
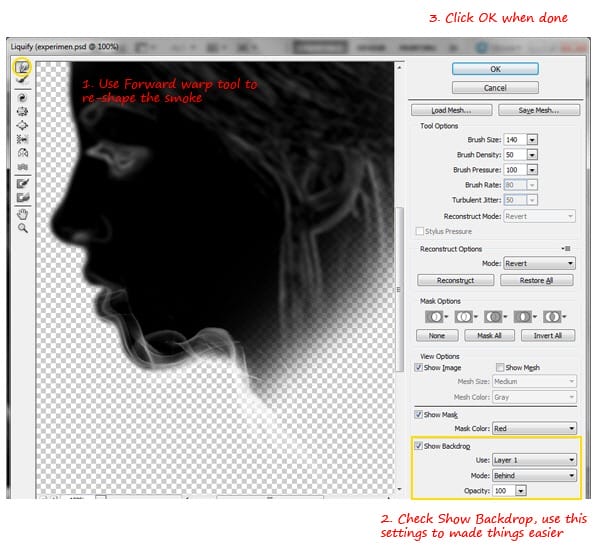
The key to getting the job done is patience. For a more convincing result, combine Option 2 (Liquify) and Option 1 (Smudge). Remember to create a new layer each time you add new smoke. You should start to get a good feel for this technique once you begin, so I will not go into further detail about this. Please see the illustrations below for a quick guide.
13 responses to “Smoke Portrait”
-
Can I get a download link?
-
the brushes can’t download for free,how can i get it?
-
Click on the “Free Download” link
-
-
pls finish tut i need no what to do?1!?!
-
sir, very fine your works………..i like this.
sorif,-
Nice work
-
-
this is amazing! Thanks so much for sharing
-
Thanks soo much the wonderful knowledge shared
-
-
what is the next step to take bcoz we don’t understand
-
what’s the next ??
-_-
-
go to next page!!
-
poda pulle
-
-
its amazing


Leave a Reply