What is Dynamic Text?
Dynamic text in Photoshop automatically resizes and adjusts your text to perfectly fit any shape or boundary. It saves time by eliminating manual resizing and reflowing, making typography layouts faster, more flexible, and easier to edit.
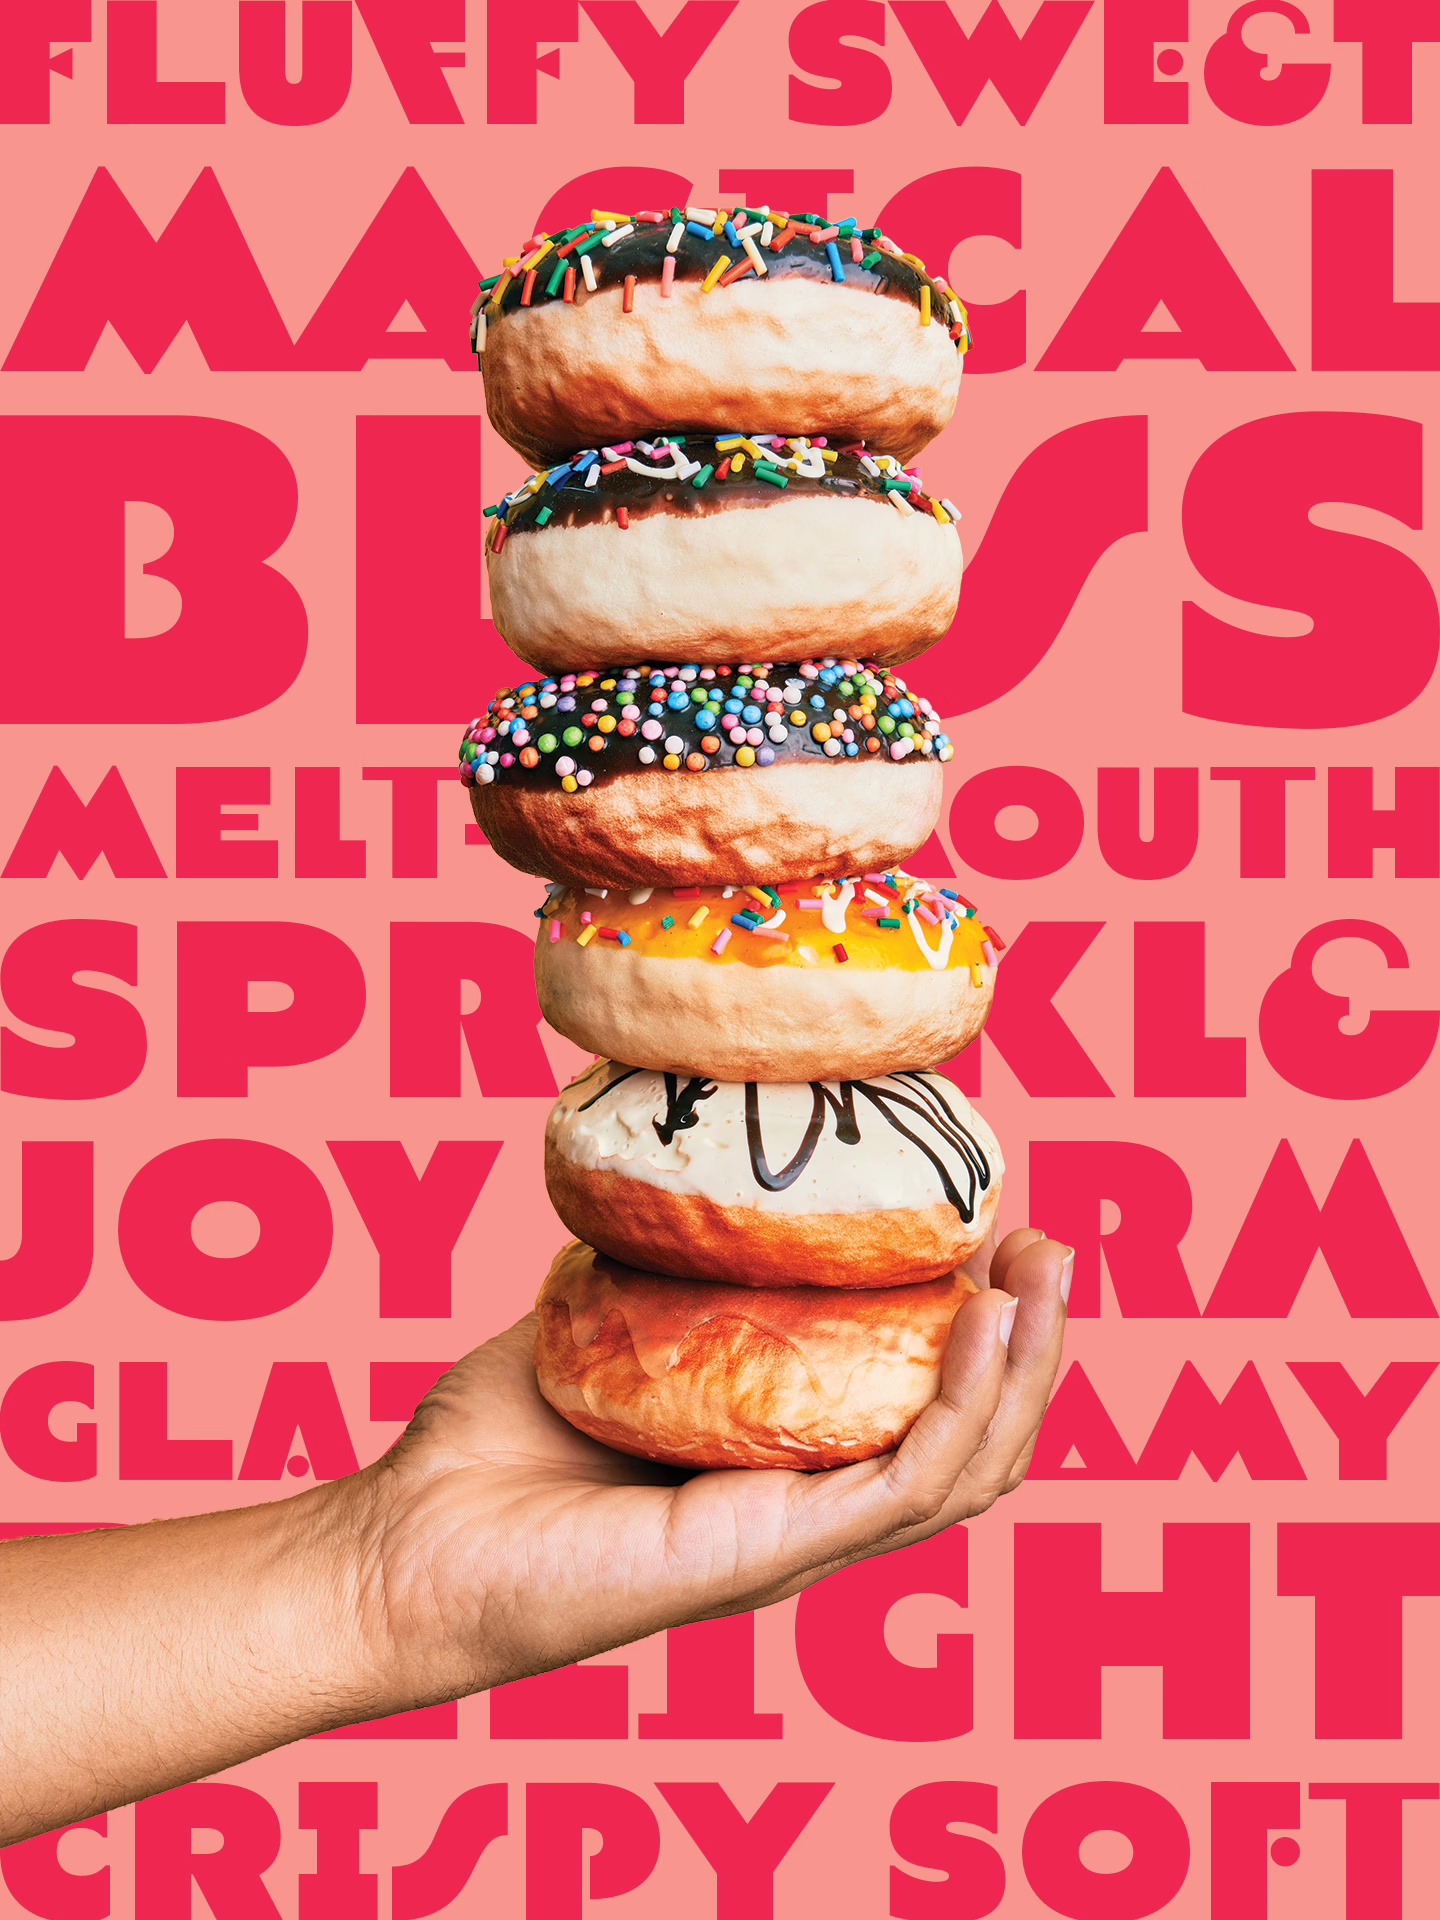
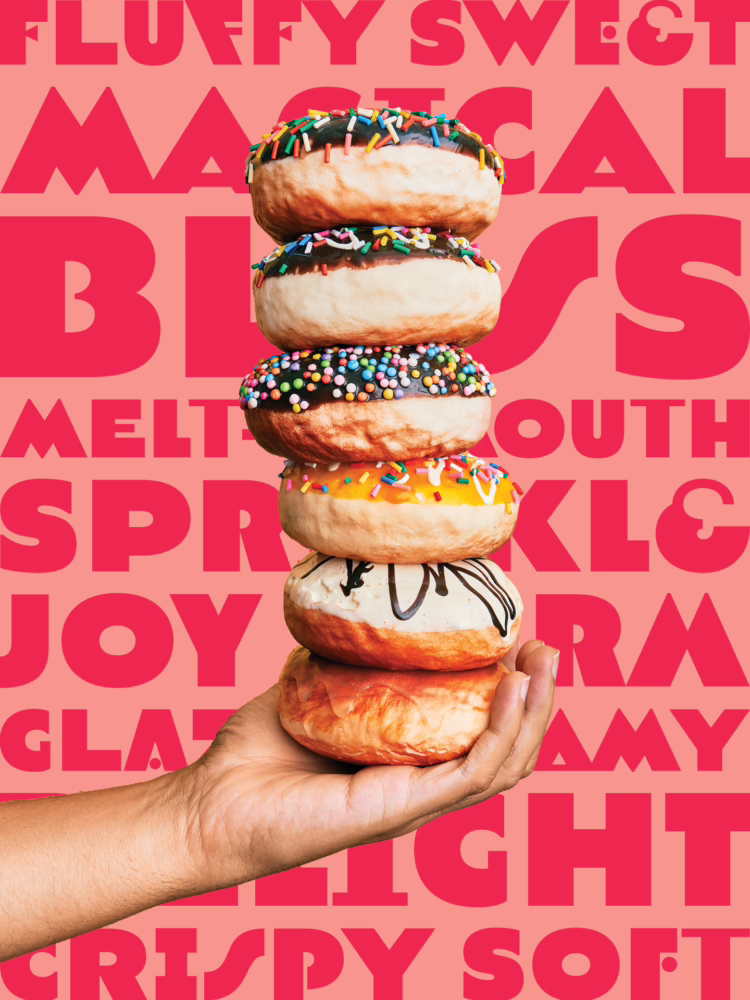
Donut Shop Poster Project
In this tutorial, you’ll start by typing a fun, descriptive phrase to use as background text. Then, you’ll convert it into dynamic block-style text. After that, you’ll customize the spacing and layout using Photoshop’s Properties panel. Finally, you’ll add a donut image in the foreground and remove its background with AI tools.
Tutorial Resources
- Donut Photo (free) – Adobe Stock
- Pilar Pro Font (optional) – Adobe Fonts
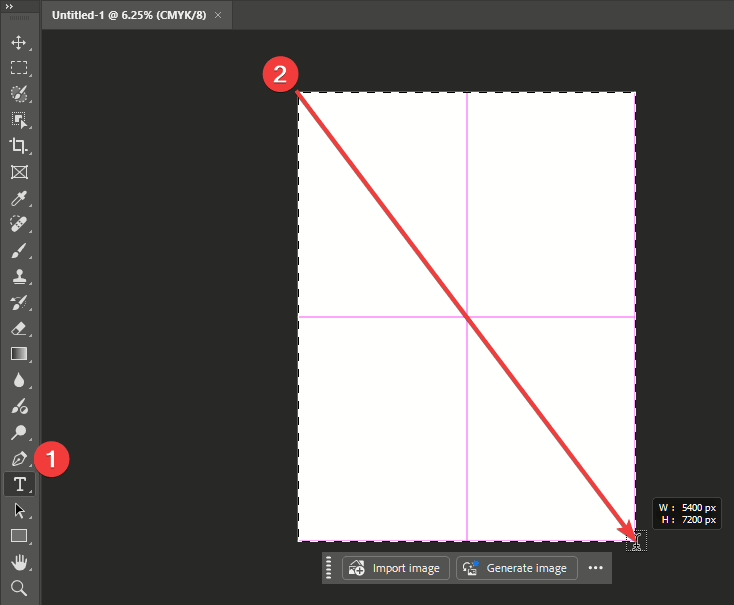
Step 1: Create a New Document
Go to File > New. Set the width to 18 inches, height to 24 inches, resolution to 300 pixels/inch, and Color Mode to CMYK Color 8-bit. Click Create.
Note: We’re using CMYK color mode for print to ensure accurate colors. For graphics intended to be used on screens such as social media posts, set the color mode to RGB.

Step 2: Add Your Text
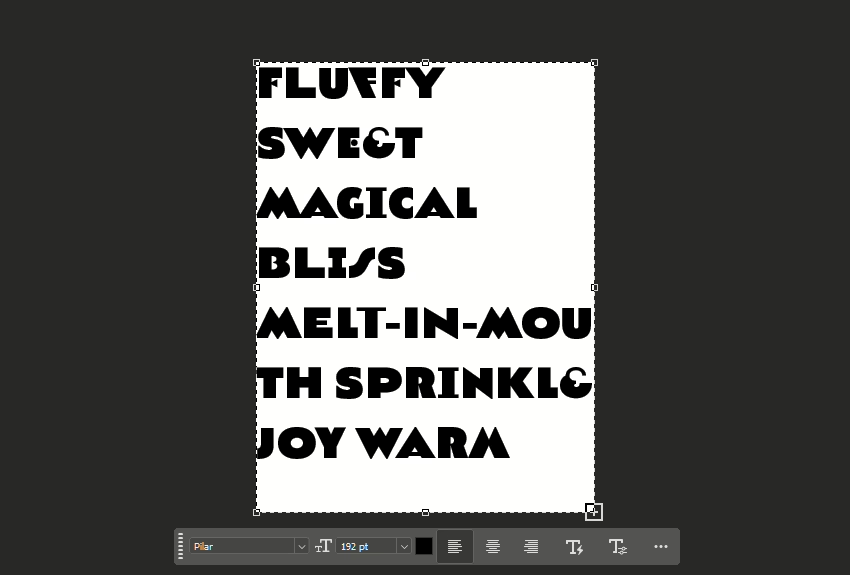
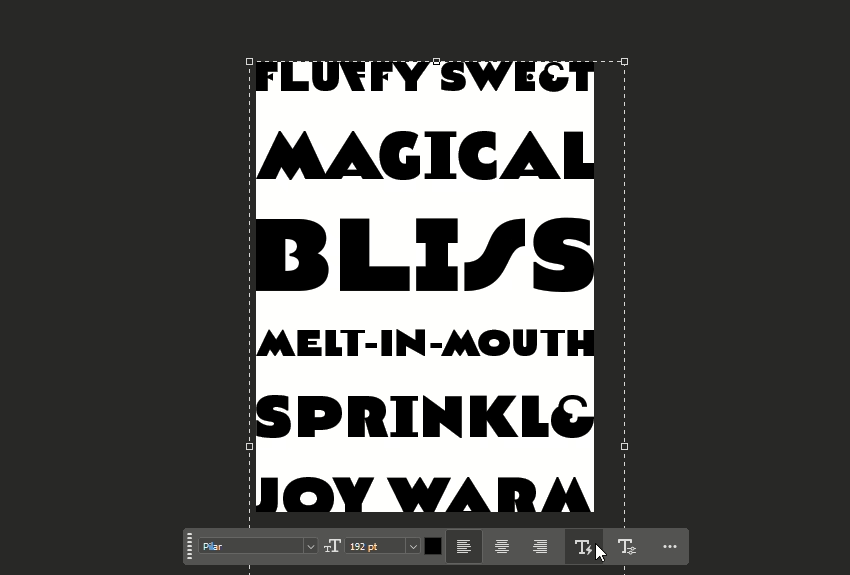
Select the Text tool (T). Click near the top-left corner of your document, then drag diagonally down to the bottom-right corner to create a large text box.
We’re using the font “Pilar Pro” but you can use any font you like. Don’t worry about the font size because this will dynamically change later.
Type this phrase:
“Fluffy Sweet Magical Bliss Melt-in-mouth Sprinkle Joy Warm Glaze Dreamy Delight Crispy Soft Heavenly”
Step 3: Convert to Dynamic Text
Locate and click the Dynamic Text button in the contextual task bar. Once clicked, notice how the text automatically fits perfectly inside the text box.
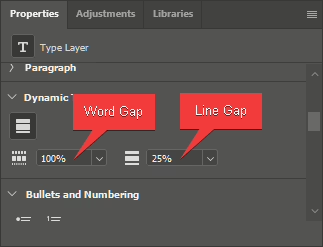
Step 4: Adjust Spacing
You will notice that the spacing is quite wide. Open the Properties panel (Window > Properties) and scroll to the Dynamic Text section. Adjust the spacing values:
- Leave the Word Gap at 100% (default)
- Change the Line Gap to 25% for a tighter, more condensed look
This controls space between words and lines dynamically.
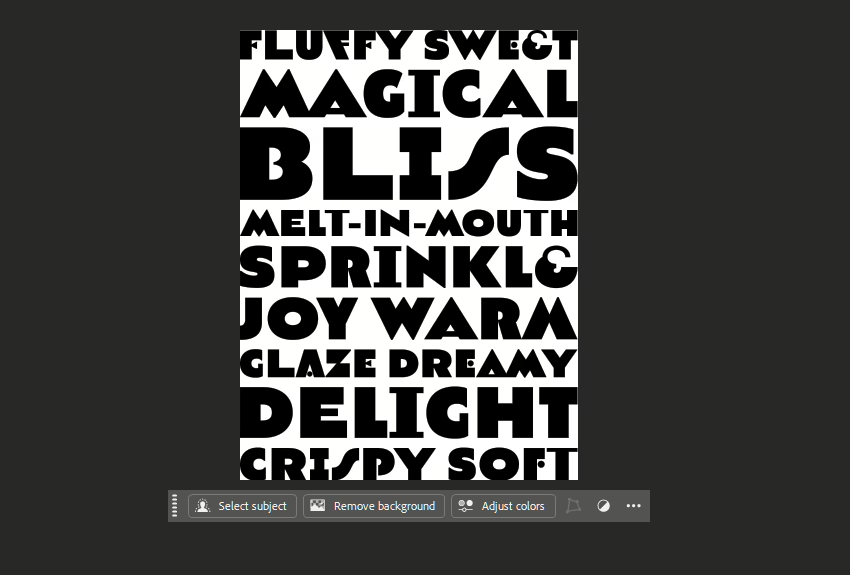
Step 5: Resize and Reposition Text Box
You can resize the text box if needed and you will notice the text automatically rearranging and resizing to fit. We didn’t need to do it but here’s how poster looks like so far.
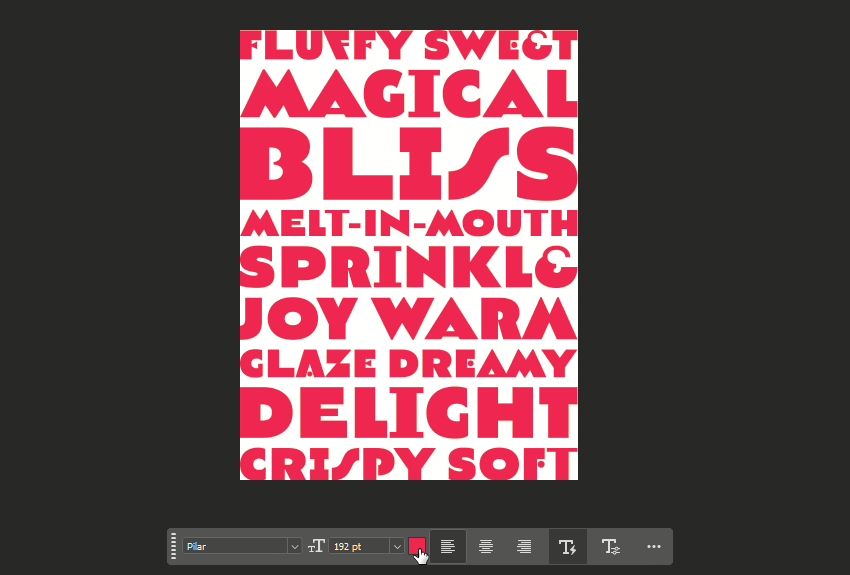
Step 6: Change Text Color
With the text layer selected, change its color to #ee2450 for a vibrant pink tone.
Step 7: Create Background Color Layer
Instead of filling the background directly, create a new Solid Color fill layer for easier future edits:
3 responses to “Auto-Resizing and Reflowing Text in Photoshop”
-

Still receiving 404 error on zip file link…..
-
404 Not Found outcome when clicking on the Dynamic Text Tutorial zip link???
-
I’m guessing you clicked the link in the newsletter. Sorry, that one wasn’t working. The link in the post is working, but here it is again for you: https://downloads.photoshoptutorials.ws/psds/Dynamic%20Text%20Tutorial.zip
-
Leave a Reply