Luminar AI lets you turn your ideas into reality with powerful, intelligent AI. Download the photo editor and see how you can completely transform your photos in a few clicks.
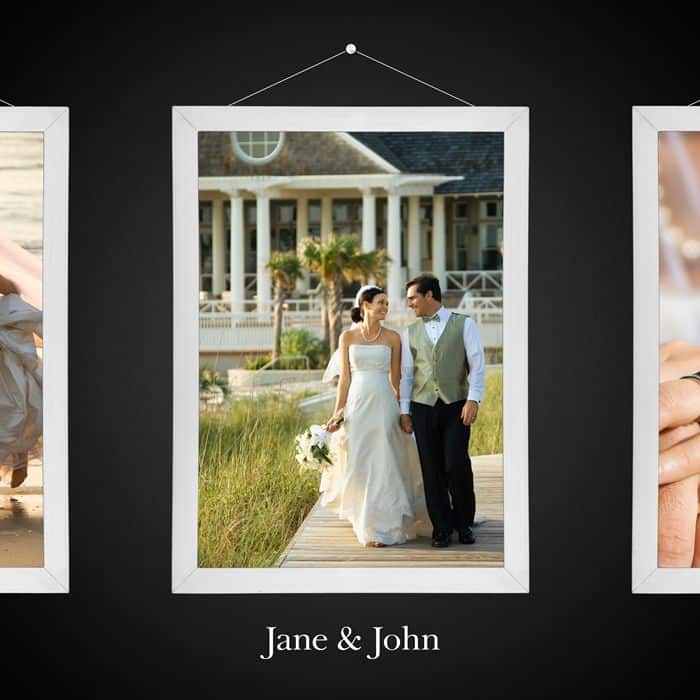
Learn how to create a wedding frame layout using only nondestructive editing techniques! You will learn how to create a subtle textured background, apply picture frames as Smart Objects, and create hanging strings. This tutorial is written for beginners and to follow it, you will need Adobe Photoshop CS6.
Preview of Final Results
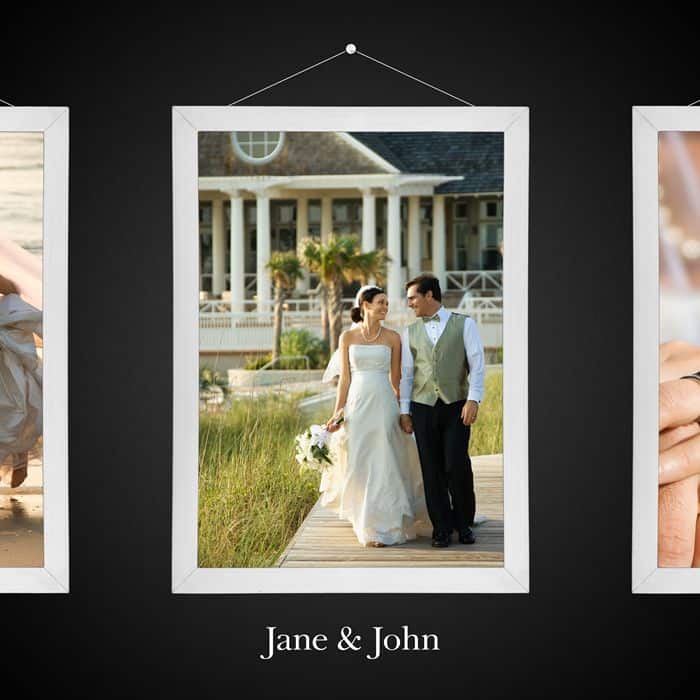
Download the PSD
[vc_column width="1/1" el_position="first last"]
[vc_cta_button title="Download" href="https://downloads.photoshoptutorials.ws/Wedding Frames.zip" color="btn" size="btn-large" icon="none" target="_self" position="cta_align_right" call_text="Wedding Frames.zip | 42.7 MB" width="1/1" el_position="first last"]
[/vc_column]
Tutorial Resources
- 12 Picture Frame Graphics - Photoshop Tutorials
Step 1
Create a new 3000x3000 pixels document. Fill it with black. If your background is white, you can just press Ctrl/Cmd+I to invert your layer.

Step 2
To start everything off, let’s create a black background with a subtle gradient. There are several ways to do this from using the Gradient tool to adding a nondestructive Gradient fill layer. The best way though is to add a gradient overlay layer style. You should use layer styles whenever you can because, unlike creating adjustment layers, they don’t add to the number of layers you have.
As with any PSD, the background layer is always locked. To add layer styles, you will need to unlock it by right-clicking and choosing “Layer from Background”.
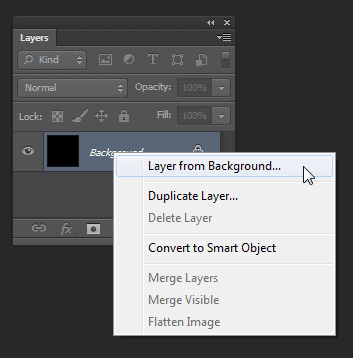
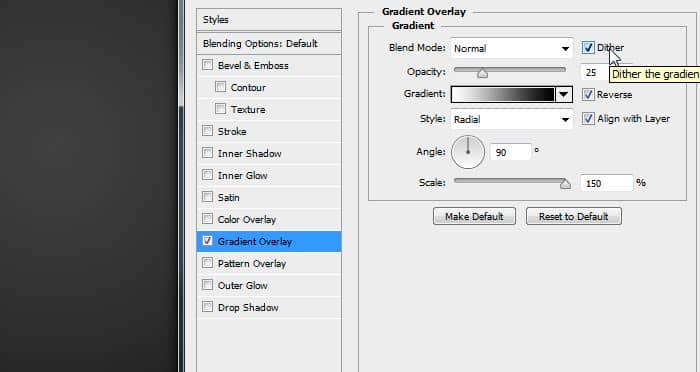
Now go to Layer > Layer Style > Gradient Overlay. Use the settings from the image below. The Dither setting is new in Photoshop and it adds speckles to your gradient to make it look smoother.
Step 3
If you look closely at the gradient, you can still see banding even though we enabled dithering. This is completely normal and to fix it, we’ll use a trick web and interface designers use – adding noise. The noise we add will hide the banding and give it a nice texture.

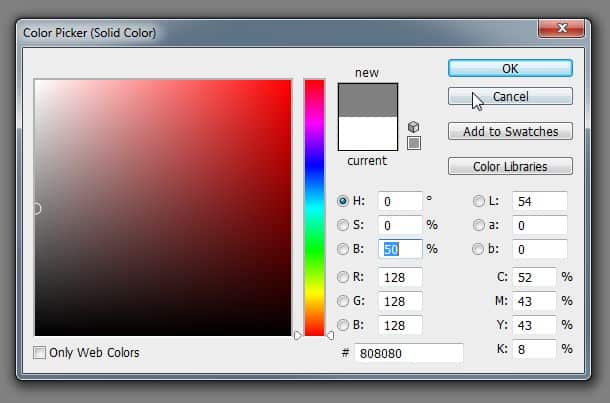
First, create a new Solid Color Fill Layer (Layer > New Fill Layer > Solid Color). Set the hue & saturation to 0 and brightness to 50%. This will give you 50% gray.
Step 4
Now we’re going to add some noise with the Noise filter. Photoshop has a small problem where you can’t apply filters to Fill Layers. To overcome this, you can either rasterize the layer or convert it to a Smart Object. It’s better to convert it to a Smart Object because it lets you apply filters nondestructively.
Convert your layer to a Smart Object by going to Layer > Smart Objects > Convert to Smart Object. Next, go to Filter > Noise > Add Noise. Set the amount to 8%, distribution to Gaussian, and enable the Monochromatic option.


8 comments on “Create a Skeuomorphic Wedding CD Cover Using Only Nondestructive Layers”
This is perfect for a wedding photographer! Great post!
Wow, these are really creative! They remind me of those Chip Fosse drawings from Overhauling’. Great work!
I've the C6 but could not find the poly option for 3 sides...also I couldn't find the steps for text. Thanks i advance for help it is appreciated.
I have a problem man when I tried to save it as picture A window came and reporting that the operation couldn't be completed!
What I do :(?
Thanks brother for good work and perfect design I just made changes that I just made metallic with LAB instead of HSB
and thanks again finished like you exactly . :) ^^ Yours:Alaa
Oh goodness!!Simple tutorial and nice :DBut i wanna ask how could you do the 10 step above?I mean, i just got one selection rectangular tool ( middle only)
How to make the selection as above?
@ZakiiAydia hey man to make many selections just press shift when you are making new selection will make it with the previous selection and press again shift and will again make the third selection :D .
Hope it works ^-^.
Your organizational skills are marvelous! This is a nice tutorial! Thank you