You were the chosen one! It was said that you would destroy the Sith, not join them. You were to bring balance to the Force, not leave it in darkness. First, add a background and apply some blur, then place a moon and Stormtrooper. Add some Adjustment Layers and place fire particles and fog/clouds. Next, we’ll add adjustment layers for color grading and finally apply the Camera Raw Filter.
Preview of Final Image

Tutorial Resources
Step 1
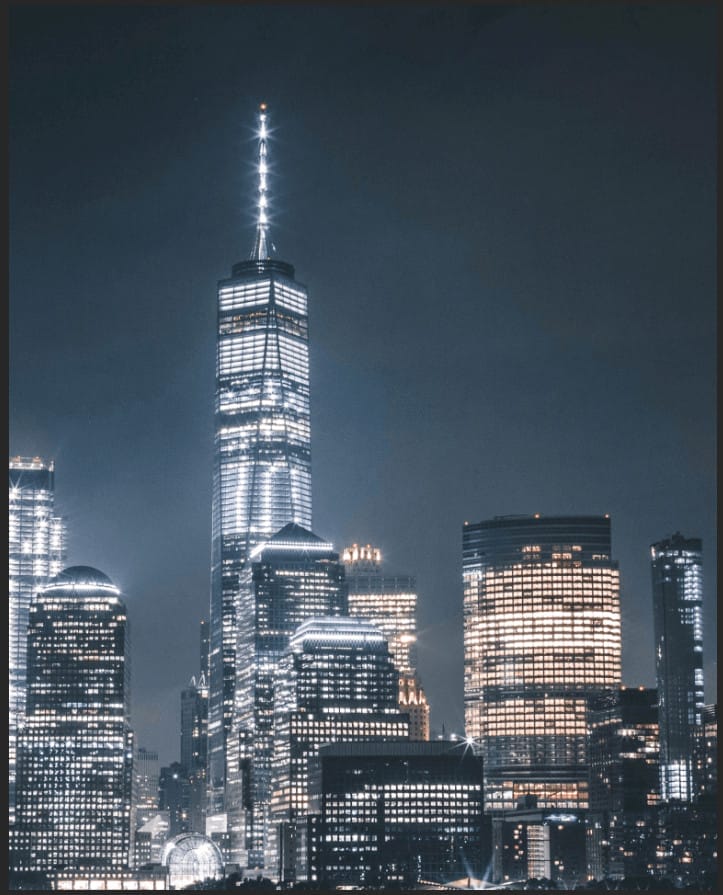
Now, let’s start open a Background image. Go to File > Open and select background photo. Press right click on mouse and in new pop-out window select “Convert to Smart Object”.

Step 2
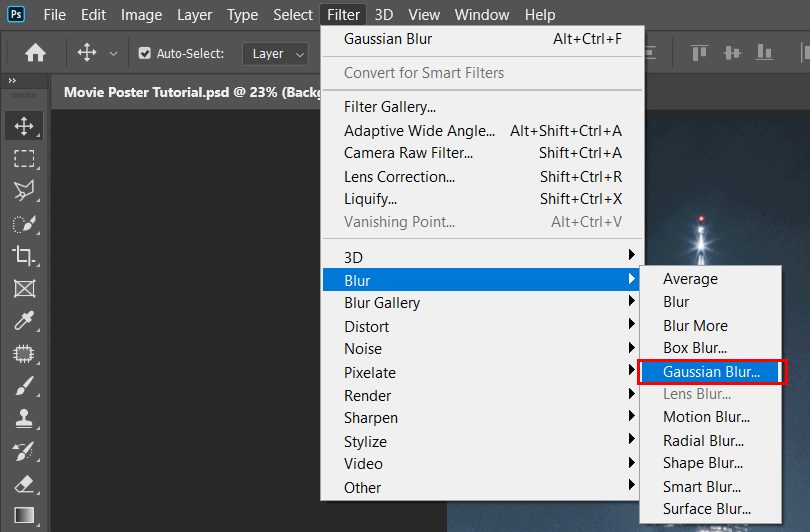
Next, go to Filter > Blur > Gaussian Blur and set Radius to 1.5px.

Step 3
In this step we will open City. After you open the image, use Rectangular Marquee Tool(M). With the Rectangular Marquee tool, drag over the area you want to select. Hold down Shift as you drag to constrain the marquee to(release the mouse button before you release Shift to keep the selection shape constrained).

After the selection area has been created, simply copy (Ctrl / Cmd + C) and Paste (Ctrl / Cmd + V) it to our work canvas. Then position the image with the transform tool (Ctrl / Cmd + T). Hold Alt + Shift and resterize like image below. In Photoshop CC only hold Alt to resterize al sides together.
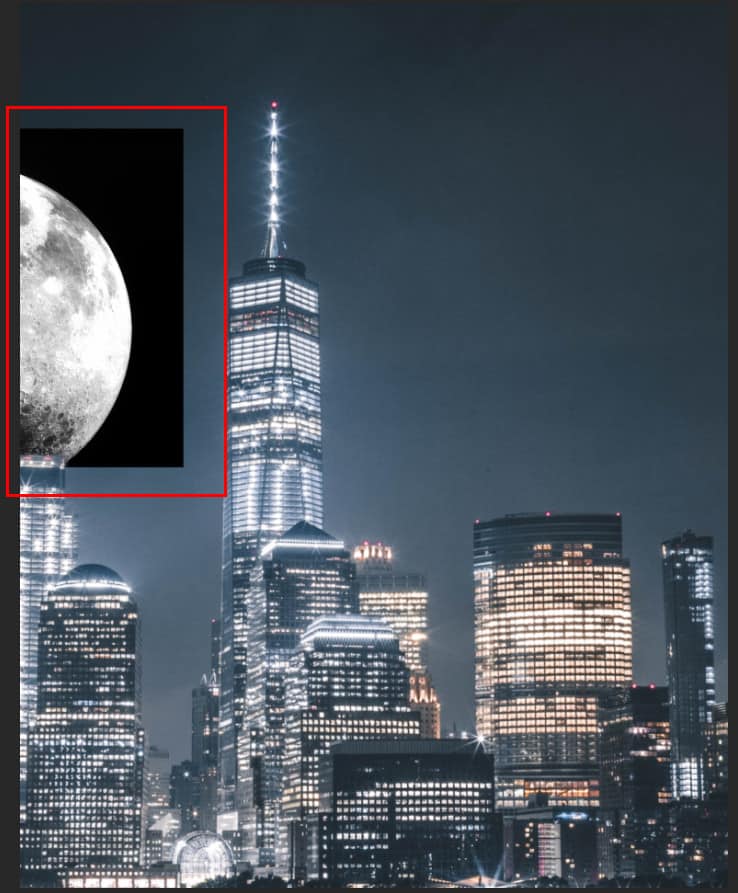
Blend mode change from Normal to Screen.


Step 4
Add Adjustment Layer “Levels”

Step 5
Add Adjustment Layer “Curves”

Step 6
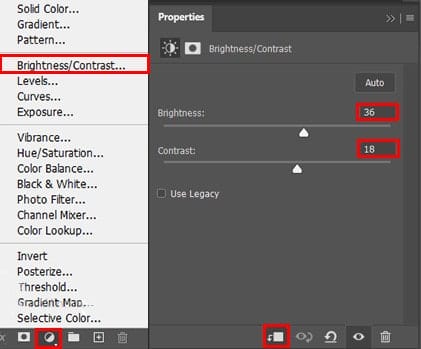
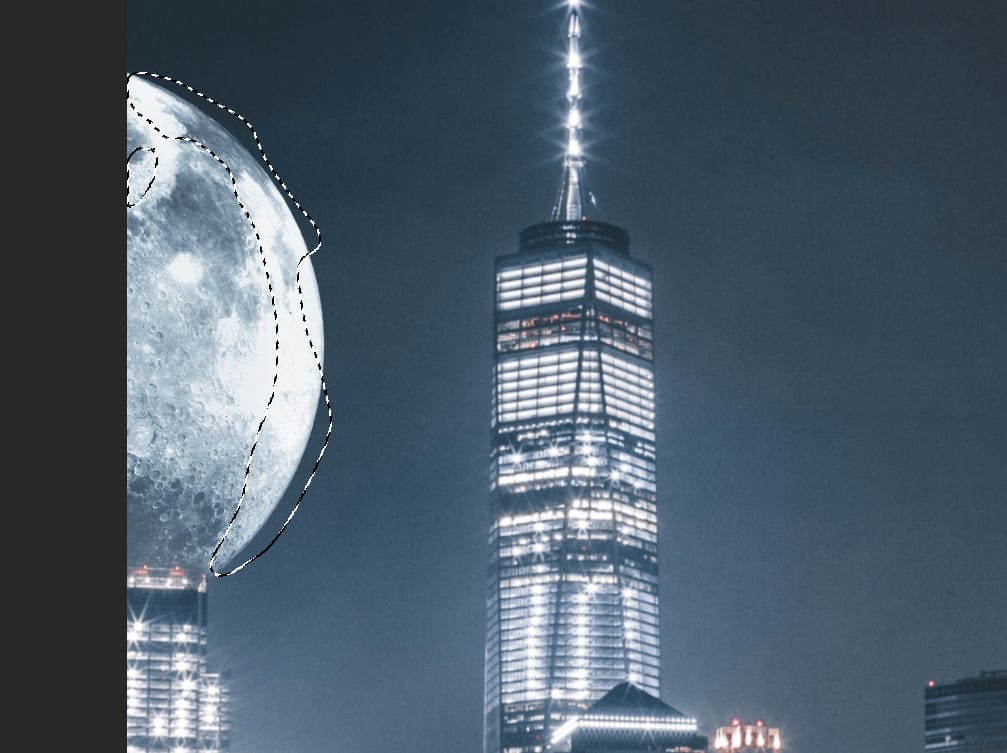
Add Adjustment Layer “Brightness/Contrast” and set Opacity to 50%. Press Ctrl/Cmd + I to invert and use Brush Tool(B) Soft Round with foreground color white and paint the highlights parts on Moon.
Step 7
Next, create a new layer and use Brush Tool(B) Soft Round with foreground color white with Brush opacity 50%. Now start painting the Moon and change Blend mode Soft Light with Opacity 50%.


Step 8
Now, go to File > Open and select Branches. Hold Ctrl/Cmd and click to layer icon to make a selection. After the selection area has been created, simply copy (Ctrl / Cmd + C) and Paste (Ctrl / Cmd + V) it below the Man and Woman. Then position the image with the transform tool (Ctrl / Cmd + T). Hold Alt + Shift and resterize like image below. In Photoshop CC only hold Alt to resterize al sides together.
3 responses to “Create a Movie Poster in Photoshop”
-
do you need me
-
Nice
-
bro

Leave a Reply