Make skin look perfect in one-click with these AI-powered Photoshop actions.
Simulate the effects of Fujifilm Velvia film. The Fujifilm Velvia film is a professional photography reversal film popular for its brighter colors and higher contrast. Like Velvia film, this Photoshop effect is great for landscape photos but may oversaturate skin tones.
Boosting Colors using the Channel Mixer
The first and most dramatic process is to boost the intensity of the colors.
Step 1
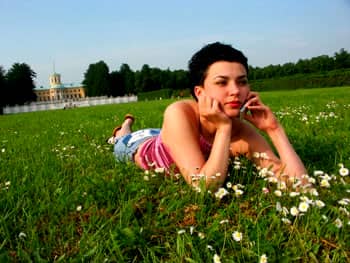
Open a photo you would like to edit. Or, you may use the photo used in this tutorial (from iStockPhoto). Make sure that the image is in RGB color mode. To switch to RGB color mode, click on RGB Color under the Image> Mode menu.
Step 2
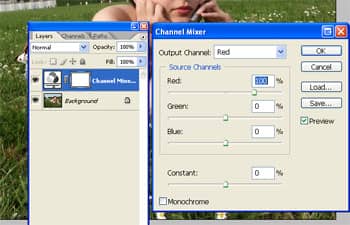
To boost the colors, we'll be using the Channel Mixer tool. Add a Channel Mixer adjustment layer (Layer> New Adjustment Layer> Channel Mixer).
Step 3
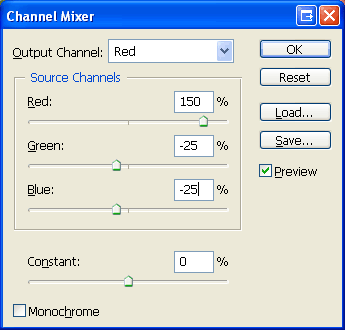
In the Channel Mixer tool, select Red in the drop down menu and increase the red to 150%. To balance the colors in the channel we just edited, we need to reduce the green and blue channels by 25%:
- Output Channel: Red
- Red: 150%
- Green: -25%
- Blue: -25%
Step 4
Repeat the above step for the green and blue channels
- Output Channel: Green
- Red: -25%
- Green: 150
- % Blue: -25%
- Output Channel: Blue
- Red: -25%
- Green: -25%
- Blue: 150%
Step 5
Click OK and the colors of your image should be brighter and move vivid. 
Increasing Contrast
This simple process will help immitate the contrast of velvia film.
Step 6
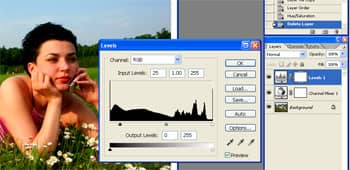
Add a Levels adjustment layer (Layer> New Adjustment Layer> Levels).
Step 7
In the Levels tool, drag the black input slider right until your desired contrast level has been achieved.
Final Results
Rollover the image to see the before and after effect.
Questions & Answers
- Does this really imitate Fujifilm Velvia film 100% perfectly?
- Why can't I just increase the saturation using the Hue/Saturation tool?
- I want to increase the saturation more. How can I do this?
- If I just want to increase saturation, which tool will produce the best results? The Channel Mixer or Hue/Saturation tool?
Does this really imitate Fujifilm Velvia film 100% accurately?
We are unsure if this Photoshop effect emulates Fujifilm Velvia film 100% accurately, but the results seem close. Because we do not have access to Velvia film and film photography equipment, we used before and after examples from a commercial software that simulates Fujifilm Velvia film as a reference. The results from this Photoshop effect was a nearly perfect match as the ones produced by the commercial software.
Why can't I just increase the saturation using the Hue/Saturation tool?
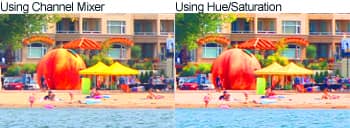
Although increasing saturation with the Hue/Saturation tool is faster and easier, the results are not the same. When comparing the following two images, you'll notice that the Hue/Saturation method cannot achieve the same level of saturation as the Channel Mixer method; especially where the yellows are. The Hue/Saturation tool may preserve more detail but the Channel Mixer method better resembles Velvia film. 