Download Lightroom presets and LUTs, absolutely free. Use the presets to add creativity and style to your photos.
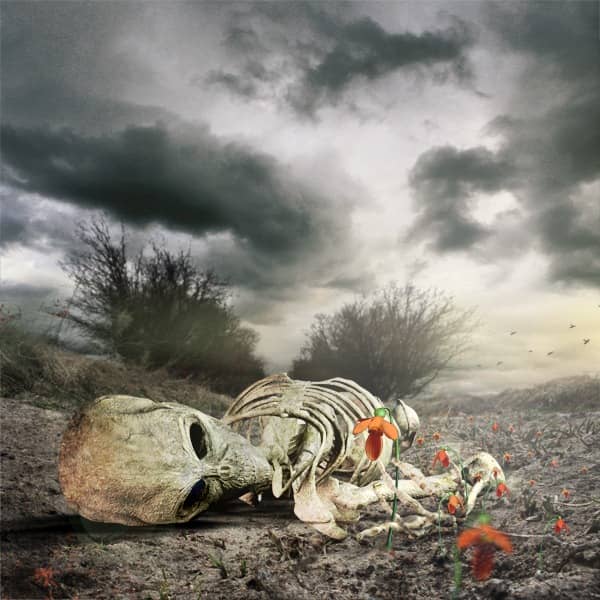
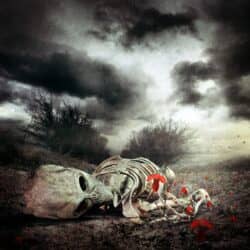
Bellow you can see how the manipulation looks so far.
Step 14 - Global Changing Of Colors
All the main elements of the pictures are placed. In this and next steps we will change color tones, brightness and contrast to give it the desire mood.
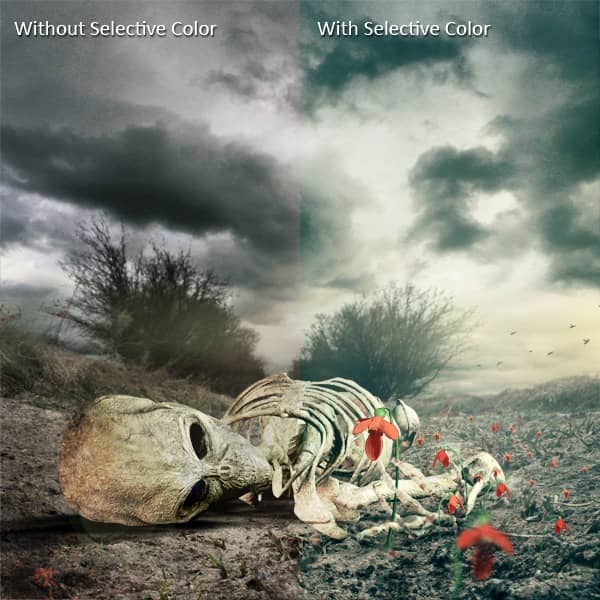
We’ll start with global color adjustment. To do that we use Selective Color. It’s a great tool which allows you to change separately each color tone which gives you much more freedom than using e.g. Color Balance. If you’re not familiar with this adjustment tool I would recommend you to look at this video which explains the basic features of it and on practical examples shows how Selective Color works.
Add new adjustment layer Selective Color on the top of your layers and set the Colors as you can see on the picture.

On the picture bellow it’s shown how the picture looks with and without the Selective Color adjustment.
Step 15 - Redder Flowers
To add more contrast and make the flowers more pronounced they should be redder. Add new adjustment layer Selective Color on the top of your layers again. This time we will change only Reds, other colors stay the same as before.
Set the Selective Color as it is shown and press OK.
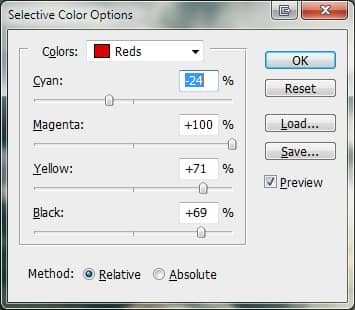
As you can see the adjustment affects also the skull which doesn’t look nice. To fix it add layer mask to this layer and paint with black over the skull. The unwanted red tones disappear.
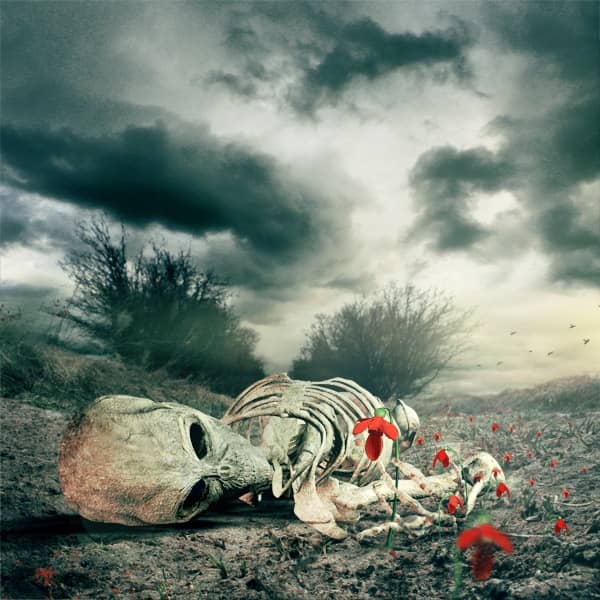
Bellow you can see how the manipulation looks after these steps.
Step 16 - More Global Adjustments
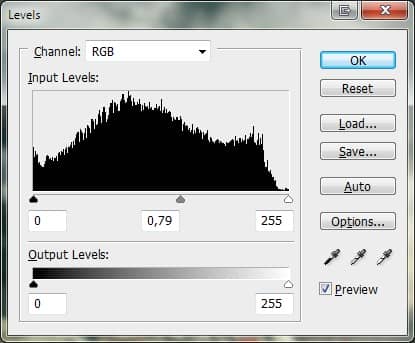
According to me the current picture is too bright. To fix it add new adjustment layer Levels on the top of your layers and set the Input Levels on 0; 0,79; 255. Press OK.
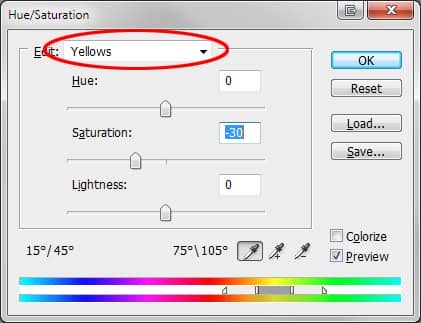
Previous darkening makes the yellow tones too saturated which ruins the cold atmosphere we’ve try to create in previous steps. To fix that add new adjustment layer Hue/Saturation on the top of your layers. In Edit option choose Yellows and set Saturation on -30. Press OK.
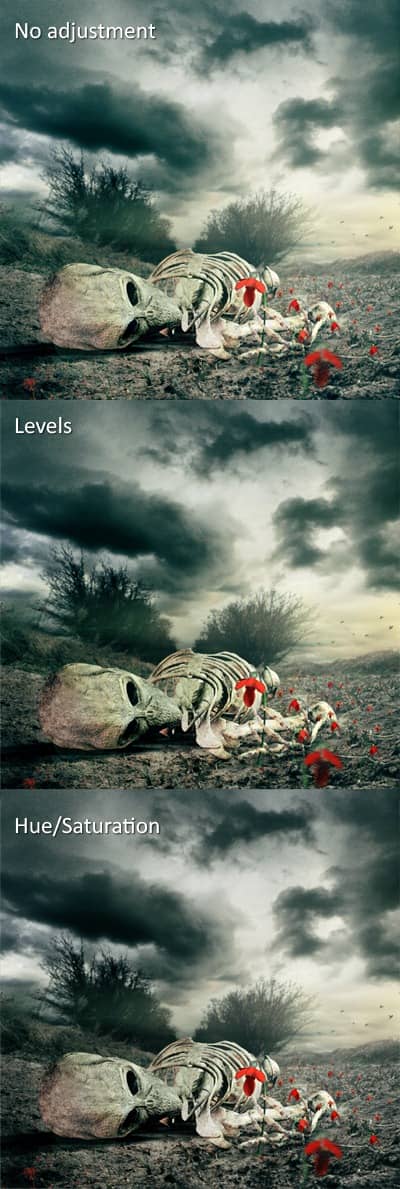
Bellow you can see how these adjustments affect the picture.
Step 17 - Applying Texture
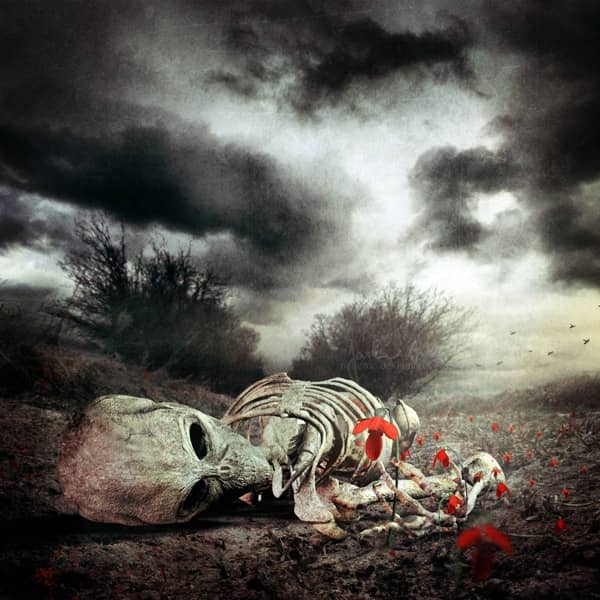
Adding textures to your work is great way how to unify the look of the picture, add more details and also add bit of painted look.
Download some nice grunge texture. I used one from the grunge pack which was already used in previous steps but feel free to use any texture you like. Good thing about the grunge textures which were used in this tutorial is that they are bit darker on the edges and lighter in the middle. It adds more plasticity to your picture and also create decent vignette.

9 comments on “Create a Deathly Photo Manipulation”
The image on the top has an error it's half white.
Thank you for letting us know! It's fixed now.
A quite good tutorial. Thanks for sharing.
this tut is horrible liek get no scoped bud!
Would love to try this but can't find the photos
I enjoyed this tutorial greatly. Thank you.
très bon tuto,bien expliqué,dont j'ai fait une libre interprétation ,merci encore
Great tutorial thank you!
thanks for this tut it us really great .