Make your artwork look like they're from an alternate universe. These Cyberpunk presets work with Photoshop (via the Camera Raw filter) and Lightroom. Download all 788 presets for 90% off.
Drag the texture you’ve chosen into the manipulation. Name it TEXTURE and place it on the top of the layers. Now experiment with Blending Modes and Opacity till you get the look you like. I set the Blending Mode on Soft Light and lower the Opacity on 45%.
Step 18 - Changing the Light Scene
There is still something wrong with the global lights and shadows. There is the light source on the right side of the horizon but if you look carefully the ground around the horizon is not lighter, but it should be. We will fix it now.
Add new layer on the top of your layers and name it e. g. HORIZONT LIGHT. Grab Brush Tool (B), select some soft round brush and pick some bright color from the sky. Lower the opacity on about 30% and paint carefully over the ground which is close to the light source.
Then pick some dark color of sky and paint over the areas which are farther from the light source.
Bellow you can see what exactly I painted. To make it well visible I add grey layer under.
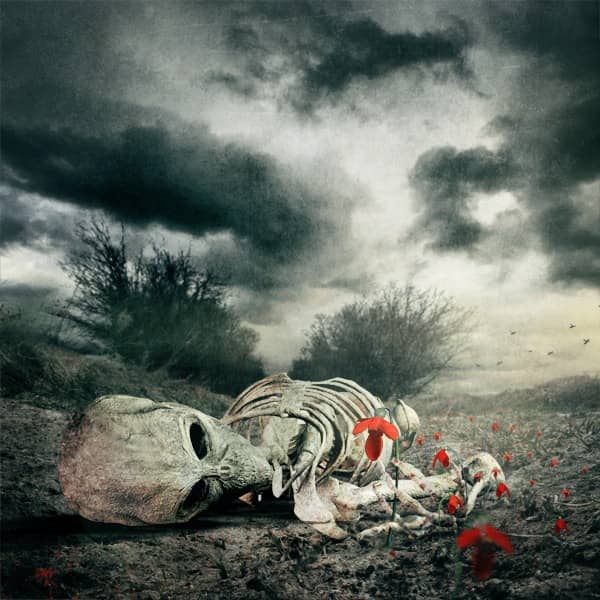
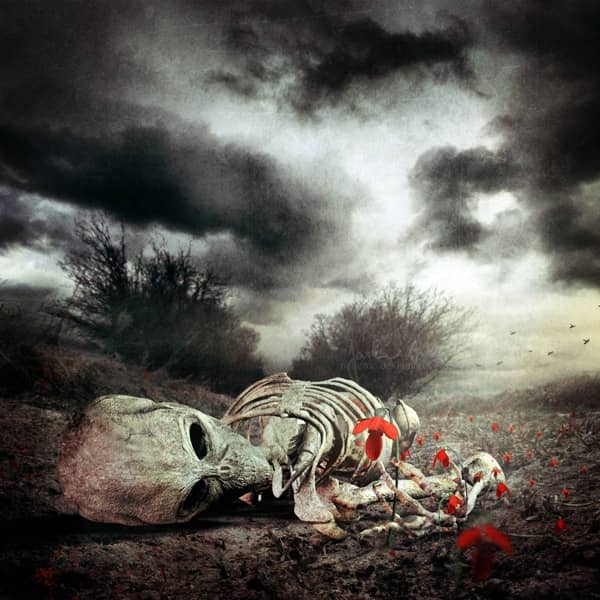
And there you can see how the whole manipulation looks.
Step 19 - Last Changing of Colors
There is only few things left. We will change the colors little bit, add vignette and correct the levels.
First let´s change the colors. Add new adjustment layer Gradient Map on the top of your layers. Choose the basic Red, Green preset and press OK.
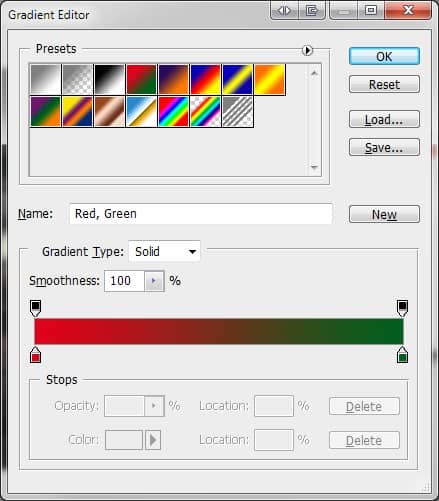
Change the Blending Mode of this layer on Soft Light and lower the Opacity on 30%.
Step 20 - Adding Vignette
Vignette is a great tool if you want to catch viewer’s attention longer in the picture. It directs his look into the center of the picture.
Add new adjustment layer Levels on the top and set the Input Levels on 0; 0,77; 255. Press OK.
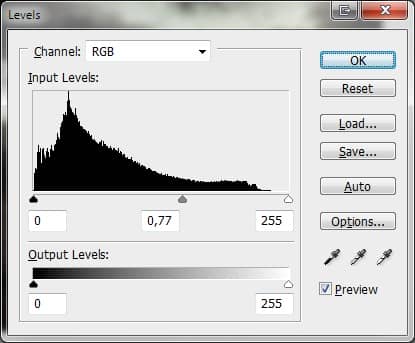
Grab the Gradient Tool (G), pick solid black color and fill the layer mask of this layer. It causes that the adjustment disappear. Now grab the Brush Tool (B), select soft round brush and pick white color. Paint over the edges of the picture. The adjustment appears and make nice vignette.
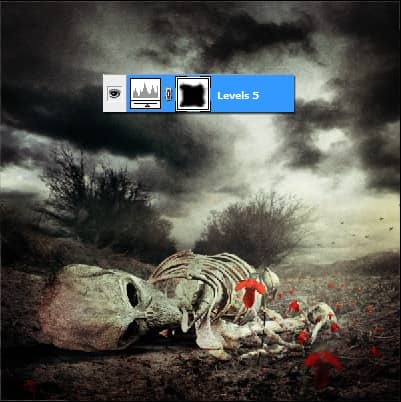
Step 21 - Correcting the Levels
The one last thing you need to do is to correct levels little bit. Grab the Marquee Tool (M) and select the whole picture. Press Ctrl + Shift + C to copy the picture merged. Now press Ctrl + V to paste it. Place this layer on the top of the layers. Now go to Image > Adjustments > Auto Levels or just press Ctrl + Shift + L. It adds bit more contrast to the picture.


9 comments on “Create a Deathly Photo Manipulation”
The image on the top has an error it's half white.
Thank you for letting us know! It's fixed now.
A quite good tutorial. Thanks for sharing.
this tut is horrible liek get no scoped bud!
Would love to try this but can't find the photos
I enjoyed this tutorial greatly. Thank you.
très bon tuto,bien expliqué,dont j'ai fait une libre interprétation ,merci encore
Great tutorial thank you!
thanks for this tut it us really great .