Learn how to create this creative mixed-media composition in Photoshop! You will learn how to combine different graphic elements with extensive use of layer masks. This is a great tutorial for designers who want to experiment with a more modern approach to digital collages.
Preview of Final Results

Create a Mixed Media Style Design In Photoshop
Resources
- Water Splash SXC
- Male Head – SXC
- Paint Splatter – SXC
- Tulip Petals – SXC
- Star Brushes – Qbrushes
- Grunge Brushes – Qbrushes
- Patterned Spheres – Media Militia
- Hot air Balloons – Media Militia
- Stag – Mediamilitia
- Paint texture – Mediamilitia
- Model – Deviantart
- Flames – Deviantart
Step 1
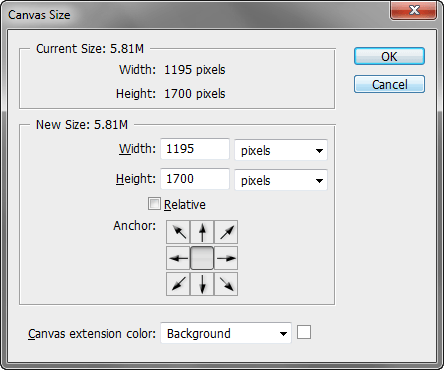
Let’s create a blank document similar to these dimensions.
Step 2
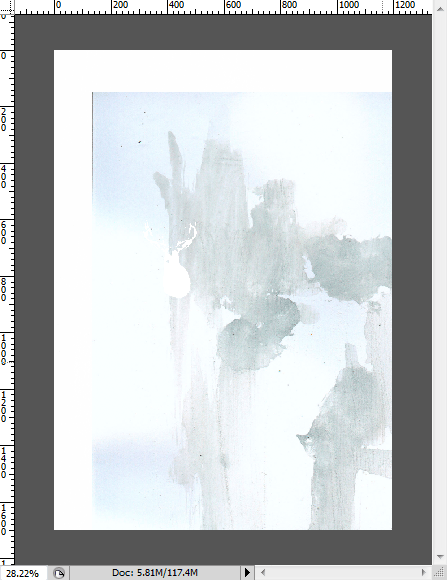
A subtly textured background works well than a plain one. Locate the paint texture and bring it into Photoshop. Drag and drop it into the composition.
Step 3
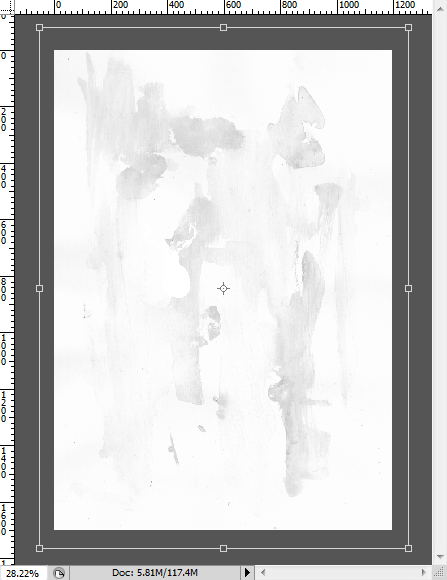
Desaturate the texture (Ctrl+Shift+U). You may need to resize the texture to fit the document.
Step 4
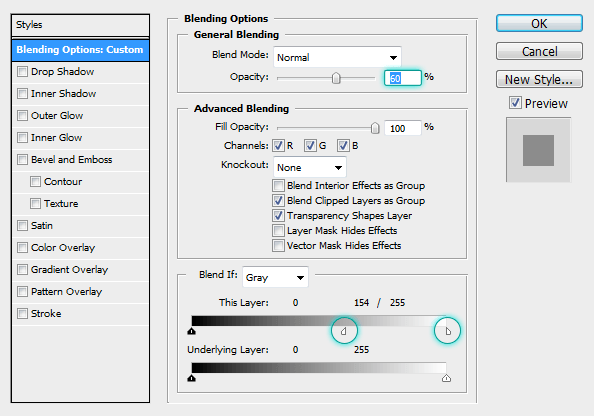
Adjust the layer Opacity and blending to make it subtle. Double click on the layer thumbnail to load Blending Options dialog box.
Step 5
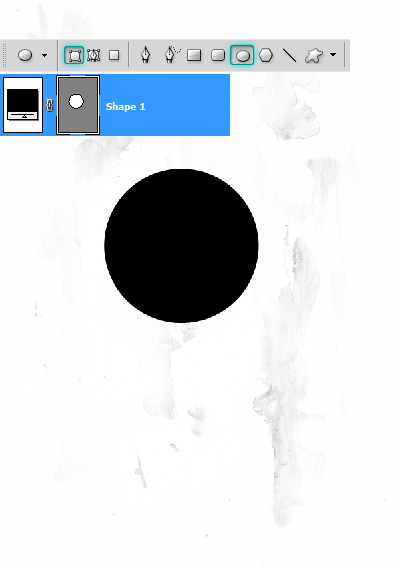
We now need to create several shapes that will define the overall design and contain other graphic elements. Set the color to #000000. Let’s Start off from the middle by drawing a circle with the Ellipse Tool. Choose the Shape layers option on the Options panel. Working with shape layers is very productive and time saving. They are resolution independent and can transform them without losing any quality.
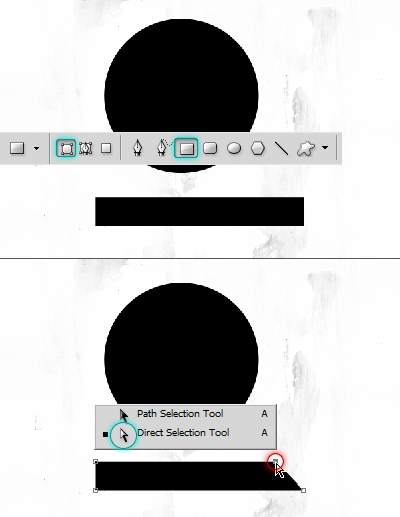
Draw this shape using the Rectangle Tool. Edit the corner with the Direct Selection Tool.
Step 6
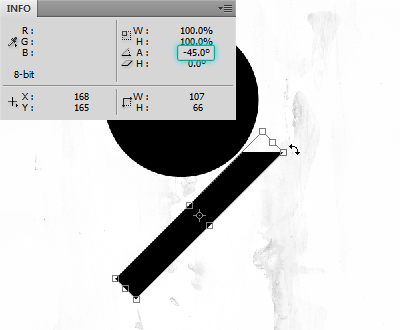
Press Ctrl+T, rotate the shape by -45 degrees. Use the Info palette see to see the properties.
Step 7
Reposition the shape. Duplicate the layer a couple of times. Stack the layers in this manner.
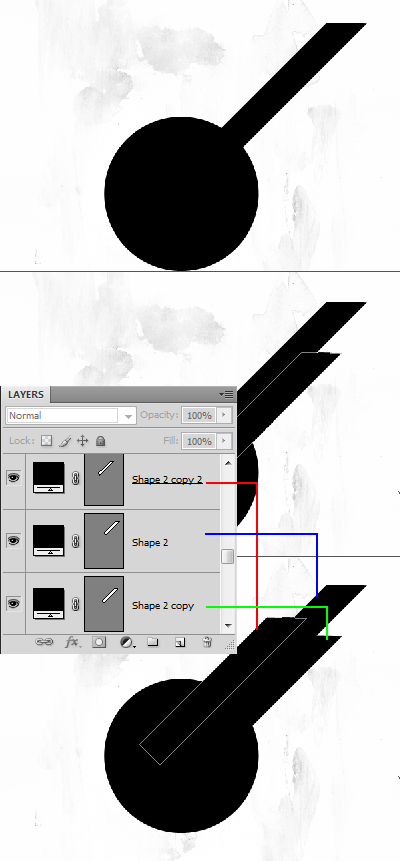
Now construct the bottom side.
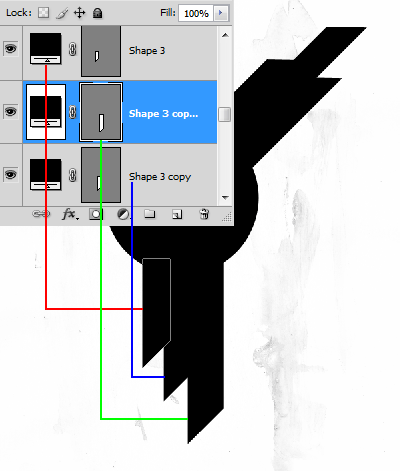
Step 8
Create another circle outside the main circle. Duplicate the circle ( Ctrl+J ). Scale it approximately by 145%. Hold Alt+Shift while scaling to maintain the center point.
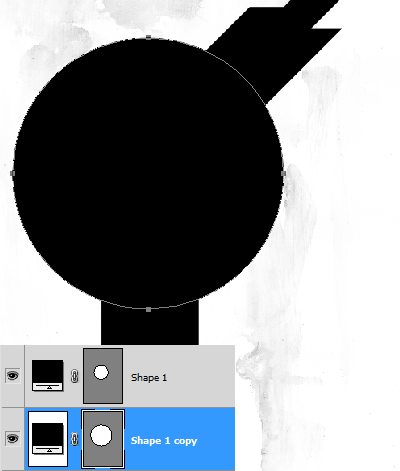
Step 10
We need to punch a hole in the circle. Click on the Vector Mask thumbnail. Copy the path by pressing Ctrl+C and hit Ctrl+V to paste. Press Ctrl+T and scale it down to 80%.
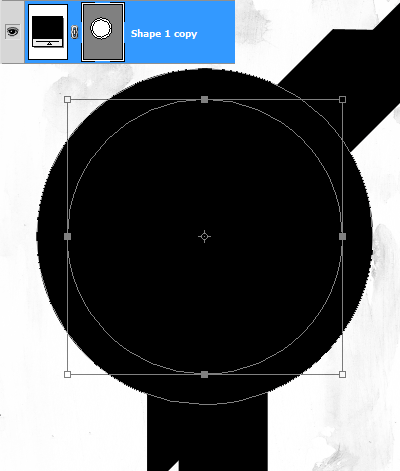
Select the inner circle, on the Options Panel click on “Exclude overlapping shape areas” button to punch hole in the circle.
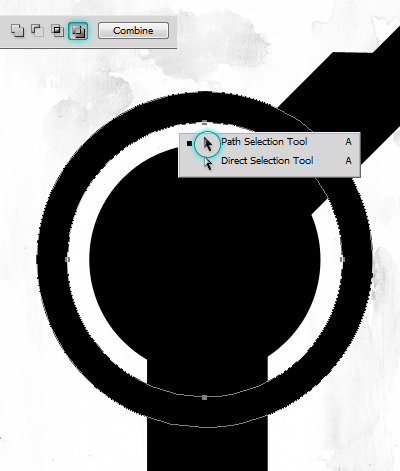
Step 11
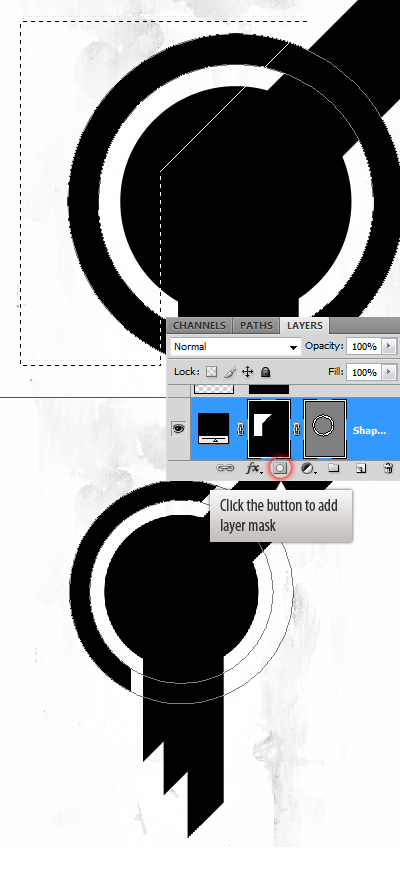
We don’t need the whole circle but a portion of it. Hide the rest with a layer mask.
Step 12
Create another circle bigger than the outer one. Just as before, duplicate the middle circle, place it below the rest.
24 responses to “Create a Mixed Media Style Design In Photoshop”
-
There’s certainly a lot to learn about this issue. I really like all the points you have made.
-
I have problem in step 11, can someone help me please?
-
can someone help me plz
-
Great, thanks for all the helpful info!
-
Hey, really nice tuto!!!!
But too hard for me, could you let me the .psd by mail? :$
Thanks you very much
-
I should qualify that. Creating a shape in CC creates a vector mask on the Paths tab, just not on the Layers tab as you tutorial shows. I thought that was kind of curious.
-
Thanks so much for this. Crystal clear. Loved it. Photoshop CC is behaving differently for me though. When I create a Shape, a vector mask isn’t automatically created with it. Hmmm…??? I did the whole thing with layer masks though with no problem. Thanks again :))
-
i love your work is amazing. your good.
-
Very got
-
I’m stuck on step 31 and 32, i can’t figure it out
-
confusing
-
thanks body i have lerned so mush things
-
The pathing is not mentioned nor being directed and probably its scrambled. I know this is not easy to process, but atleast consider the “detail by detail” rule in terms of making tutorials. But atleast you made it shorter so thank you!
-
I love this tutorial but I always have trouble with step 24. I have done it a few times, but it always takes me a good chunk of time to do it. When I do the alt+delete it either turns it white or the color of the shape.
Anyway you can go into a little more detail on that step?
-
It simple add me on bbm 2861821c and i will tell u the majic about this
-
-
Yes, I agree with the above comment. Smaller steps get skipped like “how to make a pattern” and the layer mask steps are very confusing.
-
This tutorial is awful, I’m going crazy trying to figure it out.
-
Actually, this tutorial is wonderful if you’ve got some graphic design background. If you have trouble understanding it, just google it. That’s what I did. I never used masks before and with a few google searches this project came out great. Love it!
-
me to I get lost to
-
-
waw… this tutorial very good.
-
Very Cool Dude, You Done Awesome Work.. :) :)
-
video tutorial pls
-
thanks for the tutorial, keep sharing
-
Step 9 is missing, I am confused about step 8 as I don’t know what I’m supposed to be creating outside the main circle :(


Leave a Reply