
Cut hole in the circle.
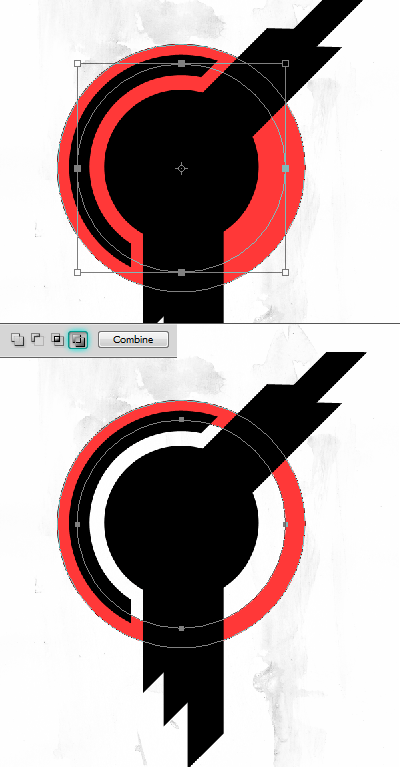
Step 13
I want to use this part of the circle, hide rest of it.
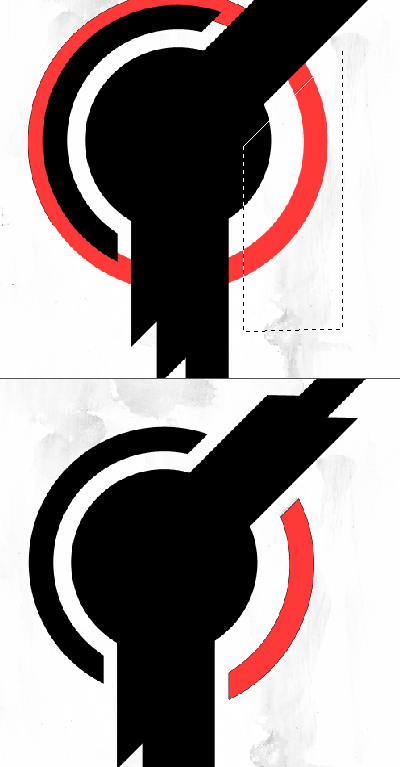
Step 14
Create a new layer above the cut circle. Use the Pencil Tool with 1px diameter to create the pattern. Select it with the Marquee Tool. Choose Edit > Define Pattern.
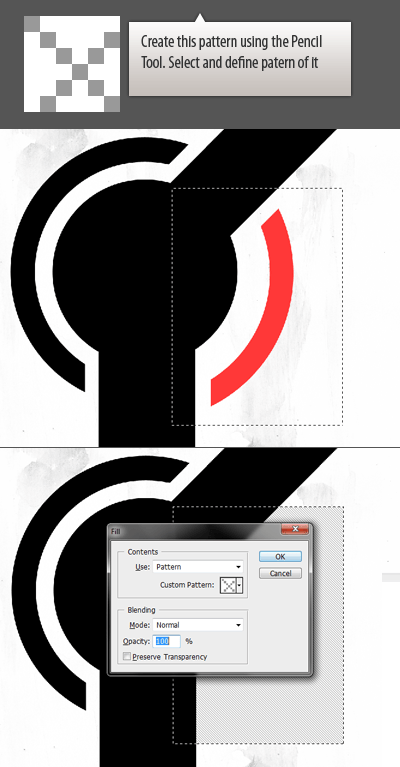
Step 15
Clip the pattern layer to the circle layer. The shortcut is Ctrl+Alt+G.
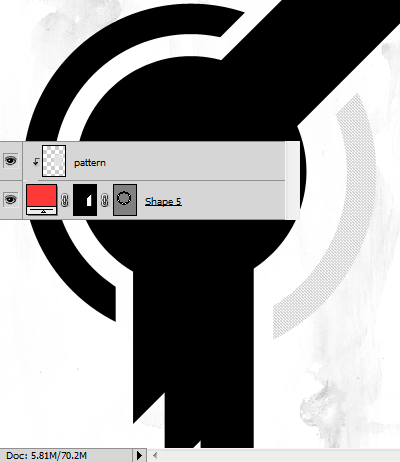
Step 16
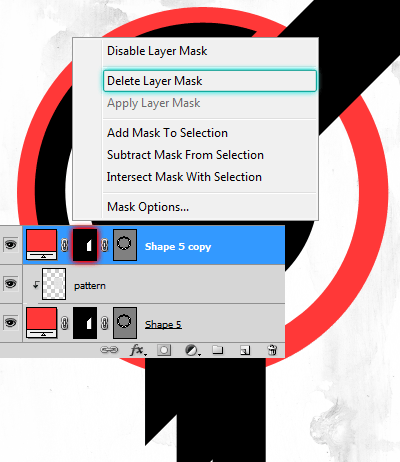
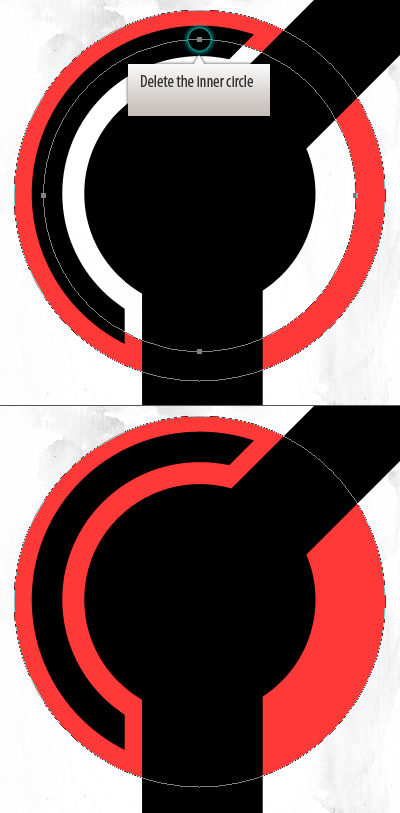
Duplicate the circle and delete the Layer Mask. Delete the inner circle.
Step 17
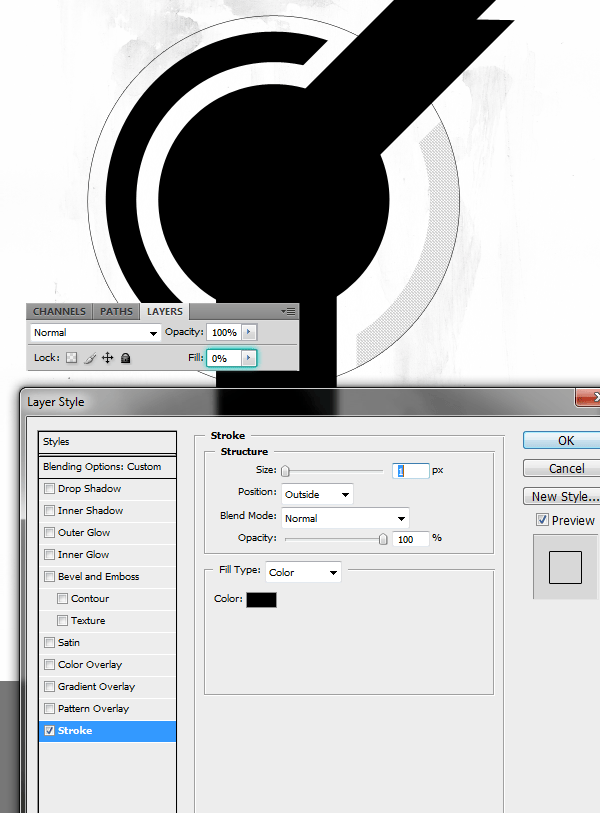
Reduce the fill opacity to zero. Then Apply stroke.
Step 19
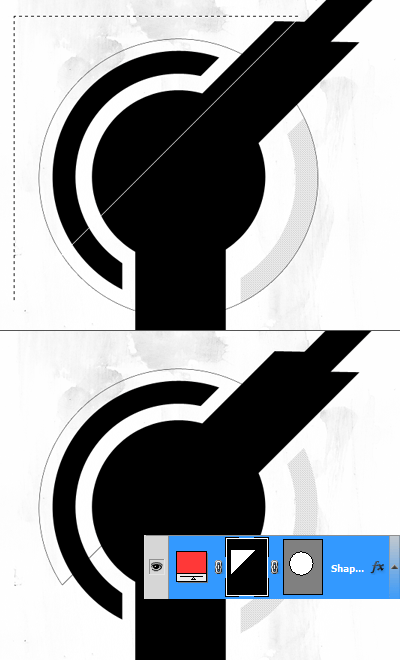
Hide part of the circle with a layer mask.
Step 20
Open up the model stock image in Photoshop. Isolate the subject from the background. Use the Pen Tool to select the subject, pay some attention while selecting the hair.

Step 21
Copy and paste the model into the main document. Convert the layer to Smart Object ( Layer > Smart Objects > Convert to Smart Object ). Resize the model.
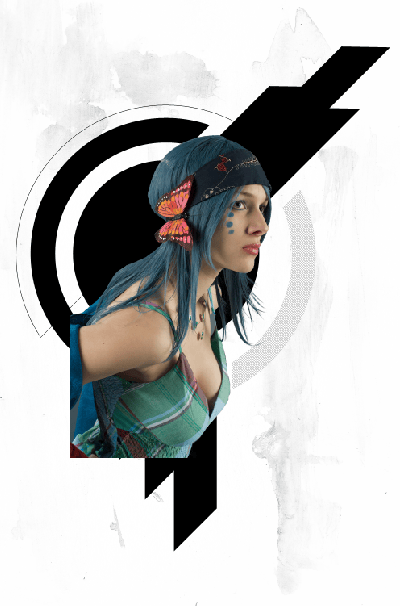
Step 22
Apply Unsharp Mask ( Filter > Blur > Smart Blur ).
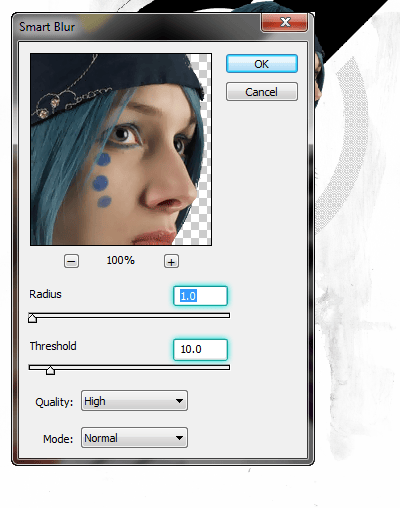
Step 23
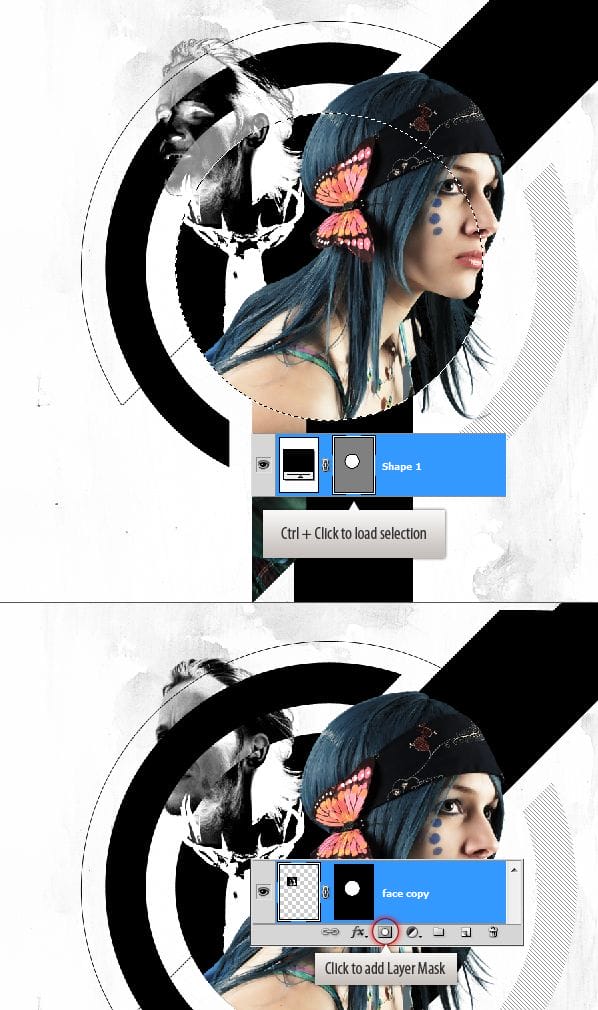
Ctrl+click on the circle vector mask to load selection. Click on the Add layer mask button to add mask.

Step 24
Reveal some more portion of the model.
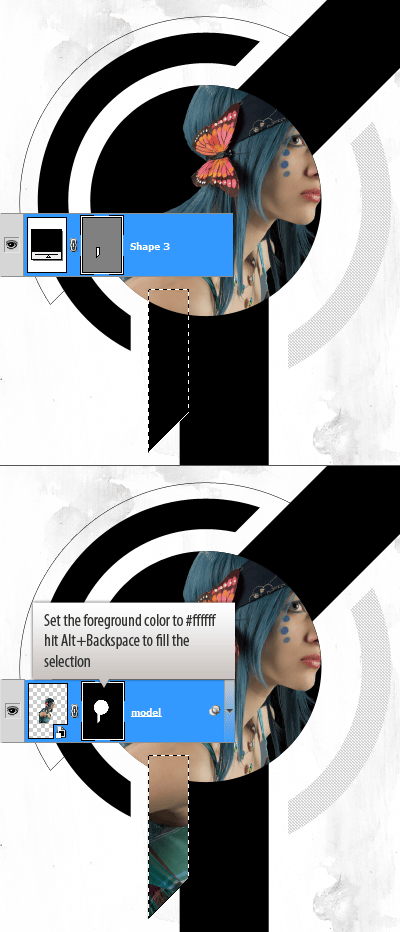
Step 25
Reveal rest of the image.
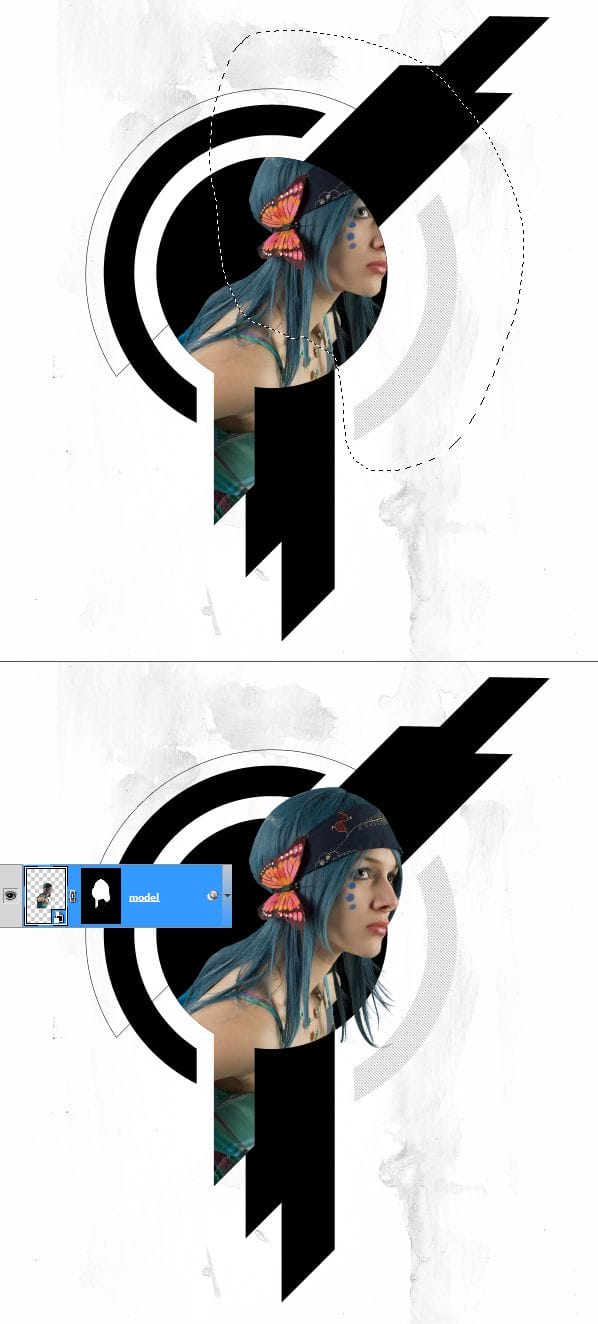
Step 26
Color correct the image using Curves and Vibrance adjustment layers.

Step 27
Load the stag ( img035 ) into Photoshop. You need to change the image mode to RGB from Index. Choose Image > Mode > RGB. Then drag it into the design. Invert the image ( Ctrl+I )
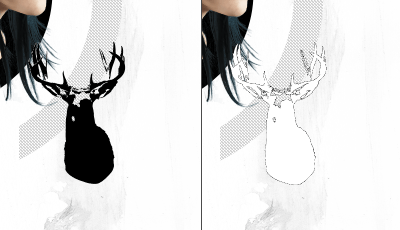
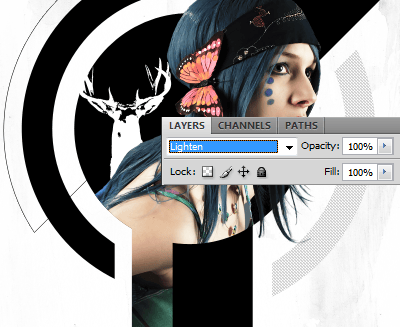
Place it behind the model. Change blend mode to Lighten.
Step 28
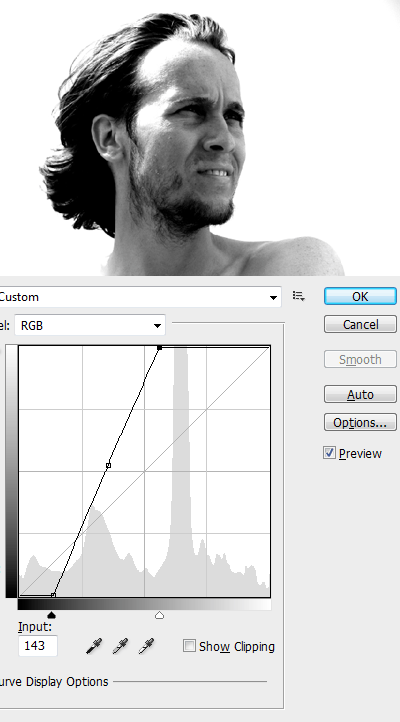
Open up the male head stock. Desaturate the image. Adjust brightness and contrast using the Curves command.
Step 29
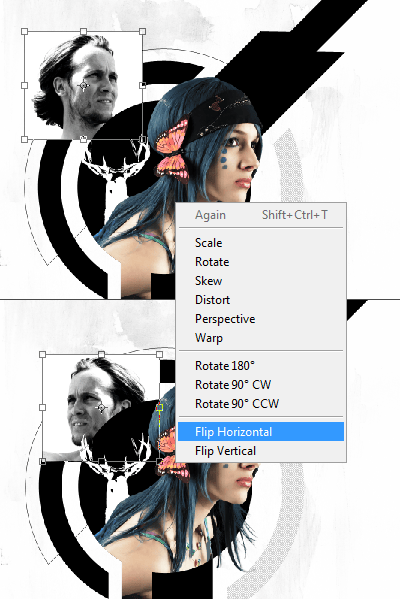
Drop the image into composition. Resize and flip horizontally.
Step 30
Change the blend mode to Multiply.

Step 31
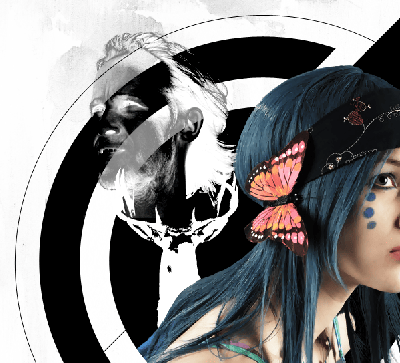
Duplicate the head layer and invert it.
Step 32
Load selection from the circle in the middle and use it to mask out the head negative thus showing the portion inside the circle.
Step 33
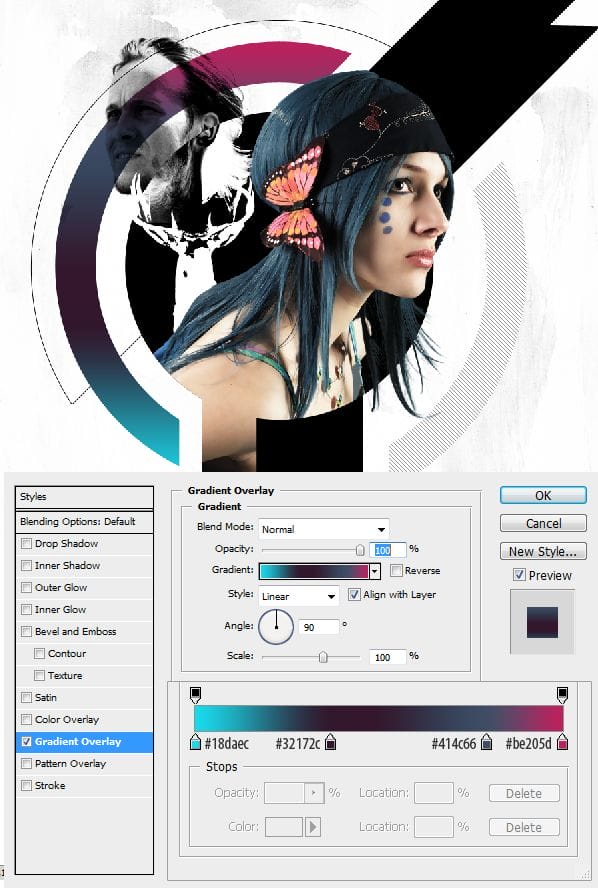
Apply gradient to the outer circle.
Step 34
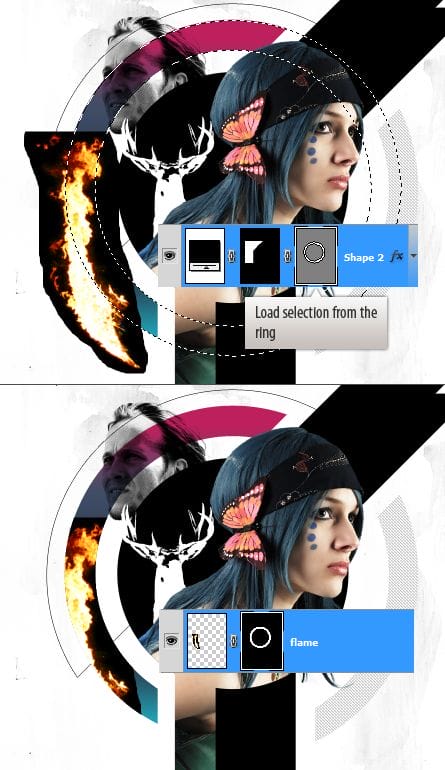
Load the flames stock image. Copy the below one and paste above the outer circle.

Step 35
Incorporate the flames into the ring. Mask out the flames using the selection from the ring.
Step 36
Change blend mode to Screen. Increase flames saturation using Hue/Saturation dialog box ( Ctrl+U ).
24 responses to “Create a Mixed Media Style Design In Photoshop”
-
There’s certainly a lot to learn about this issue. I really like all the points you have made.
-
I have problem in step 11, can someone help me please?
-
can someone help me plz
-
Great, thanks for all the helpful info!
-
Hey, really nice tuto!!!!
But too hard for me, could you let me the .psd by mail? :$
Thanks you very much
-
I should qualify that. Creating a shape in CC creates a vector mask on the Paths tab, just not on the Layers tab as you tutorial shows. I thought that was kind of curious.
-
Thanks so much for this. Crystal clear. Loved it. Photoshop CC is behaving differently for me though. When I create a Shape, a vector mask isn’t automatically created with it. Hmmm…??? I did the whole thing with layer masks though with no problem. Thanks again :))
-
i love your work is amazing. your good.
-
Very got
-
I’m stuck on step 31 and 32, i can’t figure it out
-
confusing
-
thanks body i have lerned so mush things
-
The pathing is not mentioned nor being directed and probably its scrambled. I know this is not easy to process, but atleast consider the “detail by detail” rule in terms of making tutorials. But atleast you made it shorter so thank you!
-
I love this tutorial but I always have trouble with step 24. I have done it a few times, but it always takes me a good chunk of time to do it. When I do the alt+delete it either turns it white or the color of the shape.
Anyway you can go into a little more detail on that step?
-
It simple add me on bbm 2861821c and i will tell u the majic about this
-
-
Yes, I agree with the above comment. Smaller steps get skipped like “how to make a pattern” and the layer mask steps are very confusing.
-
This tutorial is awful, I’m going crazy trying to figure it out.
-
Actually, this tutorial is wonderful if you’ve got some graphic design background. If you have trouble understanding it, just google it. That’s what I did. I never used masks before and with a few google searches this project came out great. Love it!
-
me to I get lost to
-
-
waw… this tutorial very good.
-
Very Cool Dude, You Done Awesome Work.. :) :)
-
video tutorial pls
-
thanks for the tutorial, keep sharing
-
Step 9 is missing, I am confused about step 8 as I don’t know what I’m supposed to be creating outside the main circle :(


Leave a Reply