

Step 9
Create a Curves adjustment layer to darken the sides of the sky. On the layer mask, paint on the middle to reveal the light there .

Step 10
Open the model image and isolate her face from the background using your own method.

Step 11
We’ll remove some unwanted details on the left of her face (from the viewer). On the model layer, use the Polygonal Lasso Tool (L) to select a part from her right cheek and press Ctrl+J to copy this part on a new layer. Flip this part horizontally (Edit > Transform > Flip Horizontal) and move it to the left of her cheek.
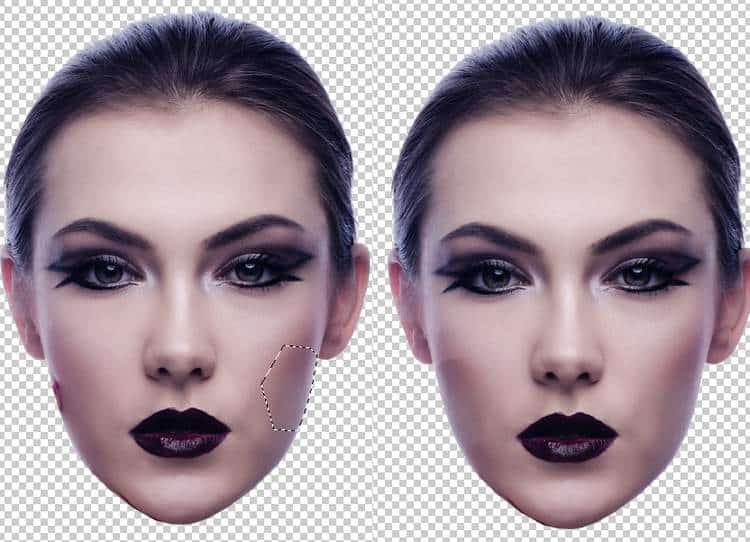
Add a mask to this layer and use a soft black brush to blend this part with the existing skin to hide to trace of the finger.

Step 12
Do the same with the left of the chin(copy a part from the right of the chin, add to the left, blend it using a layer mask). Now her face looks good enough and ready for the next steps. Turn off the background layer and hit Ctrl+Shift+Alt+E to merge all layers into a new layer.

Step 13
Drag the model’s head into the space between two desert ones and resize it down using Ctrl+T. Add a mask to this layer and use the Pen Tool (P) to draw a path on the top of the head. Press Ctrl+Enter to turn this part into a selection.


Set the foreground to white and on the layer mask, click Delete to remove this top.

Step 14
To make shadow for the model’s head, click a new layer below the head’s one. Hold Ctrl and click the head thumbnail layer to load its selection. Fill this selection with black and flip it vertically. Move it under the head and use Ctrl+T to transform the shadow to fit the direct backlight.

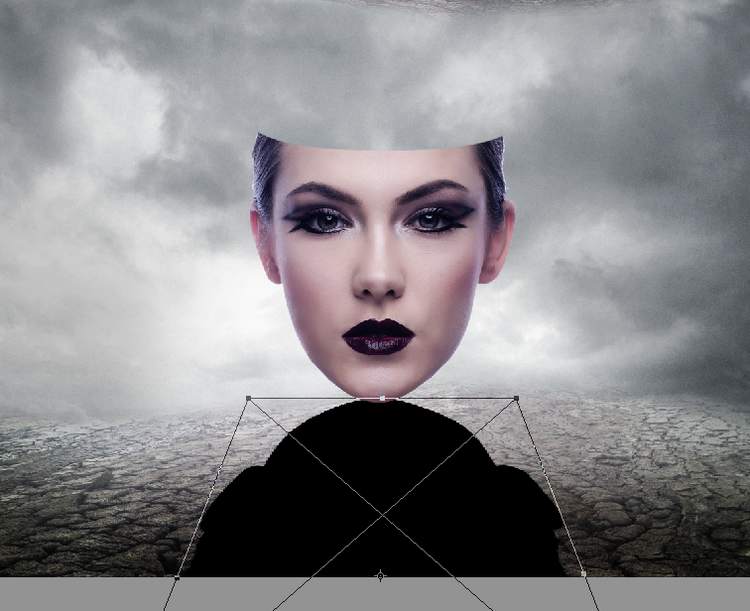
Lower the opacity of this layer to 50% and use a layer mask to reduce the opacity on the shadow part on the foreground.
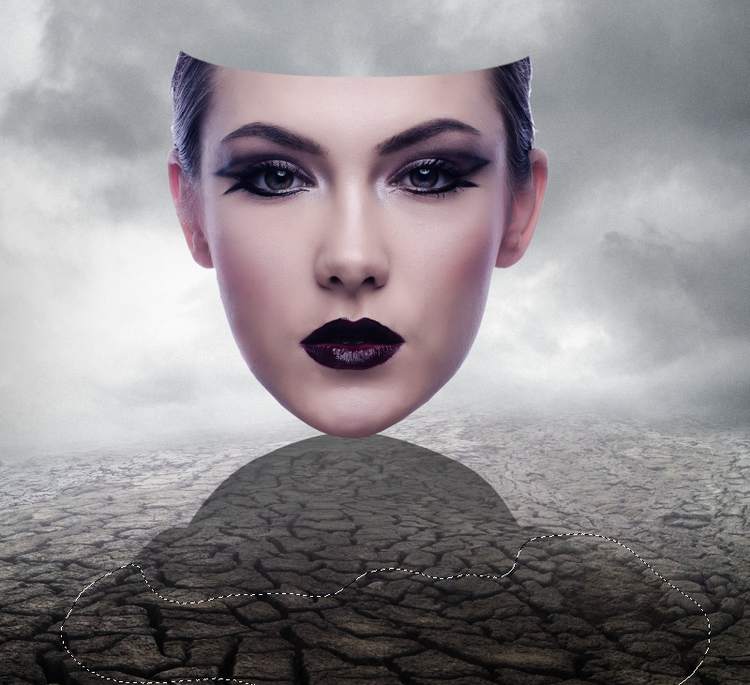
Step 15
On the shadow layer, go to Filter > Blur > Gaussian Blur and apply a Gaussian Blur to 4 px. This step is to soften the shadow a bit.

Step 16
Make a new layer and use a soft black brush, the opacity about 30-40% to strengthen the shadow below the model’s chin, making it more believable.

Step 17
To make a head’s hole, create a new layer below the shadow ones and use the Pen Tool to draw a shape to fill in the head and pick the color #a69d9f.
5 responses to “How to Create a Surreal, Conceptual Head Photo Manipulation with Photoshop”
-

would be happy to see the psd file which is not listed on the tut. thanks
-
This is cool! Thank you!
By the way, I found a broken light bulb on DeviantArt.
https://www.deviantart.com/absurdwordpreferred/art/Broken-Light-Bulb-PNG-160293712-
Thank you! I added it as a free alternative in the tutorial.
-
-
I just want to thank you so much for allowing this tuts to be available. I have been trying to get better at photo manipulation for so long but I just don’t do well with video tuts, my brain just does not learn well that way. I need to be able to read the steps and then implement.
Thank you so much!-
These are how I learned Photoshop. They’re awsome!
Su
-
Leave a Reply