
Step 6
Add Adjustment Layer “Color Balance”

Step 7
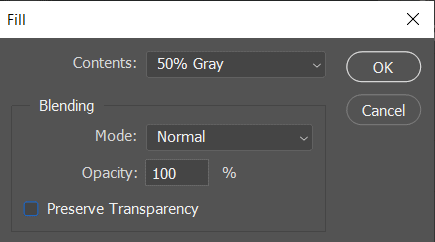
Now, create some lights. Create a new layer then go to Edit > Fill and Contenst: 50% Gray and press Ok.

Now use Brush Tool(B) Soft Round with foreground color white and Brush Opacity set to 10-20%. Then start painting lights. Take a look at the example in the picture below how much you need to paint, where there is the most white color, draw the most. Blend mode change to Overlay.

Step 8
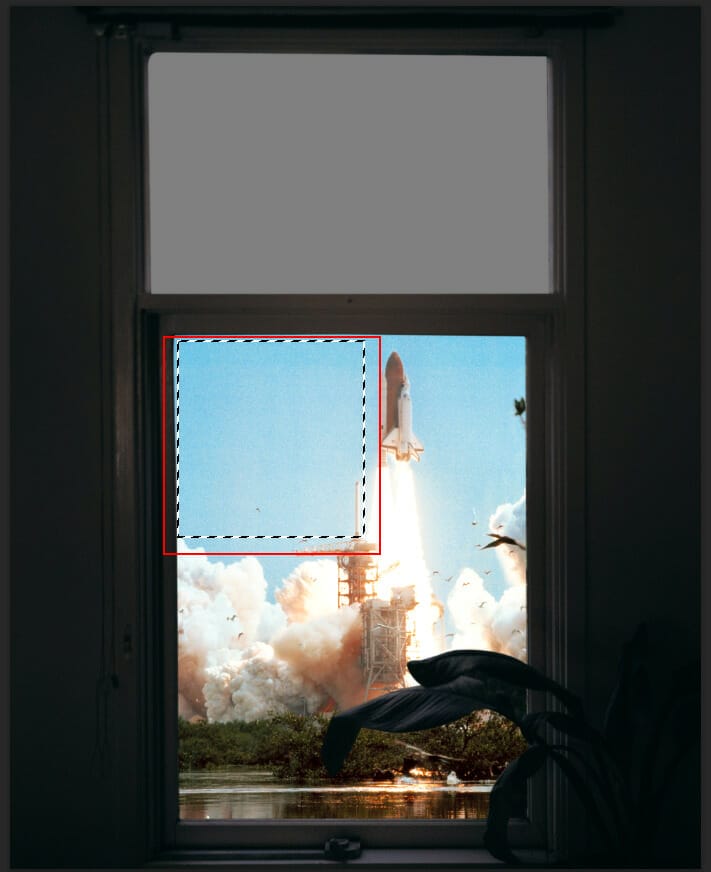
Next select Rocket layer and use Rectangular Marquee Tool then select Sky and press Ctrl/Cmd + J to duplicate it. After that use Transform Tool(Ctrl/Cmd + T) Hold Alt + Shift and rasterize like the image below. In Photoshop CC only hold Alt to rasterize all sides together.


Step 9
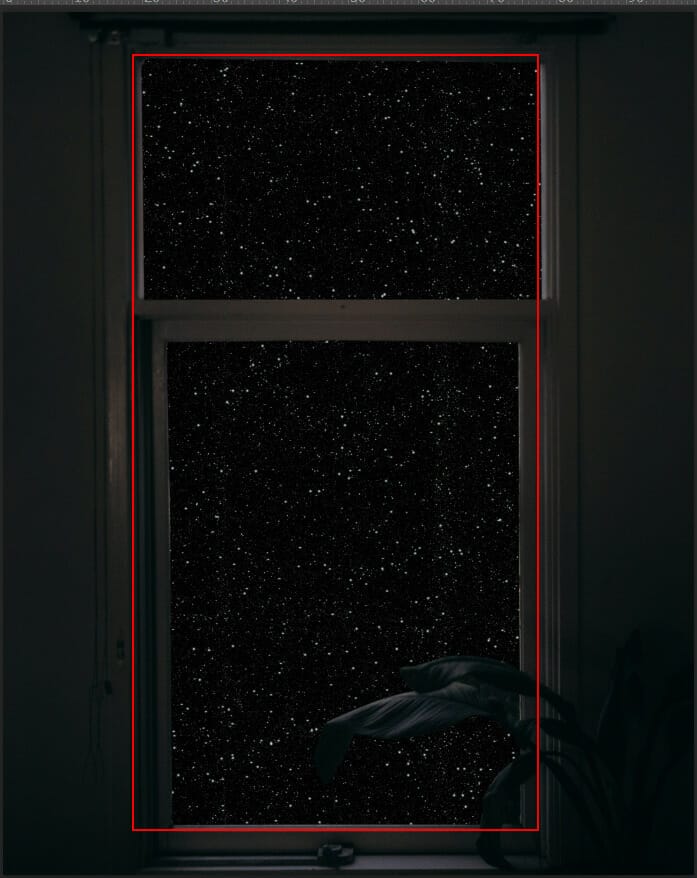
Now, place Stars Go to File > Place and select Stars, Then place it to our work canvas and position the image with the transform tool (Ctrl / Cmd + T). Hold Alt + Shift and rasterize like the image below. In Photoshop CC only hold Alt to rasterize all sides together.

Blend mode change to Screen.
Step 10
In this step repeat the same proccess. Go to File > Place and select Sky. Then place it to our work canvas and position the image with the transform tool (Ctrl / Cmd + T). Hold Alt + Shift and rasterize like the image below. In Photoshop CC only hold Alt to rasterize all sides together. Blend mode change to Overlay and create a layer mask. Use Brush Tool(B) Soft Round with foreground color black and delete the bottom part of sky.


Step 11
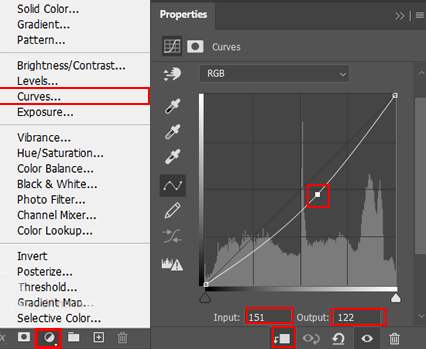
Add Adjustment Layer “Curves”

Step 12
Select Window layer and create another Adjustment Layer “Color Balance”

Step 13
Add Adjustment Layer “Hue/Saturation”

Step 14
Add Adjustment Layer “Curves” and press Ctrl/Cmd + I to invert. Then use Brush Tool(B) Soft Round with foreground color white and paint edges on window.


Step 15
Add Adjustment Layer “Curves” and press Ctrl/Cmd + I to invert. Then use Brush Tool(B) Soft Round with foreground color white and paint edges on window.


Step 16
Add Adjustment Layer “Curves” and press Ctrl/Cmd + I to invert. Then use Brush Tool(B) Soft Round with foreground color white and paint.


Leave a Reply