In this tutorial you will learn how to create a balloon text effect in Adobe Photoshop.You will begin to create the text using a font and then you will convert it to a vector shape. You will learn how to manipulate the anchor points to create a unique text design. Finally you will create a highlight over the text, to accentuate the 3D feeling using a simple procedure and you will create a rope as an ornament for your text. Let’s begin!
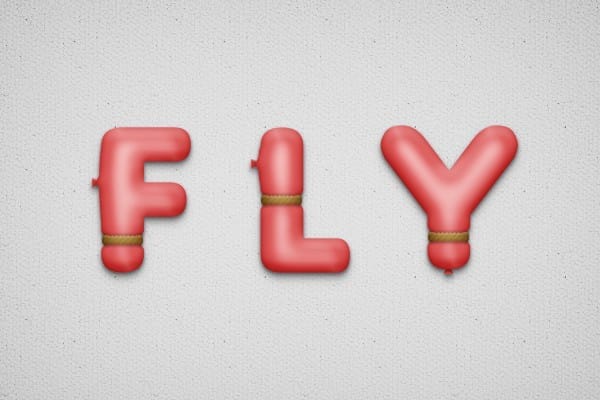
What you’ll be creating
Tutorial Resources
Step 1
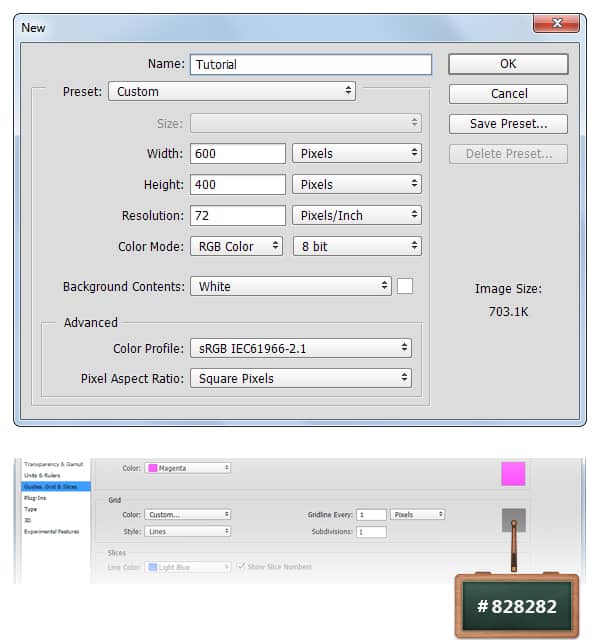
Create a 600x 400px document, go to View > Show > Grid to enable the Grid and then go to View > Snap To > Grid to enable the Snap to Grid. Hit Control + K to open the Preferences window, go to Guides, Grid & Slices and enter the settings mentioned in the next image. Along the tutorial I turned off the grid ( Control + ‘ ) for you to have a better vision. The grid will make it easier for you to create/edit the shapes.
Step 2
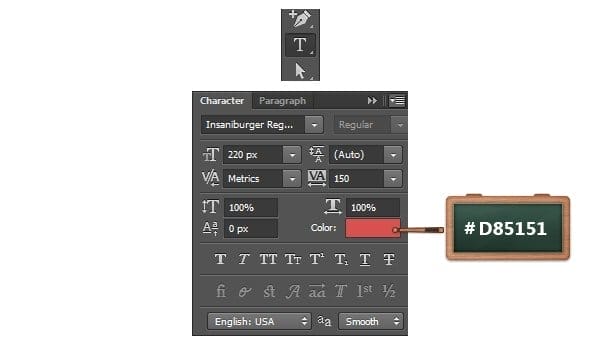
Pick the Horizontal Type Tool and use the Insaniburger font.
Move to your canvas, add the “F” text with the size to 220px and the color to #D85151.

Step 3
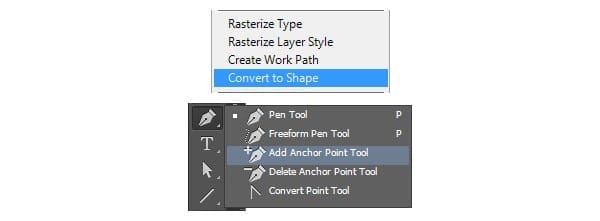
Focus on the Layers panel, right click on your “F” text layer and go to Convert to Shape.
Make sure that your “F” vector shape is selected and pick the Add Anchor Point Tool.
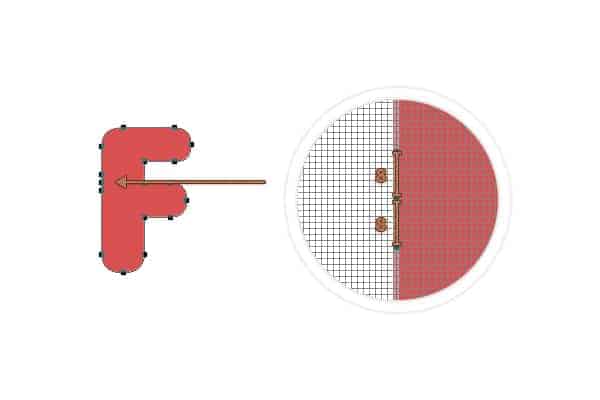
Keep focusing on your “F” shape and add new anchors points as shown in the next images.
Tip: Use the Control and “-” to zoom out or Control and “+” to zoom in. You can return to your default zoom using the Control and 0 shortcut

Step 4
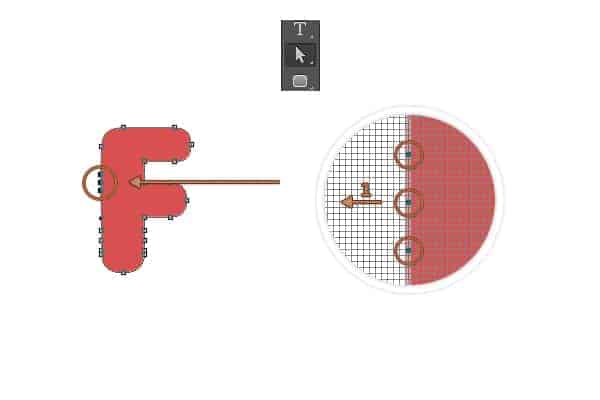
Pick the Direct Selection Tool, focus on the top of your “F” text and select only the first 3 anchors points added in the previous step (highlgihted in the first image).
Hit the left arrow button from your keyboard once to move the anchors points 1px to the left.
Now, select only the middle anchor point and hit again that left button three times to move it 3px to left. In the end things should look like in the second image.
Step 5
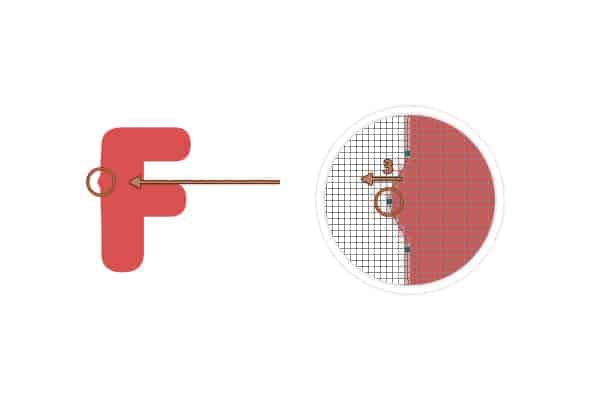
Focus on the bottom side of your “F” shape, select the left anchor point highlighted in the following image and drag it 5px the right and then select the right anchor point highlighted in the same image and drag it 5px to the left. In the end your shape should look like in the second image.
One response to “Create a Balloon Text Effect in Photoshop”
-

nice text effect. :-)
Leave a Reply to Fagun MaashCancel reply