Step 4
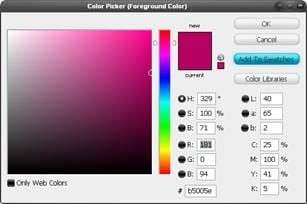
Before you start on the foreground, a good idea is to set up some swatches that you will use regularly throughout this piece. Double click on the foreground color and create a swatch of these three colors; #b5005e, #39d336, #00baff.
Step 5
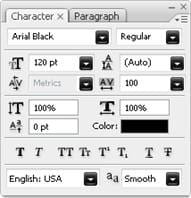
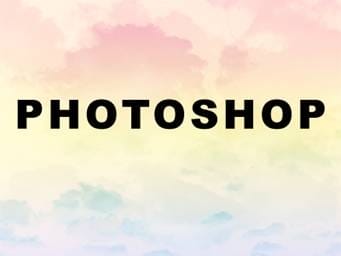
Okay now for the text, start by creating a new layer group named ‘foreground’, it will become clear why we did this later on. Select the text tool (T) and draw a text box that goes from the left of the page to the right. Type your text in then highlight it all and go window>character to bring up the character settings. Use all the same settings as shown here. The reason for the wide character spacing is to allow enough space for the borders we will add.
Step 6
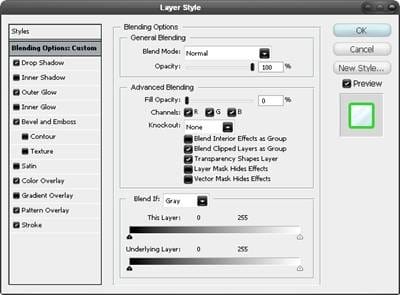
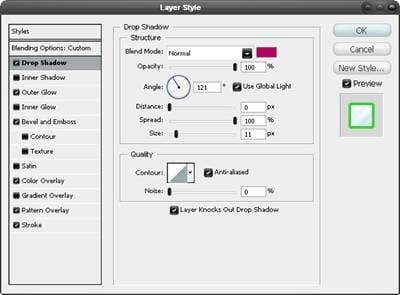
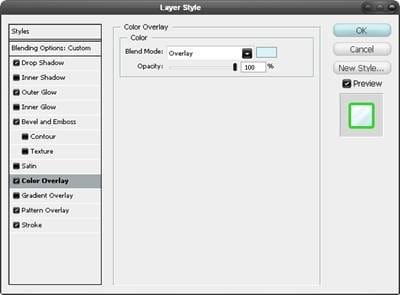
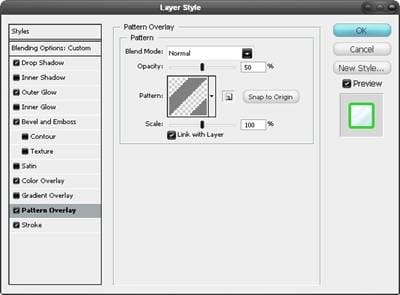
Right click on the text layer and select blending options and add a drop shadow, outer glow, bevel and emboss, color overlay, pattern overlay and a stroke. Use the settings shown below. You will notice that, although we used the drop shadow and the outer glow, we just mimicked the effect produced by a stroke. The blending options can be very powerful when used in this way so take words like drop shadow as a guideline rather than an instruction.



Step 7
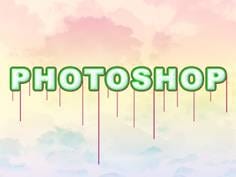
The next few steps will show how to add some goo and drips to the text. Set the foreground color to the purple swatch then create a new layer group named goo directly below the text, still within the foreground group. Create a new layer within this group (Shift+Ctrl+N). Use the line shape tool (U) and create lines like the ones shown here, make some with the weight set at 2px and some with weight at 3px to add some variety.
Step 8
Create a new layer within the goo group. Select the brush tool (B) and use a round brush with a size of 3px and a hardness of 100%. Zoom in to about 400% and draw some droplets at the bottom of each line, also draw some beads of liquid on the line.

Step 9

Create another new layer within the goo group. Using the same brush, decorate the text a little more to achieve a result similar to below. This step can take a few tries to get right but is quite enjoyable at the same time.
11 responses to “Decorating Text”
-
Very nice art work. My path was not so smooth, need more practice. I could hide some imperfections in color mode:-). My pattern creation was not cool, either. TU so much for sharing.
-
Still The First Step to Create Pattern was confusing. What you mean by use polygon tool and make the first image. We didn’t get. Anyone one can help? What it really means?
-
i don’t understand the first step, could someone please elaborate? :)
thanks-
I got a little confused there too. What you do is create a new layer, hide the background by clicking the eye looking button on the left of it, click your color square at the bottomish left and put in the hex code number #808080 if you dont know what that is, it is the bottom middle option when you click the color square. Then just set layer 1 to that color. Next you use the polygonal lasso tool to recreate the first image that was shown. So just use the lasso tool to select parts to delete to RECREATE the FIRST image shown. Hope I helped!
-
-
CULO
-
awesome !!
-
great shareing i love it
-
how do you add the things coming off of the letters?
-
I love it ;P no i hate it f off
-
Bet you can do a lot better
-
-
Awesome! Great Tutorial. I did it with my name :)


Leave a Reply