Step 20

Now select this layer then go layer>layer mask>hide all, change the foreground color to white then use a few of the following brushes with medium opacity to unhide some of the content on this layer, make sure the layer mask is selected rather than the layer itself.
1. A grungy brush of any size, this can be a brush you have downloaded or one that comes with Photoshop like the spatter, charcoal or chalk brushes, these work well when used at a larges size and dotted rather than dragged.

2. A floral brush of medium to large size. This looks good on a slightly higher opacity brush as well as on low. Never drag these brushes, it just doesn’t work.
3. A really good effect can be created when using the pattern stamp tool (s), although it requires a few tries to get it right. Try using the pattern we created earlier and also some of Photoshop’s like the checkered one.
Optionally you can repeat these two steps again to add more detail as you are trying to get a fine balance between the foreground and background.
Step 21

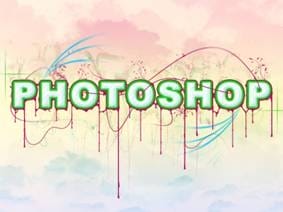
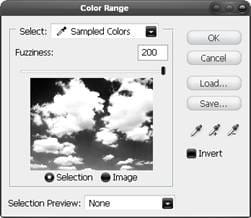
You will notice with the image we have at the moment, the clouds are only in the background. Let’s solve this problem; we have to choices here, we either add more in front of the foreground group or we can take something away from the foreground. I’ve found that the taking away method produces a more realistic result. However if you have some cloud brushes kicking about feel free to use them but in this image I didn’t. First let’s check where we are at in terms of layers; at the moment you should only have a foreground group, a background group and the white background layer, everything else should be contained within these. In the background group duplicate one of the cloud layers then drag it out of this group and to the very top of the layer stack. Change the blending mode to normal then go select>color range and pick the very darkest part of the image and use the settings shown below, OK. Now you should have a rough selection around the clouds, hide this layer then select the foreground group and in the layers panel click the layer mask button at the bottom.
11 responses to “Decorating Text”
-
Very nice art work. My path was not so smooth, need more practice. I could hide some imperfections in color mode:-). My pattern creation was not cool, either. TU so much for sharing.
-
Still The First Step to Create Pattern was confusing. What you mean by use polygon tool and make the first image. We didn’t get. Anyone one can help? What it really means?
-
i don’t understand the first step, could someone please elaborate? :)
thanks-
I got a little confused there too. What you do is create a new layer, hide the background by clicking the eye looking button on the left of it, click your color square at the bottomish left and put in the hex code number #808080 if you dont know what that is, it is the bottom middle option when you click the color square. Then just set layer 1 to that color. Next you use the polygonal lasso tool to recreate the first image that was shown. So just use the lasso tool to select parts to delete to RECREATE the FIRST image shown. Hope I helped!
-
-
CULO
-
awesome !!
-
great shareing i love it
-
how do you add the things coming off of the letters?
-
I love it ;P no i hate it f off
-
Bet you can do a lot better
-
-
Awesome! Great Tutorial. I did it with my name :)


Leave a Reply