Luminar AI lets you turn your ideas into reality with powerful, intelligent AI. Download the photo editor and see how you can completely transform your photos in a few clicks.
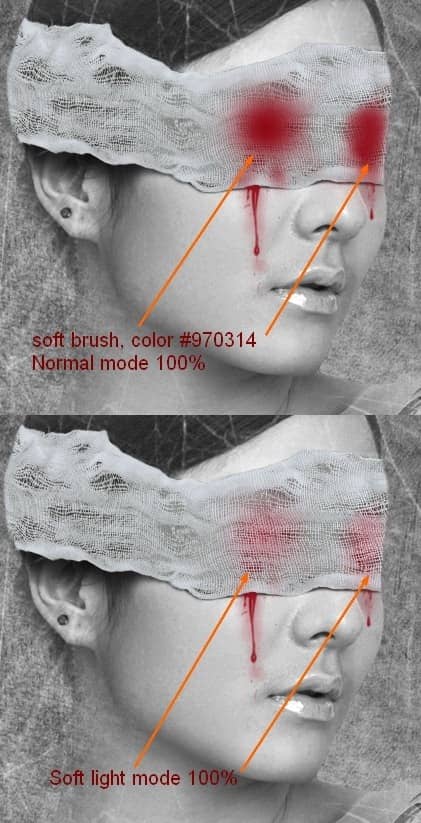
Step 28
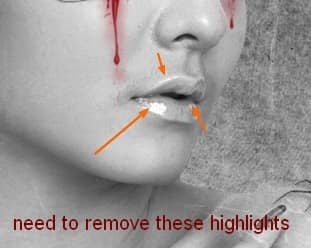
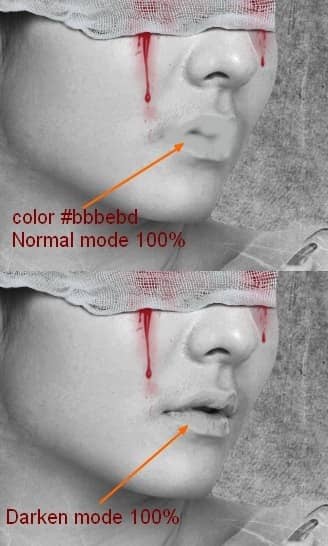
You can see some highlights on model lips. With this tutorial concept we need to remove it. Create a new layer on the top. I use brush with similar color with model lips ( #bbbebd) and paint on lips. Set the mode as Darken 100% ( it's the best mode in this case).
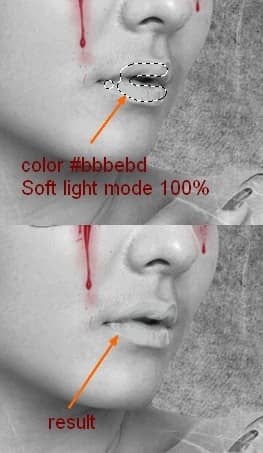
Make a new layer and continue painting this brush over model lips, but with Soft light mode 100% to make a pale look for lips:
Step 29
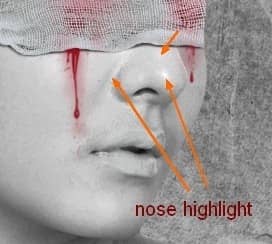
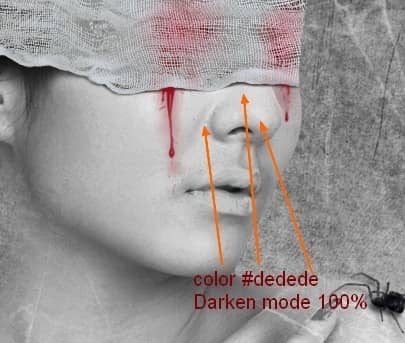
To remove highlights on model nose I use brush with color #dedede. Paint and put the mode as Darken 100%:
Step 30
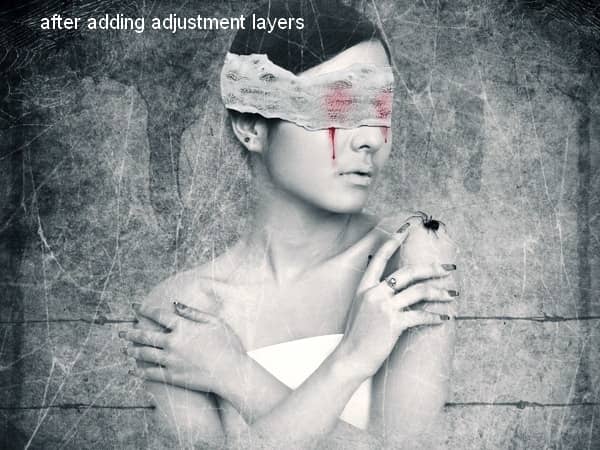
I use some adjustment layers to change color of picture.
Go to Layer-New adjustment layer-Gradient Map:
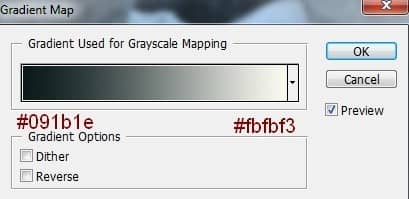
Change the mode of this Gradient Map layer to Soft light 80%.
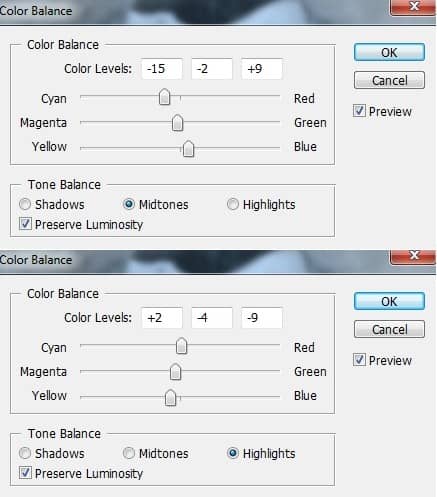
Layer-New adjustment layer-Color Balance:
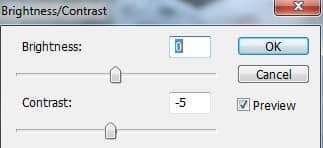
To reduce the contrast I add a Brightness/Contrast layer ( Layer-New adjustment layer-Brightness/Contrast):
Final Results
![pain30-final[1]](https://cdn.photoshoptutorials.ws/wp-content/uploads/2012/07/The-Pain.jpg?strip=all&lossy=1&quality=70&webp=70&avif=70&ssl=1)
Download the PSD
The Pain.zip | 28.04 MB

15 comments on “"The Pain" - Create this Eerie Abstract Photo Manipulation”
I think the instruction is pretty good however when I enter some of the values for the blood colors they don't look like yours ....not sure if that is because I have an older version or what.
Which step are you not getting the right color for?
You can turn this artwork into a symbolism of the Hong Kong police force by putting the blood in one eye only.
Where is the pain? She looks pretty comfortable! lol
cool
Wonderful tutorial..Thanks for sharing.
your work is amazing .....well done xx
it was great.can you please send this instruction to my email.
cool!
yes girl.
wow what a great tut, thank you very much <3
Great tutorial, thank you very much :) Easy to follow and an awesome result! Cheers
Can't download the model stock, please reupload it! Thanks for the tut!
i love it^^
excellent! better remove the earring and ring,redo the nails pure black