Step 31
Select Polar Bear layer. Press Ctrl+T to enter free transform. Hold shift and drag one of the corner points towards center to resize the layer proportionally. While in Free Transform mode right click and choose Flip Horizontal. Place the bear like shown below.
![image033[1] image033[1]](https://cdn.photoshoptutorials.ws/images/stories/4e87332e2856_11009/image0331.jpg?strip=all&lossy=1&webp=82&avif=82&w=1920&ssl=1)
Step 32
We will make the shadow of the bear so he doesn’t look fake. Select layer Polar Bear and press ctrl+J to make a duplicate. Rename this layer shadow and move it below Polar Bear layer. Our color balance layer it’s not clipping our layer Polar Bear anymore so hold alt and click between the Color Balance layer and Polar Bear layer. Press D to set default colors . Now press alt+shift+Backspace to fill opaque pixels with black. You probably won’t see any change because the shadow layer is below our polar bear layer. Press ctrl + T to free transform our shadow layer. Drag the center point to lower left corner point. Transform the shadow like shown below.
![image034[1] image034[1]](https://cdn.photoshoptutorials.ws/images/stories/4e87332e2856_11009/image0341.jpg?strip=all&lossy=1&webp=82&avif=82&w=1920&ssl=1)
Step 33
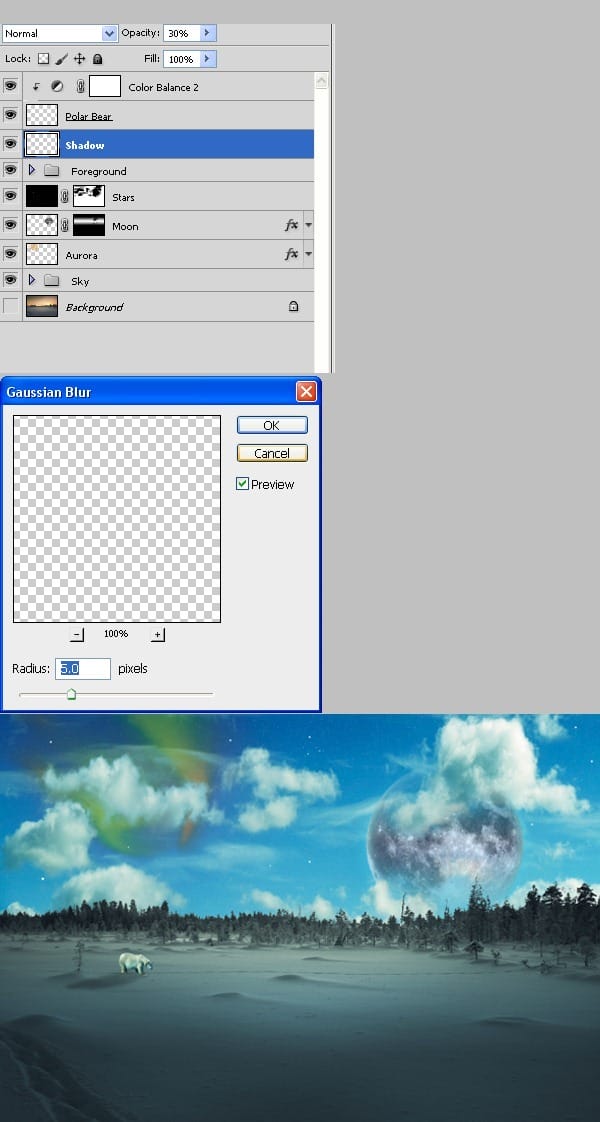
Apply Filter > Blur > Gaussian blur to our shadow. Then choose a brush with following settings:
- Size: 9px
- Hardness: 0%
Set it’s opacity to 30% and paint gently to add a little more shadow under our bear feet. Lower the Shadow layer’s opacity to 30%.

Step 34
Add a layer mask to Shadow layer. Press D to choose default colors. Press G to choose gradient tool. Choose Foreground to Background. Click on the layer mask to select it. Press X to switch Background and Foreground colors. Drag our gradient tool to blend the topmost of the shadow with the environment. Change the shadow layer blending mode to Multiply.
![image036[1] image036[1]](https://cdn.photoshoptutorials.ws/images/stories/4e87332e2856_11009/image0361.jpg?strip=all&lossy=1&webp=82&avif=82&w=1920&ssl=1)
Step 35
Let’s make the bear’s tracks. Make a new layer and place it on top of the layers. Rename the layer tracks. Choose from the brush presets Chalk 17 px and lower brush opacity to 50%. Tap with the brush behind the bear on the snow like shown in the image below.
![image037[1] image037[1]](https://cdn.photoshoptutorials.ws/images/stories/4e87332e2856_11009/image0371.jpg?strip=all&lossy=1&webp=82&avif=82&w=1920&ssl=1)
Step 36
Apply a Filter > Blur > Gaussian blur to Tracks layer. Lower Tracks layer opacity to 60%. Hold ctrl and click Tracks layer, Polar Bear layer, Shadow layer and Color Balance layer to select them. Press ctrl+G to group them. Rename the group Polar Bear.
2 responses to “Create a Surreal Arctic Scene in Photoshop”
-
Ahlie
-
Great tutorial, best regards from Czech Rep.


Leave a Reply