Download Lightroom presets and LUTs, absolutely free. Use the presets to add creativity and style to your photos.
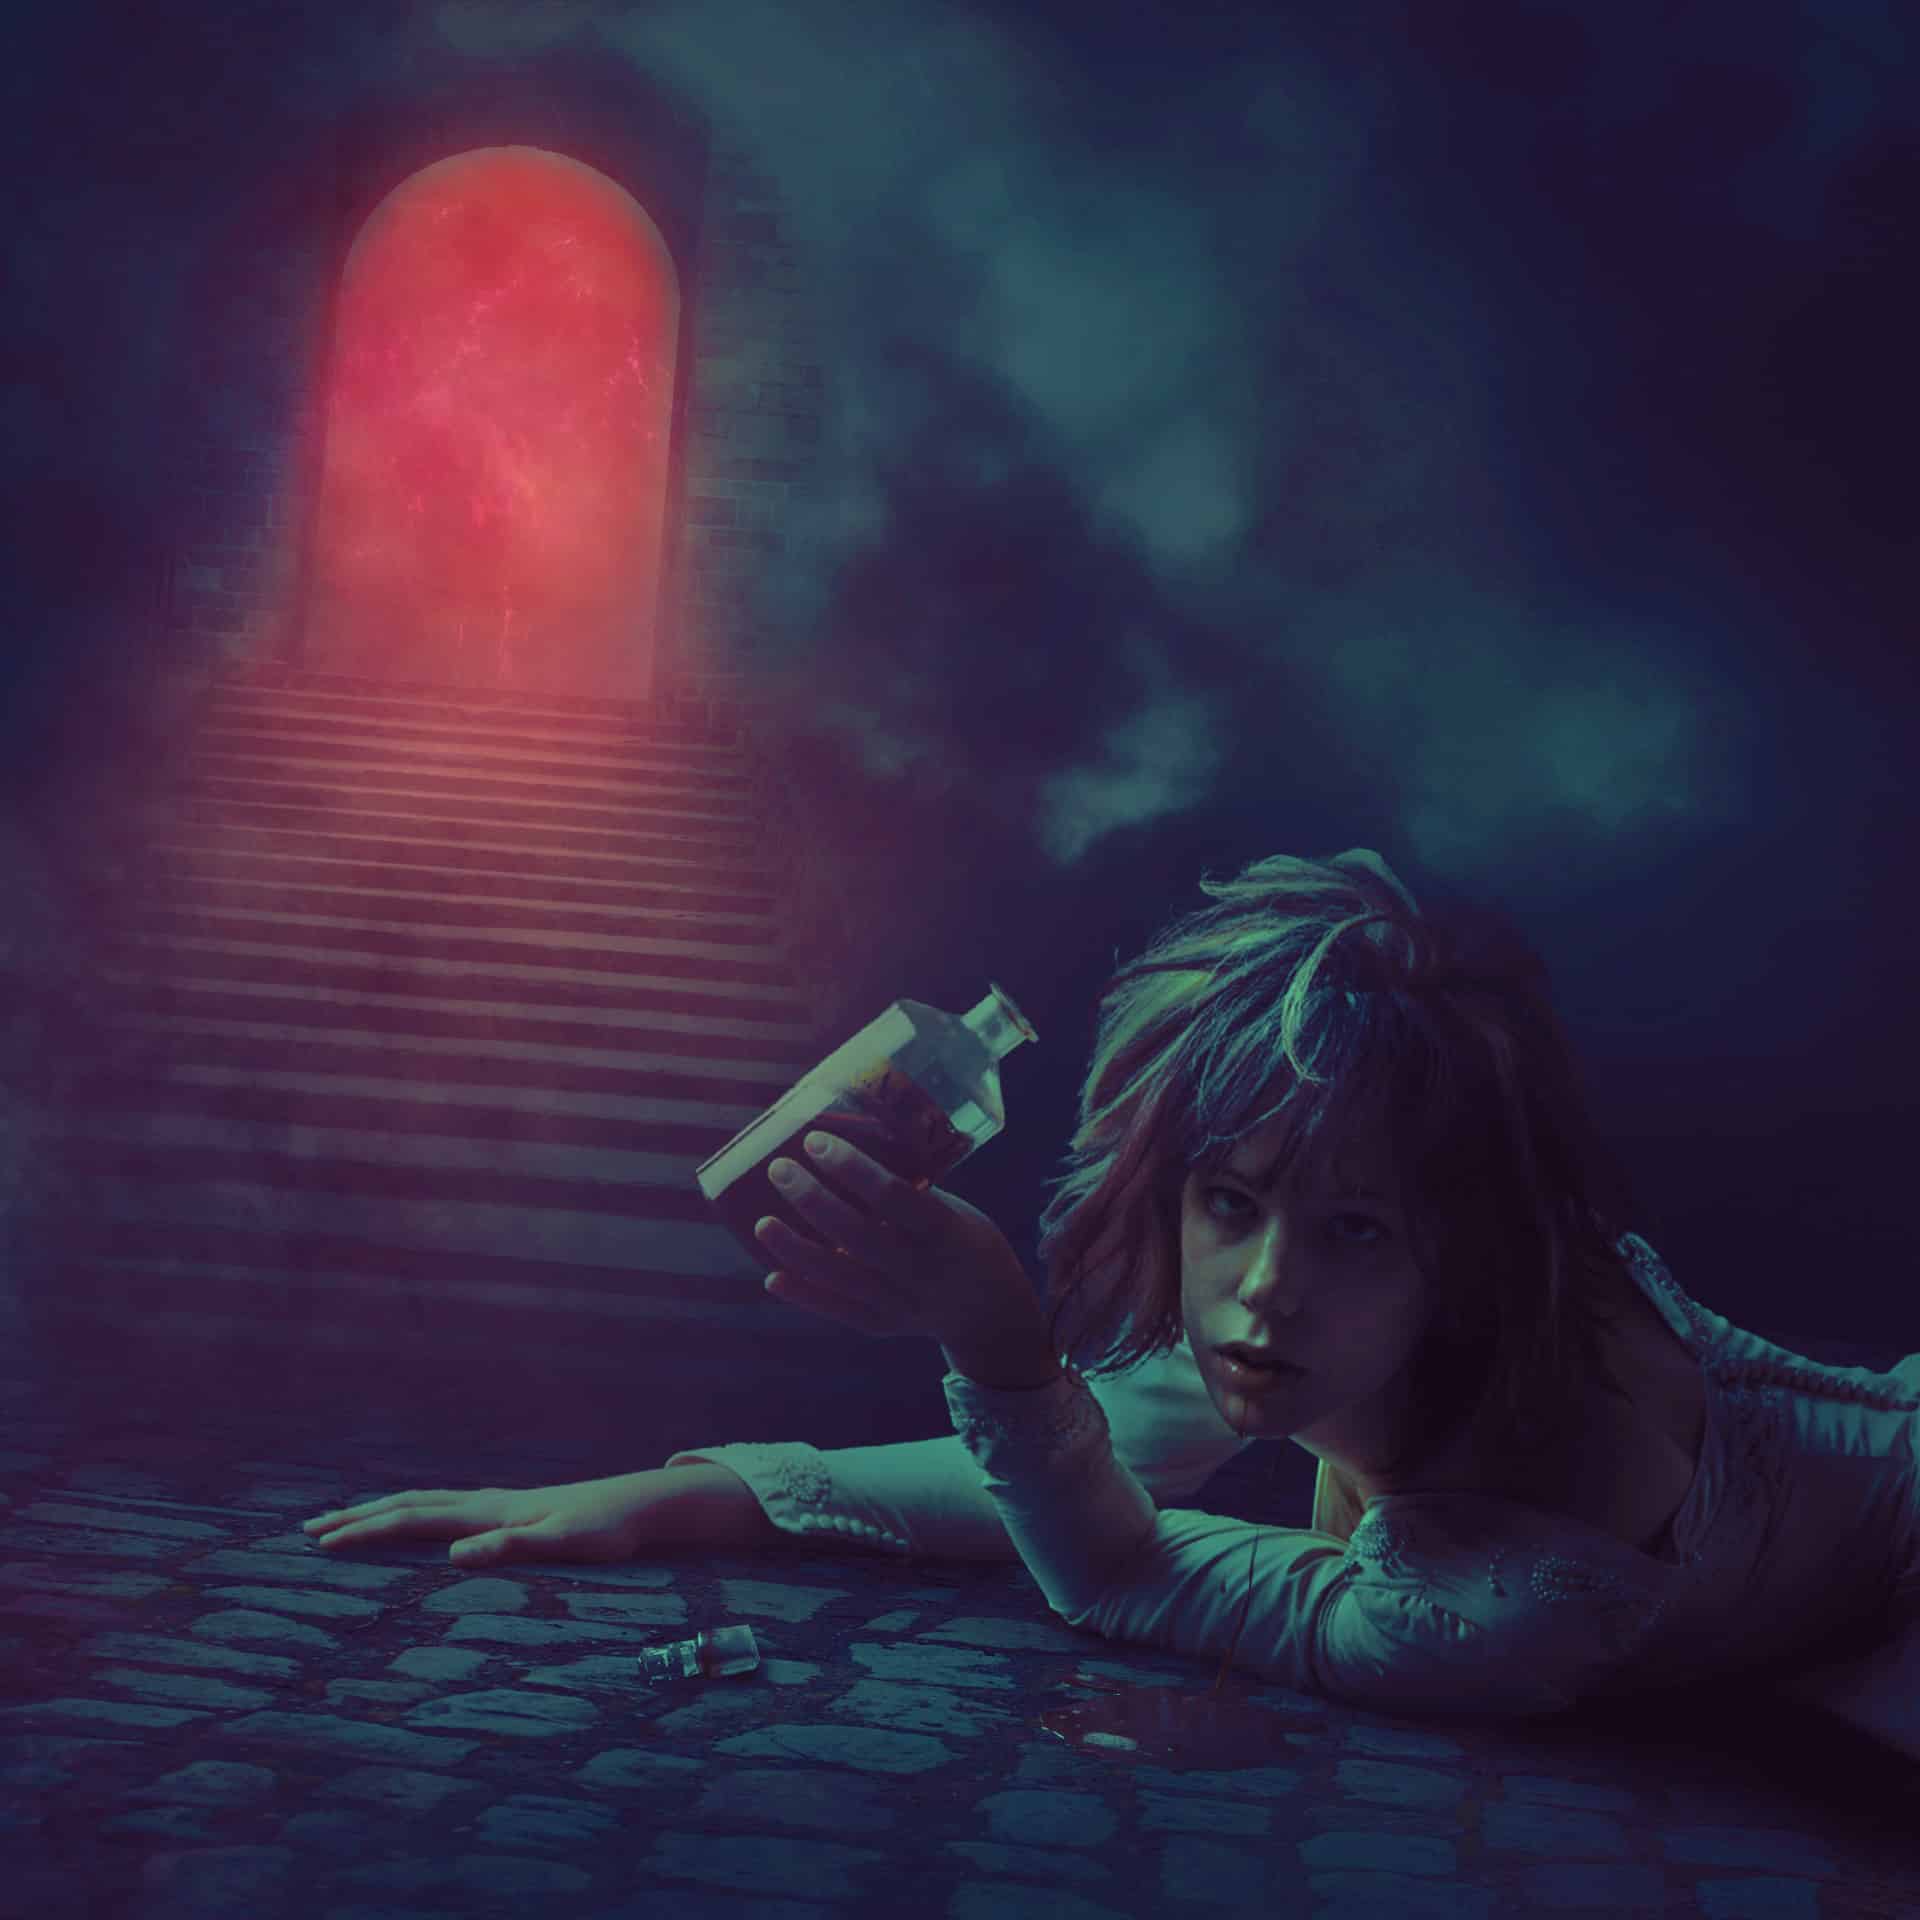
In this tutorial, I'll show you how to create an anti-alcohol concept artwork using a range of photo manipulation techniques. You'll work with blending, masking, image extraction, lighting, coloring, and more.
What you'll be creating
We'll start this tutorial by setting up a scene from the sky, ground, and stair images. Then we'll add the model and do some retouch on her. Later we'll use the smoke image to build up a dark and mysterious atmosphere. After making the blood we'll use some adjustment layers to enhance the color and contrast of the whole pic. Then we'll take care of the lighting and create a special effect for the "gate of hell" with a few adjustment layers, brush and nebula texture. We'll use an adjustment layer to enhance the final result. You should use Photoshop CS3 or newer to follow this tutorial properly.
![drunk39-final[6] drunk39-final[6]](https://cdn.photoshoptutorials.ws/wp-content/uploads/2014/07/drunk39-final6.jpg?strip=all&lossy=1&quality=70&webp=70&avif=70&w=1920&ssl=1)
Tutorial Resources
Step 1
Create a new document in Photoshop with the following settings:
![drunk1[4] drunk1[4]](https://cdn.photoshoptutorials.ws/wp-content/uploads/2014/07/drunk14.jpg?strip=all&lossy=1&quality=70&webp=70&avif=70&w=1920&ssl=1)
Step 2
Open the sky stock. Use the Move Tool (V) to drag the sky into our white canvas:
![drunk2[4] drunk2[4]](https://cdn.photoshoptutorials.ws/wp-content/uploads/2014/07/drunk24.jpg?strip=all&lossy=1&quality=70&webp=70&avif=70&w=1920&ssl=1)
To darken the sky, I used an adjustment layer. Go to Layer > New Adjustment Layer > Curves:
![drunk2a[4] drunk2a[4]](https://cdn.photoshoptutorials.ws/wp-content/uploads/2014/07/drunk2a4.jpg?strip=all&lossy=1&quality=70&webp=70&avif=70&w=1920&ssl=1)
![drunk2b[4] drunk2b[4]](https://cdn.photoshoptutorials.ws/wp-content/uploads/2014/07/drunk2b4.jpg?strip=all&lossy=1&quality=70&webp=70&avif=70&w=1920&ssl=1)
Step 3
Open the ground image. Place it at the bottom of our main document using the Move Tool, also use the Cmd/Ctrl+T key to transform it as shown below:
![drunk3[4] drunk3[4]](https://cdn.photoshoptutorials.ws/wp-content/uploads/2014/07/drunk34.jpg?strip=all&lossy=1&quality=70&webp=70&avif=70&w=1920&ssl=1)
You can see that I've rotated the ground to get a lean angle to fit this tutorial concept.
Click the second button at the bottom of the Layers Panel to add a mask to this layer. Use a basic, soft brush with black color to soften the edge of this ground:
![drunk3a[4] drunk3a[4]](https://cdn.photoshoptutorials.ws/wp-content/uploads/2014/07/drunk3a4.jpg?strip=all&lossy=1&quality=70&webp=70&avif=70&w=1920&ssl=1)
Step 4
To darken the ground, I used a Curves adjustment layer with Clipping Mask:
![drunk4[4] drunk4[4]](https://cdn.photoshoptutorials.ws/wp-content/uploads/2014/07/drunk44.jpg?strip=all&lossy=1&quality=70&webp=70&avif=70&w=1920&ssl=1)
On this layer mask use a soft black brush with the opacity and flow about 20% to erase the left of this ground (we aim to add a light source there, see in next steps).
![drunk4a[4] drunk4a[4]](https://cdn.photoshoptutorials.ws/wp-content/uploads/2014/07/drunk4a4.jpg?strip=all&lossy=1&quality=70&webp=70&avif=70&w=1920&ssl=1)
Step 5
Open the gate and stair image and isolate it from the background:
![drunk5[4] drunk5[4]](https://cdn.photoshoptutorials.ws/wp-content/uploads/2014/07/drunk54.jpg?strip=all&lossy=1&quality=70&webp=70&avif=70&w=1920&ssl=1)
Step 6
To remove some of the unwanted details on the stair, make a new layer and active the Clone Tool (S):
![drunk6[4] drunk6[4]](https://cdn.photoshoptutorials.ws/wp-content/uploads/2014/07/drunk64.jpg?strip=all&lossy=1&quality=70&webp=70&avif=70&w=1920&ssl=1)
Use this tool to delete the indicated details :
![drunk6a[4] drunk6a[4]](https://cdn.photoshoptutorials.ws/wp-content/uploads/2014/07/drunk6a4.jpg?strip=all&lossy=1&quality=70&webp=70&avif=70&w=1920&ssl=1)
Step 7
Hide the background layer by clicking its eye icon. Press Cmd/Ctrl+Option/Alt+Shift+E to merge the extracted stair and the clone layers. Use the Move Tool to drag it into our main image, position it at the left:
![drunk7[4] drunk7[4]](https://cdn.photoshoptutorials.ws/wp-content/uploads/2014/07/drunk74.jpg?strip=all&lossy=1&quality=70&webp=70&avif=70&w=1920&ssl=1)
Add a mask to this layer. Use a soft black brush to remove the edges of the stair as shown below:
![drunk7a[4] drunk7a[4]](https://cdn.photoshoptutorials.ws/wp-content/uploads/2014/07/drunk7a4.jpg?strip=all&lossy=1&quality=70&webp=70&avif=70&w=1920&ssl=1)
Step 8
I used Curves (Clipping Mask) to darken the stair:
![drunk8[4] drunk8[4]](https://cdn.photoshoptutorials.ws/wp-content/uploads/2014/07/drunk84.jpg?strip=all&lossy=1&quality=70&webp=70&avif=70&w=1920&ssl=1)
![drunk8a[4] drunk8a[4]](https://cdn.photoshoptutorials.ws/wp-content/uploads/2014/07/drunk8a4.jpg?strip=all&lossy=1&quality=70&webp=70&avif=70&w=1920&ssl=1)
Step 9
Cut out the model from the background and place her at the right of the ground, remember to rotate her to fit the angle of the ground:
![drunk9[4] drunk9[4]](https://cdn.photoshoptutorials.ws/wp-content/uploads/2014/07/drunk94.jpg?strip=all&lossy=1&quality=70&webp=70&avif=70&w=1920&ssl=1)
Step 10
Make a new layer above the model one, change the mode to Overlay 100% and fill with 50% gray:
![drunk10[4] drunk10[4]](https://cdn.photoshoptutorials.ws/wp-content/uploads/2014/07/drunk104.jpg?strip=all&lossy=1&quality=70&webp=70&avif=70&w=1920&ssl=1)
Use the Dodge and Burn Tool (O) with Midtones Ranges, Exposure about 15-20% to refine the contrast on the model face. You can see how I did it with Normal mode and the result with Overlay mode:
![drunk10a[4] drunk10a[4]](https://cdn.photoshoptutorials.ws/wp-content/uploads/2014/07/drunk10a4.jpg?strip=all&lossy=1&quality=70&webp=70&avif=70&w=1920&ssl=1)
Step 11
Copy the cap and blood from the original image and position them beside the model:
![drunk11[4] drunk11[4]](https://cdn.photoshoptutorials.ws/wp-content/uploads/2014/07/drunk114.jpg?strip=all&lossy=1&quality=70&webp=70&avif=70&w=1920&ssl=1)
Step 12
Make a new layer under the model one. Use a soft black brush with the opacity varied from 40% to 70% to paint the shadow under the model and the cap.


11 comments on “Create an Anti-Alcohol Concept Artwork with Photoshop”
Once again, just an awesome tutorial. So easy to follow along with~!
the best i know right i am doing it right now
This is actually a very beautiful idea, I'm actually looking to use an anti-alcohol graphic for a work project. This tutorial has given me some great tips, nice one...
SO cool I actually need to do an anti-alcohol graphic for a project right now! I won't use this verbatim obviously, but this tutorial has given me some GREAT ideas!
WoW ! excellent tutorial that is. Your writing quality is really easy to understanding. Thank You for sharing....
very impressive ! love this post! keep up!
Pagal Pura pi
wooooooow i like this one
thats was very wonderful, I tried to do it my self it was an epic fail
Thanks for your nice artwork. Really is it very helpful for me. because I am new worker about it.
Thank you so much! I've been following your work on Deviantart & I'm a huge fan!