Photoshop features a powerful stitching tool to create panoramas from a series of photographs. In this Photoshop tutorial, you will learn how to use the Photomerge tool in Photoshop CS3 to stitch a series of photos into a panorama.
My wife and I went to Crested Butte, Colorado, recently for spring break. We snowboarded for a few days and enjoyed the outdoors, taking a few photos along the way. One sure thing to do when enjoying the outdoors is to take panoramic shots. You don’t need a wide-angle lens to capture the vast expanse of outdoor landscapes photography. A technique I and many other photographers utilize is to take overlapping shots of a landscape and merge them later in Photoshop. Photoshop CS3 has a few new features and options to consider.
First, let’s go over some tips for when shooting these types of photos.
- Hopefully, you’re using an SLR camera with an adjustable shutter speed and aperture. Don’t let the shutter speed and aperture change between shots; this would cause the resulting merged photo to not match up. Some parts of the resulting photo would have more exposure with a wider aperture and slower shutter speed. The depth of field would also differ with different aperture settings. So use manual mode, and remember what settings the shutter speed and aperture are set to and keep them the same for each shot.
- Once you focus on the first photo, turn the lens to manual focus. This way, you control the focus of each shot, which should be the same for all of them.
- Shoot the shots with the SLR camera held vertically, so more if covered at the top and bottom of the shot.
- Be sure to overlap each shot about a quarter of the previous shot, so they overlap. We should avoid any blank areas in between obviously.
- Before the first shot, take a photo of something unique, like your hand or snow glove in this case. After the last shot of the series, do that same thing. This way, you know which shot if the first in the panoramic series and which is the last, when you later browse the folder on your computer.
Photomerge Photoshop Tutorial
Support Files
Before we start, download this file that contains six images that you will use to follow this tutorial.
Step 1:
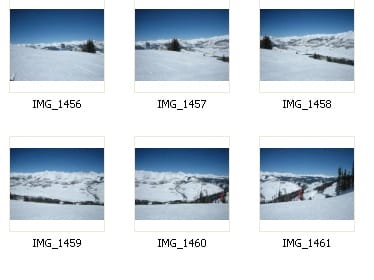
Now let’s get started. For this example, I didn’t use my SLR camera, because I didn’t feel like lugging up the bigger Canon Rebel while snowboarding, especially since it’s more expensive than the one I brought, a Canon Powershot. I can put the Powershot in my pocket while snowboarding, so it was more convenient. But using an SLR is ideal for the reasons listed above. Go ahead and start up Photoshop CS3. Here’s there six images that we’ll be using from the support files.

{articlead}
Step 2:
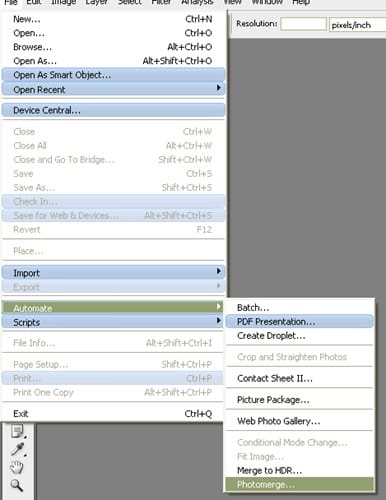
Go to File>Automate>Photomerge.

Step 3:
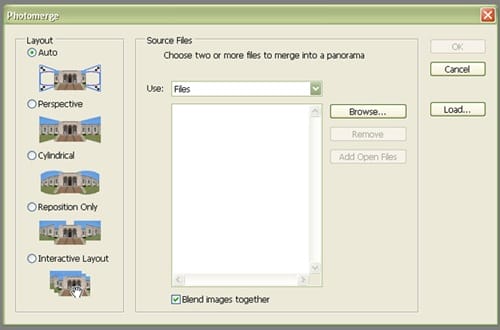
A dialog will open that lists a few different options. “Auto” tells Photoshop to choose the best setting and apply it. It has less flexibility, but is quick and to the point. “Perspective” sets the image in a perspective that includes less barrel distortion, while “Cylindrical” has more barrel distortion. “Reposition Only” simply does that—repositions the images but doesn’t change the perspective. “Interactive Layout” allows a few more options, so let’s choose that.

Step 4:
Click Browse and select the images from the support files by clicking-and-dragging over them in the dialog. Click OK and the images will now be listed in the dialog. If we had already had the files open, they would already be listed there. Click OK to merge the photos.


Leave a Reply