
Step 8
Now we need to apply 2 adjustment layers, Curves and Hue/Saturation.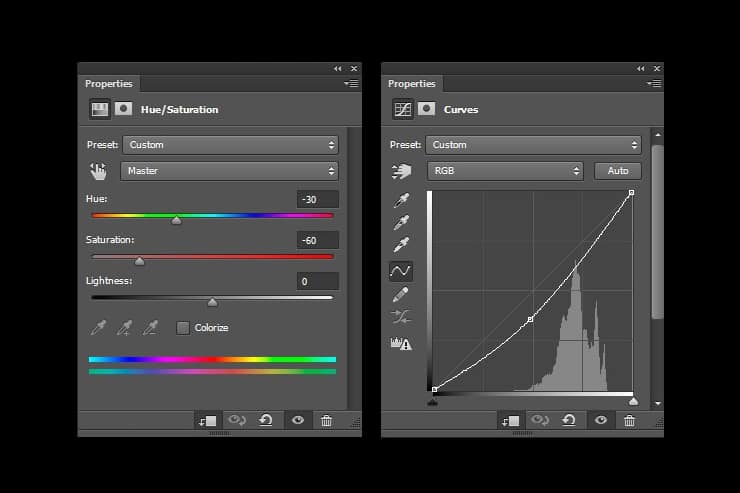
Step 9
And this is the result.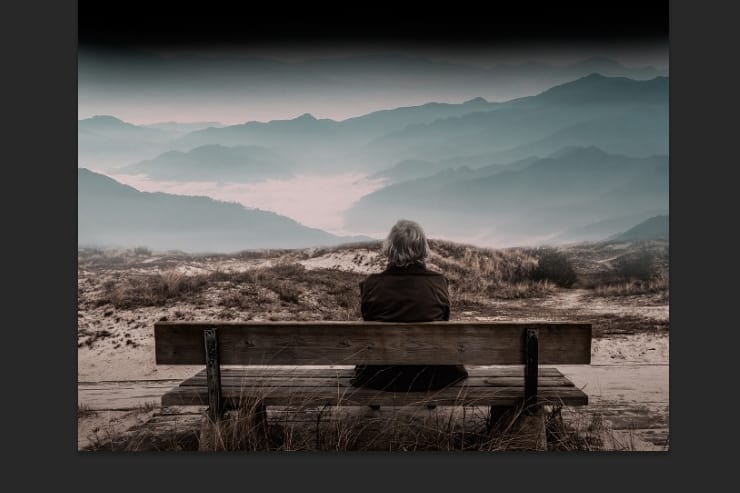
Step 10
Place the picture with the stars under the previous layer in the layers panel and change the layer mode from Normal to Lighten.
Step 11
At the bottom of all layers and just on top of the background, place the picture with the sky on top of the stars, this layer requires no masking or adjustments layers. Having the layer with the stars on Lighten mode will make the stars slightly visible.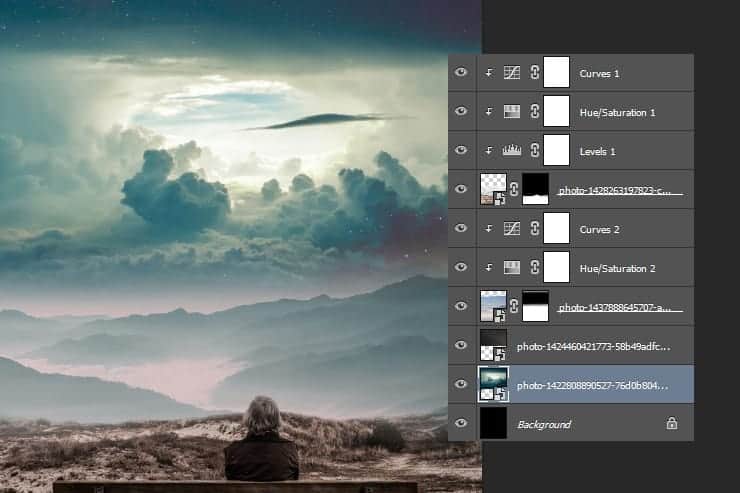
Step 12
Bring the cone-shaped structures on the canvas and get rid of the background, leaving only the structures. One way to do it through masking is to add the mask to this layer and paint it all black, now you won’t see anything and we need to bring back only the structures. The way to do it is to disable the mask, in the layers panel, right-click on the mask and select Disable Layer Mask, now we just need to make a selection of the shapes and paint it white, this way when we enable the mask the structures will still be visible.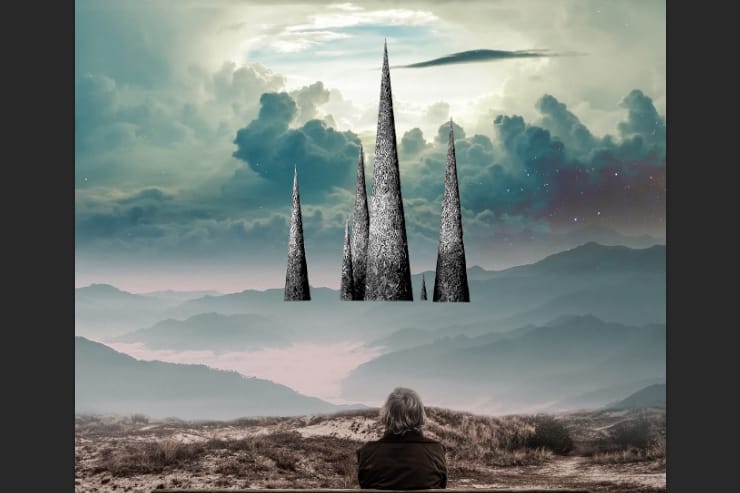
Step 13
Now we will place these shapes around the landscape. The first spot will be on the right side of the man. To blend it together we will reduce the Opacityto 65% and with a soft brush and black color we will paint a little bit on the mask the bottom of the shapes.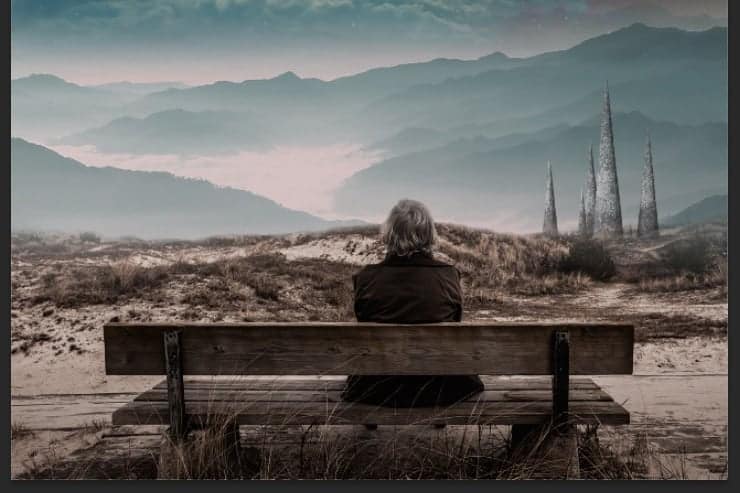
Step 14
Duplicate that layer and place it somewhere on the left with 50% Opacity. Since it’s supposed to be further, reduce the size.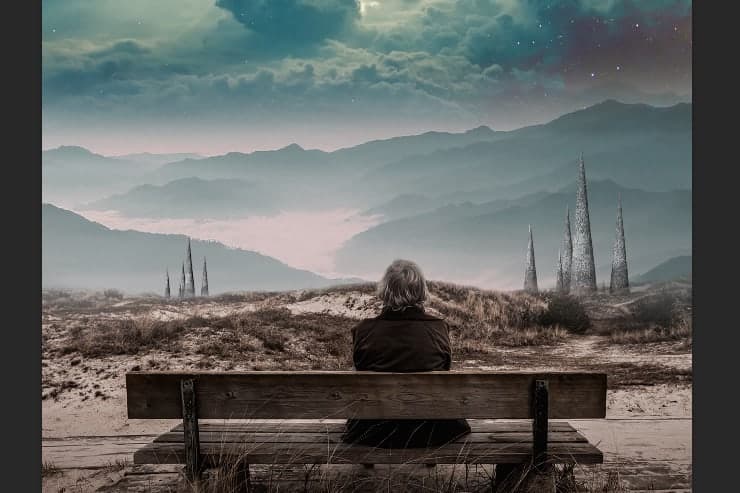
Step 15
Place another one somewhere in the middle and reduce the Opacityto 25%. This is how it should look:
Step 16
Next, we will add the lines coming from the center of the sky with the Line Tool(U). So pick up the Line Tool and create some lines with this color: #db9da1.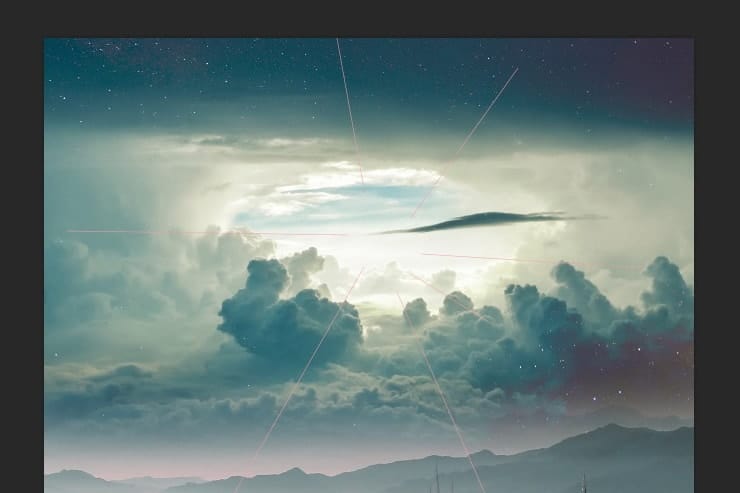
Step 17
For each line you create a new shape layer is going to be created in the layers panel, combine these layers into just one layer by selecting them in the layers panel, right-clicking and selecting Merge Shapes. Now add a layer mask to it and using a soft brush paint with black color the tip of the lines.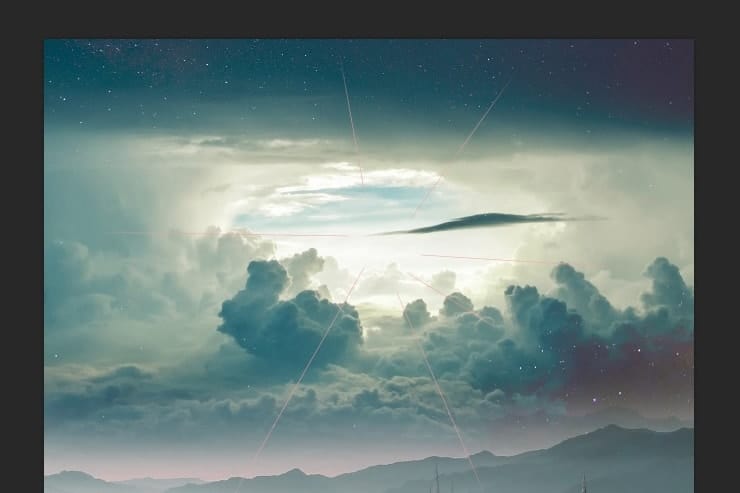
Step 18
We will repeat the process with another set of lines but this time we’re going to make them white.15 responses to “Create a Surreal Photo Manipulation of a Man Watching a Magical Sky”
-
thank you for ur tutorials.
-
Took me an hour to make it… it
-
I still cannot believe that the end result came from what the original photo started with. Very good work!
-
Fantastic Artist
-
Totally cool. Doesn’t photoshop have the coolest features if you can make an image like this out of basically nothing?
-
The tutorials are very easy to follow and I appreciate that very much. I am just getting started and sometimes I am not even sure what photoshop can really do for me. I love the results. great work
-
The man sitting on the bench reminds me of my grandfather, who’s passed away. This would be a great pic to memorialize him . Thanks for the tutorial.
-
So much helpful tutorial indeed to create magical or super-real photo. Thank you for sharing.
-
Have you finished this project yet? I would like to see the end results of others that have tried the tutorial.
-
-
Hi Alexander West,
I love the results. great work -
What a superb tutorial! Thanks
-
Amanda Boyd?
-
Man Watching A Magical Sky – looks like an Incomplete tutorial. Disappointed. Unable to continual after staep 14.
-
Hehe, it’s split into two pages. You needed to click “2” to get to the second page of the tutorial. Common sense really. It’s a good tutorial.
-


Leave a Reply