Luminar AI lets you turn your ideas into reality with powerful, intelligent AI. Download the photo editor and see how you can completely transform your photos in a few clicks.
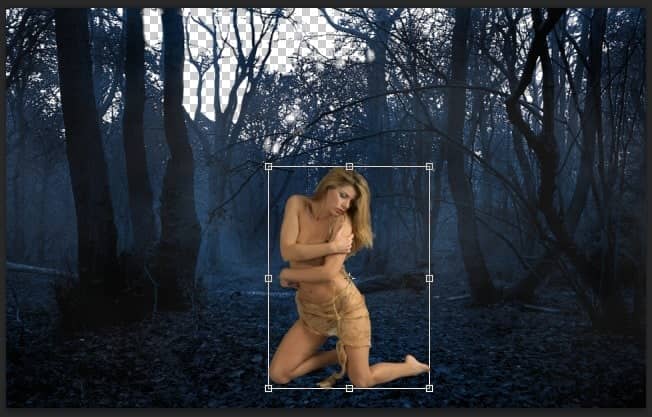
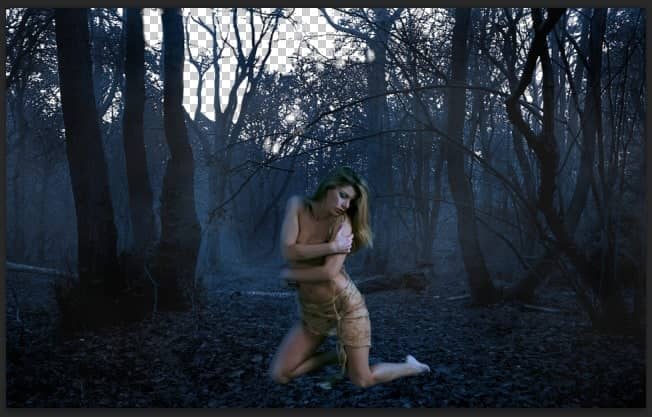
Step 8 - First Model Blending Process
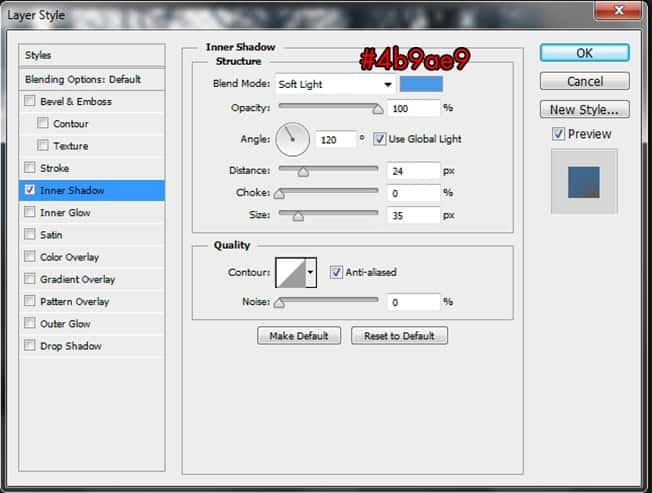
Access to the Model's Blending Option -> Inner Shadowand adjust the attribute like this :
Continue adding these following adjustment layers :
Curves-> Brightness/Contrast-> Photo Filter-> Color Balance-> Exposure
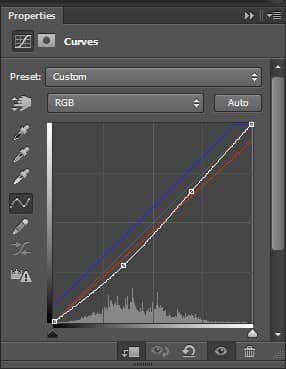
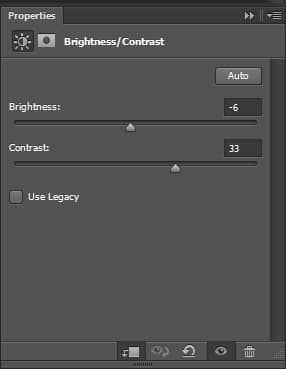
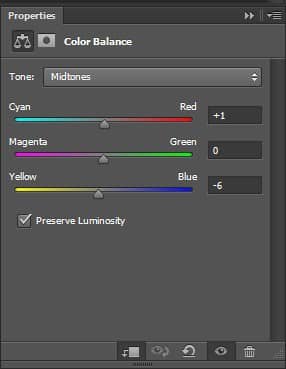
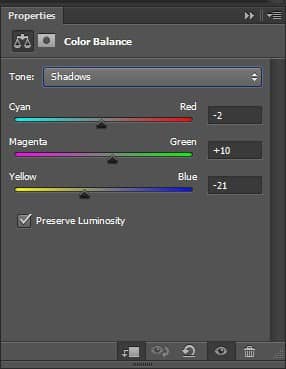
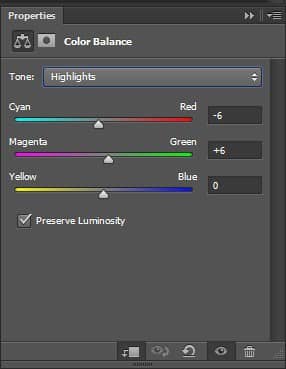
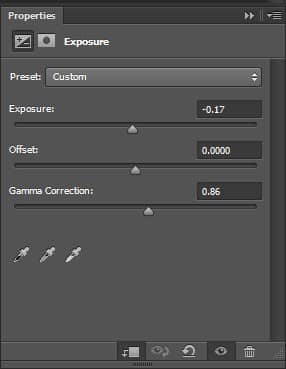
And here is the result :
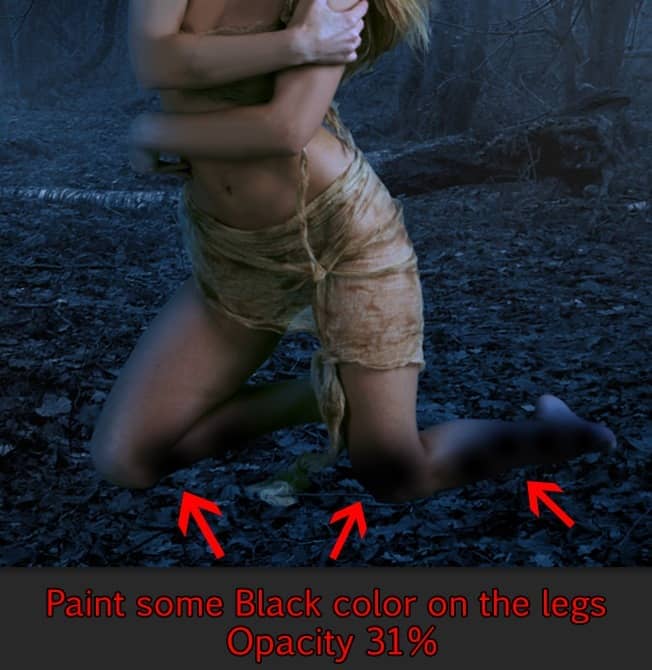
Step 9 - Adding Shadow To The Model's Legs
We will use the same method we just did with the forest to the model's legs in this step. Reduce the Opacity to 31%.
Step 10
As you can see the Model's base lightning is not really fit with our image. Normally it would take many adjustment layers to fix this but the result won't be good. With this step I will show you this good trick to adjust the lightning as you want with the help of Dodgeand Burn Tool.
First you need to create a new layer and fill it with 50% Gray. Do so by hit Ctrl + A to select the layer, right click on the screen and chooseFill -> 50% Gray. Create Clipping Mask on the Model layer.
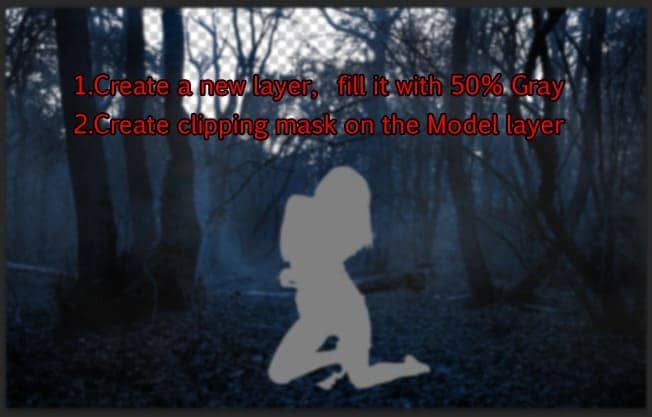
Grab the Dodge and Burn Tool, keep the setting as Midtonewith 12% Exposure. Start painting on the model. Notice that the light source we will create later will come from the top so use the Dodge Tool to highlight the parts where the light sources will possibly touch the model, and Burn Tool to darken the other parts.
As in the image, red arrowsindicate where to use Burn Tool, blue arrowsindicate where to use Dodge Tool.
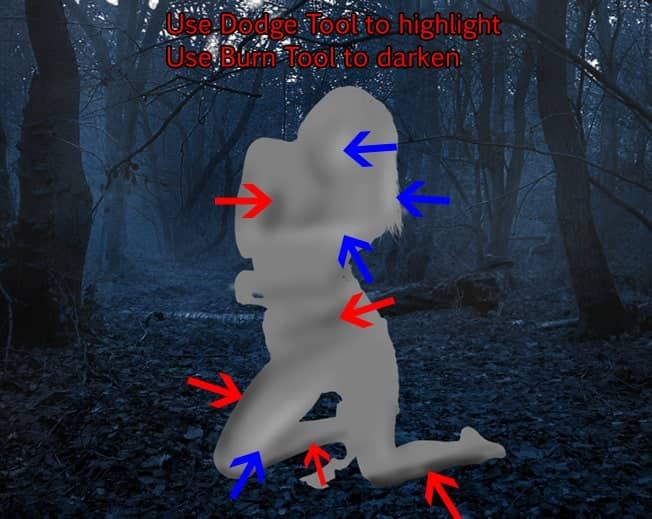
Change the Blend Mode to Overlay and see the result!

Step 11 - Adding The Sky
Place the Sky stock photo into our document, behind the forest.
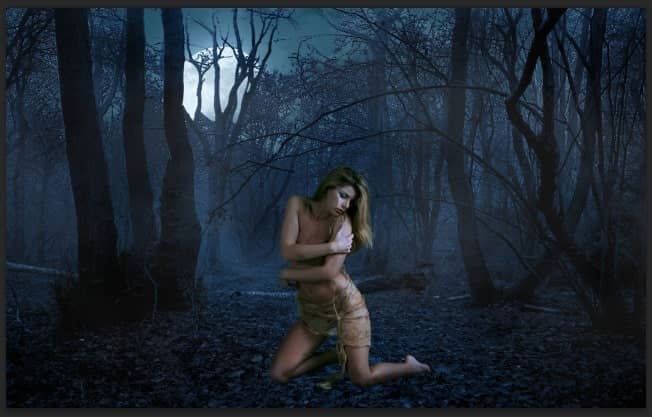
Add the Curves adjustment layer to the sky.
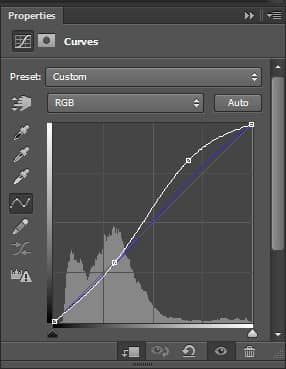
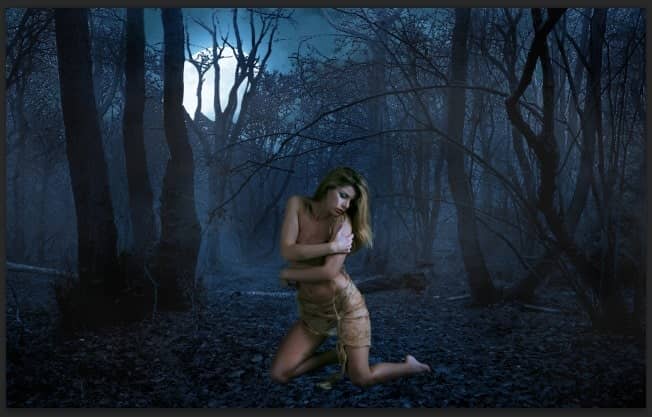
Step 12
Open the Dead Tree 1 stock photo and select this specific part. Use Color Range to extract it as we did with the forest in step 2. This is a very good chance to try out this tool.
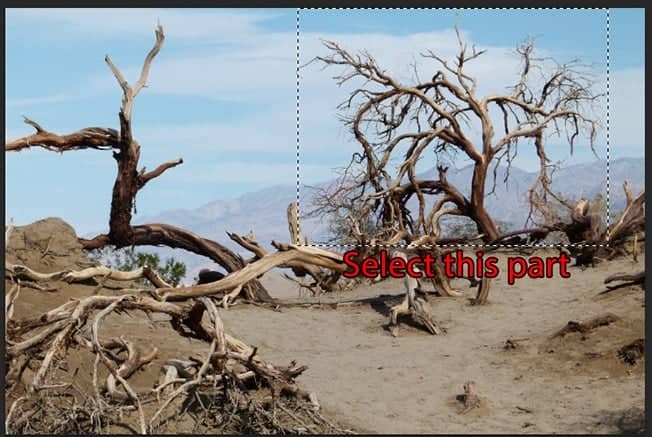
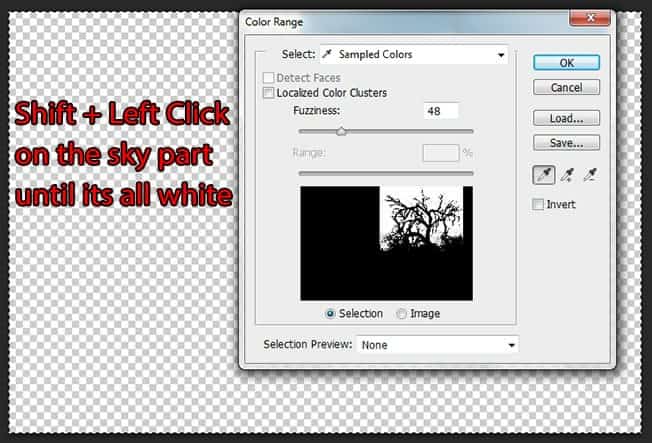
Step 13
Place the extracted dead tree behind the model.
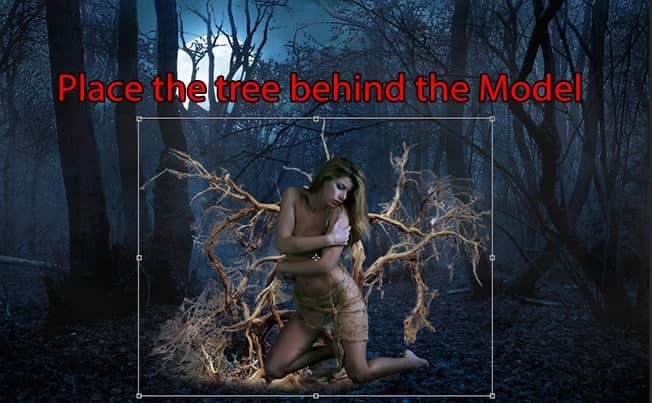
We don't want those white pixels remain on the dead tree so we will seek the help of Refine Edgeto get rid of these annoying thing. Select the dead tree by Ctrl + Left Click on its layer and hit Ctrl + Alt + Rto open Refine Edge.
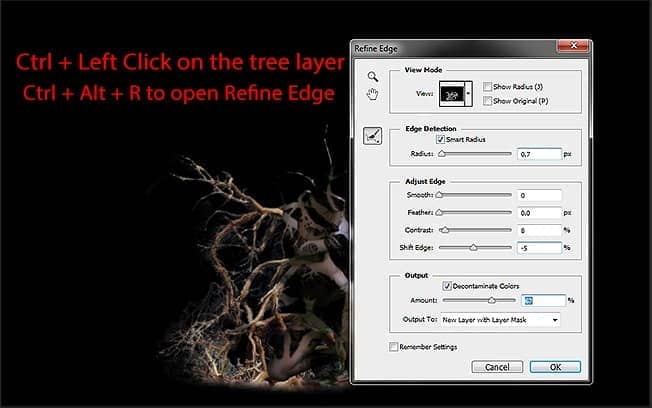
Just with a few tweaks, the white pixels are gone!
Step 14
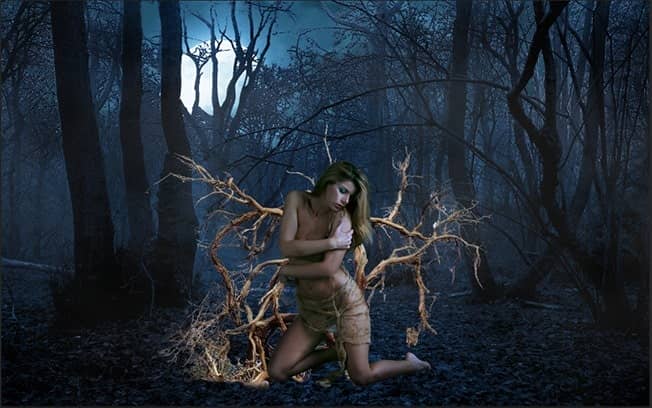
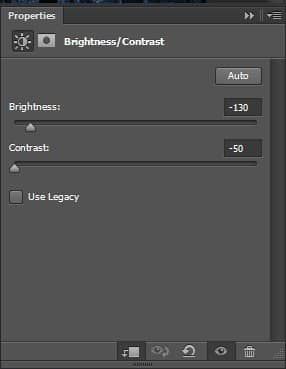
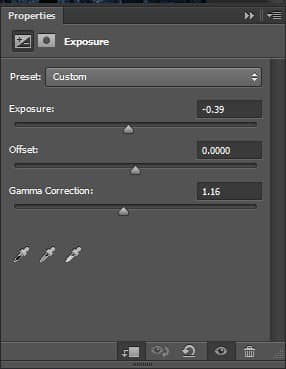
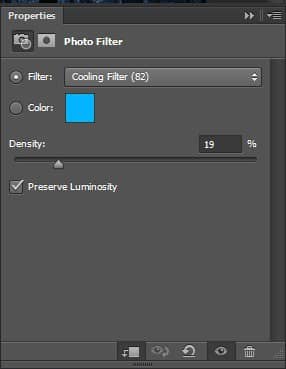
Apply following adjustment layers to the dead tree.
Brightness/Contrast-> Exposure-> Photo Filter
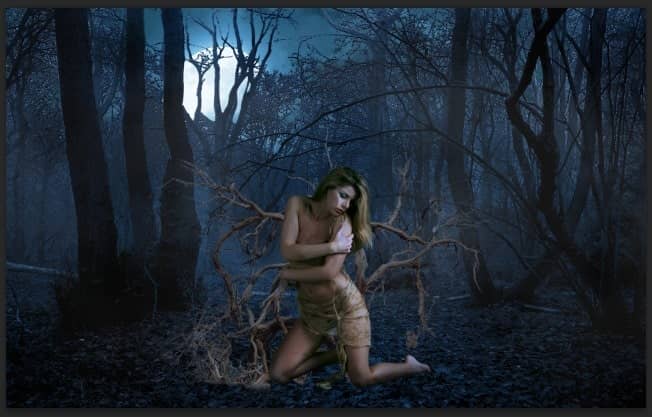
Here is the result
Step 15
Open the Dead Tree 2 and extract the following part
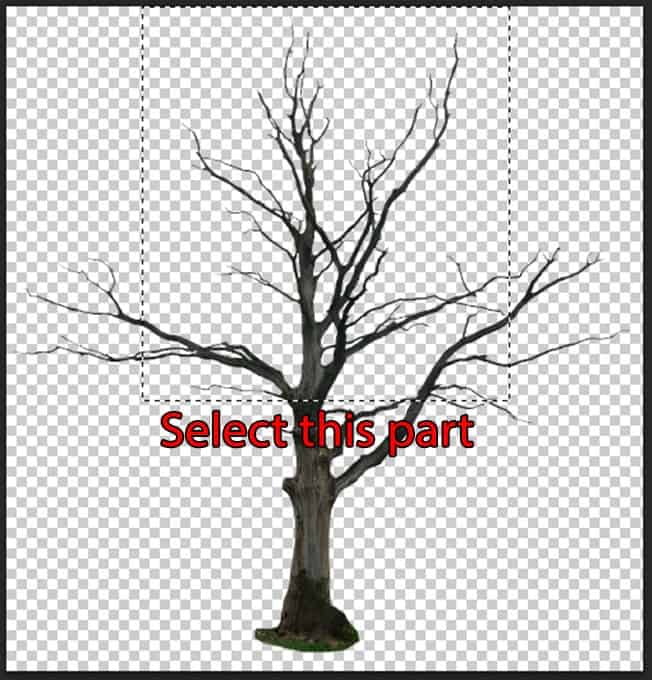
Place it behind the model.
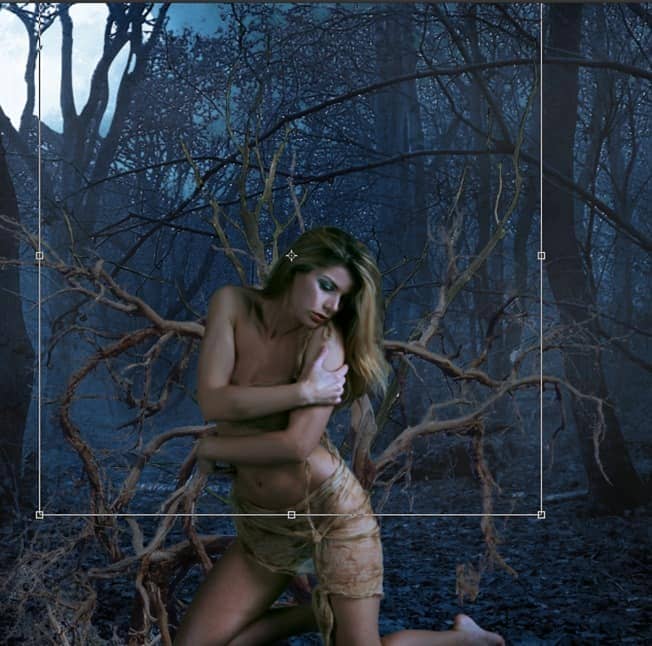
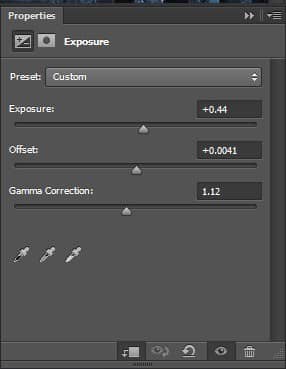
Add an Exposure adjustment layer
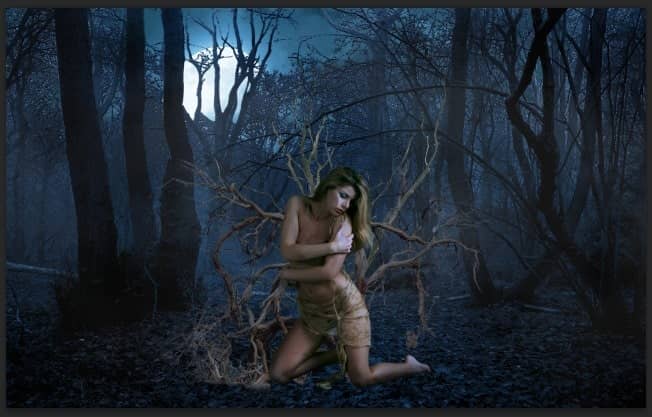
And we have some extra dead tree for the girl!
Step 16
This is a very interesting step and I recommend you try it out by your free will. We will make the model being tangled by the dead tree's branches. Open the Dead Tree 1 stock again and get any piece of branch you want. For example this one
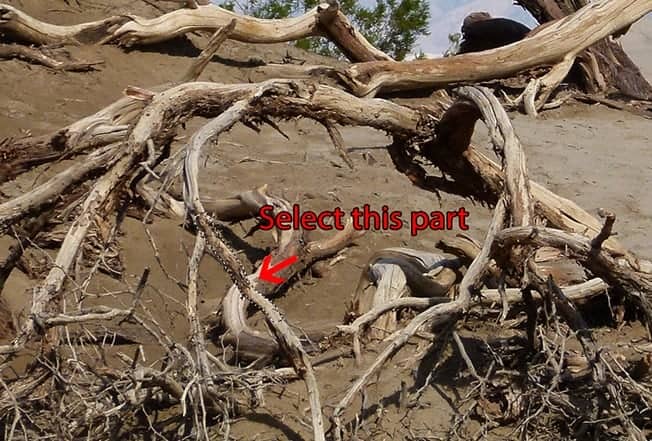
Paste it to our document, right-click on its layer and choose Convert To Smart Object, in this way we can transform the branch freely without fearing the quality reduction.
Now you can bend, twist the branch at your free will. Hit Ctrl + T to bring up the Transform tool, right-click to choose the option. In this picture I use Warp to bend the branch.
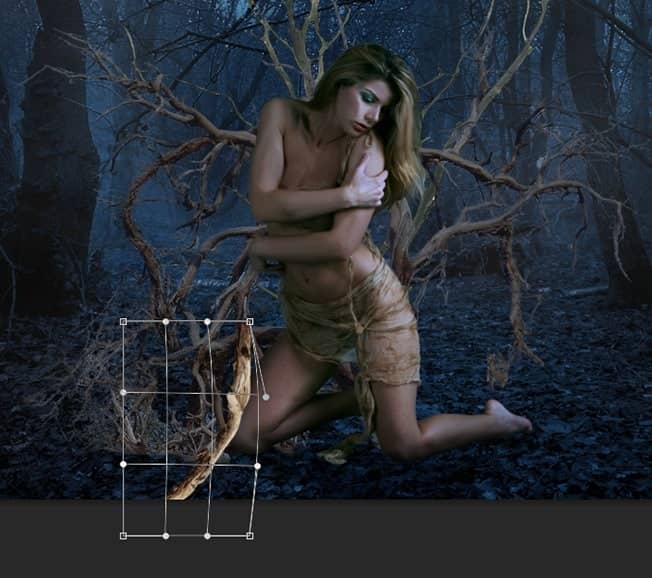
Continue duplicate and bend the branches. Make them twist around the model.


5 comments on “Create an Alluring and Magical Forest Photo Manipulation”
cool Photoshop tutorial..
cool
THANK YOU!! I have been trying to learn to create fog forever
The pixabay link works on my side using Safari and Chrome
I want to try this tutorial but the images on Pixabay don't work. It's telling me this: "Oh snap! Something went wrong! Don't panic!! You can try reloading this page to solve the problem."