Step 33
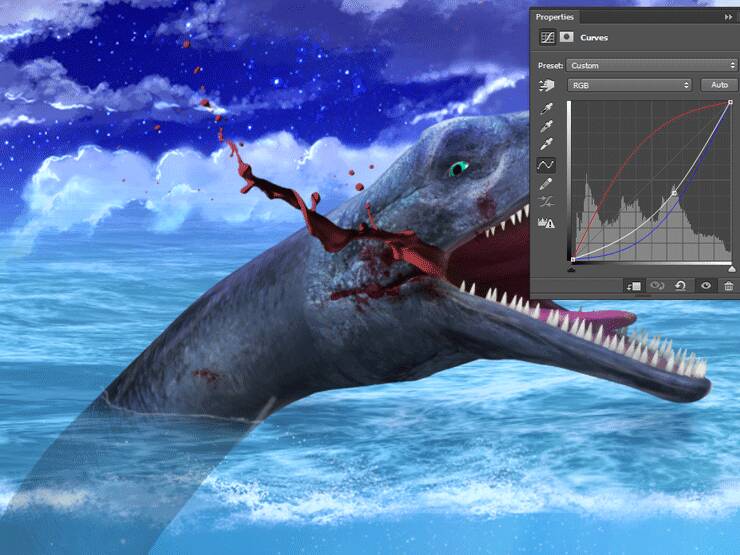
Open the image “Hand” and use the Pen Tool to make a selection of the hand. Copy/paste into our document and place the hand inside the creature’s mouth.

Step 34
Create a Curves Adjustment Layer and clip it to the hand. Drag the curve down to darken it. You can also add a Hue/Saturation Adjustment Layer and clip it to the hand. Drag the saturation slider to -52.

Step 35
Open the image “Boat”. Use the Pen Tool to make a selection of the boat. Copy/paste the boat in our scene and place it as indicated below. Use a layer mask to partially hide the bottom part of the boat (where it is emerged underwater).

Step 36
Create Curves Adjustment Layer and drag the curve down to darken. Clip it to the boat layer.

Step 37
Now create another clipped Curves Adjustment Layer but this time drag the red curve up to increase the color intensity of the boat.

Step 38
We should tone down the intensity of the boat a little. Create a Hue/Saturation Adjustment Layer and clip it to the boat layer. Drag the saturation slider to -74.

Step 39
Create yet another clipped Curves Adjustment Layer and clip it to the boat layer. This time use the settings shown below to increase the contrast.

Step 40
Create a new layer and set the blending mode to Overlay or Color Dodge. Use a white round soft brush to paint over the boat to make it stand out like we did at step 27.

Step 41
Create a new layer and make a wave line where the water surface hits the boat with the chalk brush.

Step 42
Open the image “Dolphin”. Make a selection of the dolphin and paste it in our scene. Place the dolphin in the background as indicated below and lower the opacity to 69%. Use a splash brush to mark the place where the dolphin jumps from the water.

Step 43
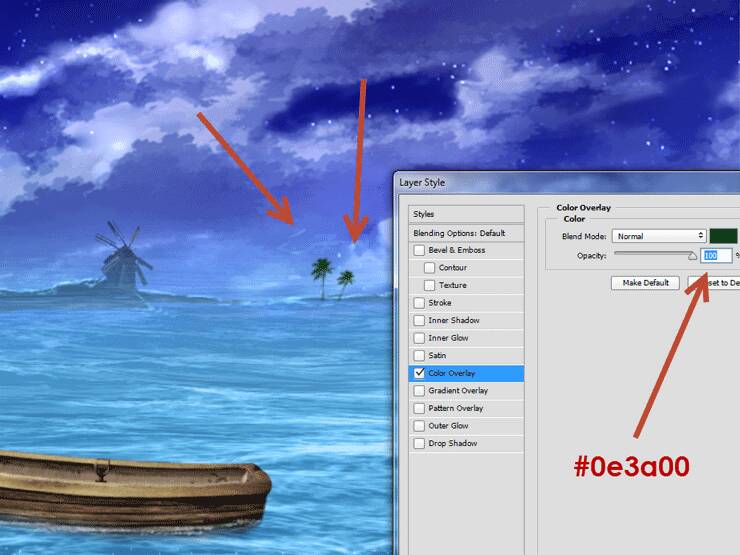
On the distant land near the mill use the palm brush to create a couple of dark palms. Apply a dark green color overlay effect.

Step 44
Time to put a pirate in the boat! Open the image “Girl”. Use the Pen Tool to make a selection of the girl (it does not have to be extremely precise as we will resize the girl). Place the pirate girl in the boat as shown below. Use the layer mask to hide the legs so that it looks like she is inside the boat.
12 responses to “Create an Epic Pirate Sea Battle in Photoshop”
-
This is so awesome! Detailed tutorial, thank you!
-
Great! How to view this article..
-
Nice
-
oh! nice tutorial, thanks for the shared.
-
thx!
I’ve spent 3 days for this tut-techniques and I think (hope-) ) I’ve done something very good) -
Omar EL-Midany wa7da b wa7da :P
-
اللهم صل عالنبي :D
-
تحوس انه نجم :v
-
-
The blood is too fake. It has a milky material and too much blood for merely a human.
-
wow nice work but the thing is that am new to this how can i get your article. i serious need to learn this, hope to hear from
-
An
-


Leave a Reply