Luminar AI lets you turn your ideas into reality with powerful, intelligent AI. Download the photo editor and see how you can completely transform your photos in a few clicks.
Step 30
Add Color Balance adjustment layer. Layer > New Adjustment layer > Color Balance or use marked shortcut. Then make it a clipping mask (Alt+Ctrl+G, Layer > Create Clipping Mask).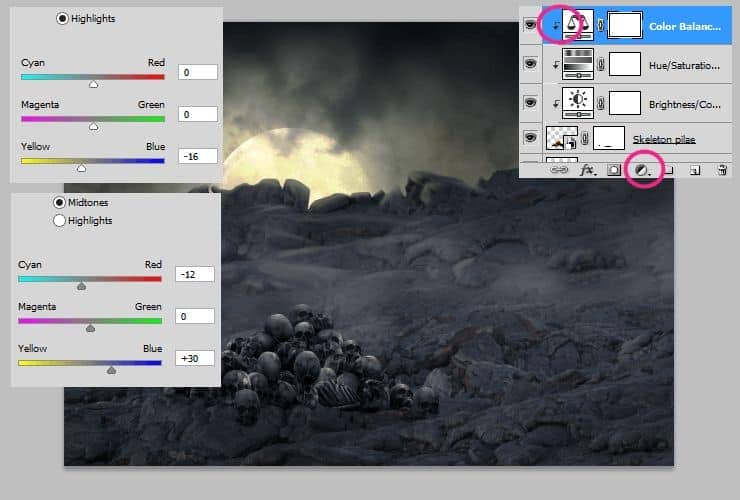
Step 31
Place "Robed 6" stock to your image. Click on white canvas next to layer thumbnail and use hard round, small size brush. Mask it.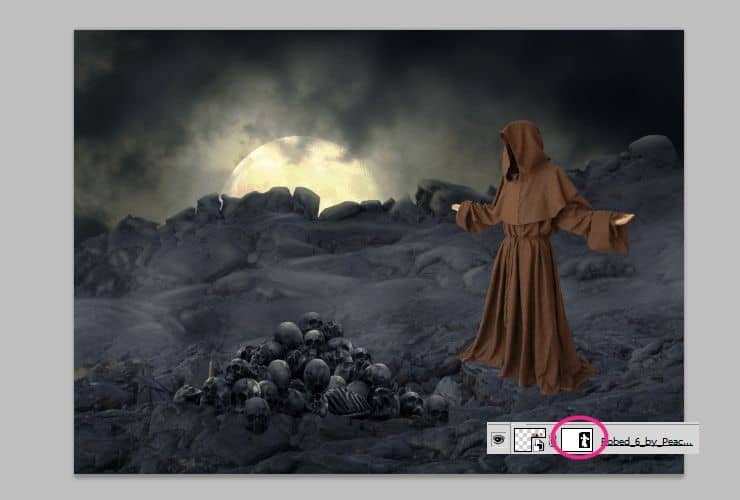
Step 32
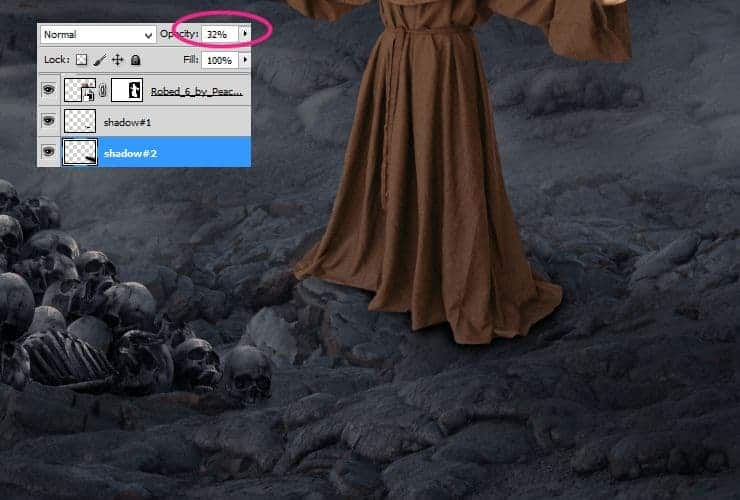
Below this layer, add new blank layer (Layer > New > Layer..., Shift + ctrl + N or shortcut). Pick small soft round brush and draw with black color shadows strictly below monk. Then, change its opacity to around 60-70%.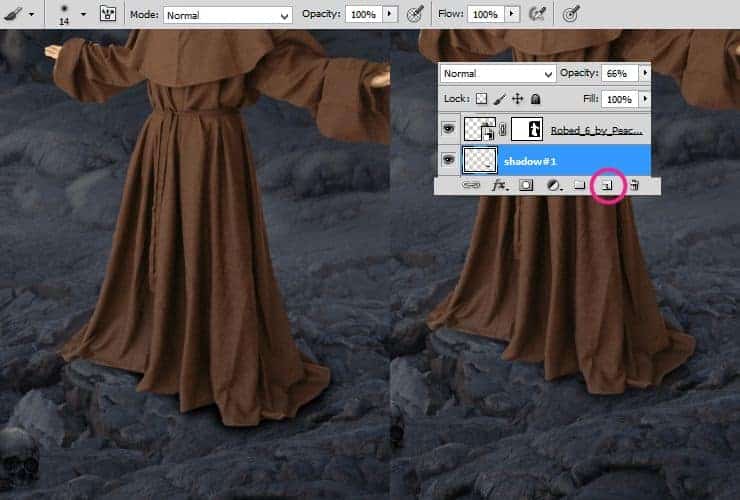
Step 33
Again add new blank layer below shadows (Layer > New > Layer..., Shift + ctrl + N or shortcut). Pick bigger soft round brush and draw more and bigger shadows.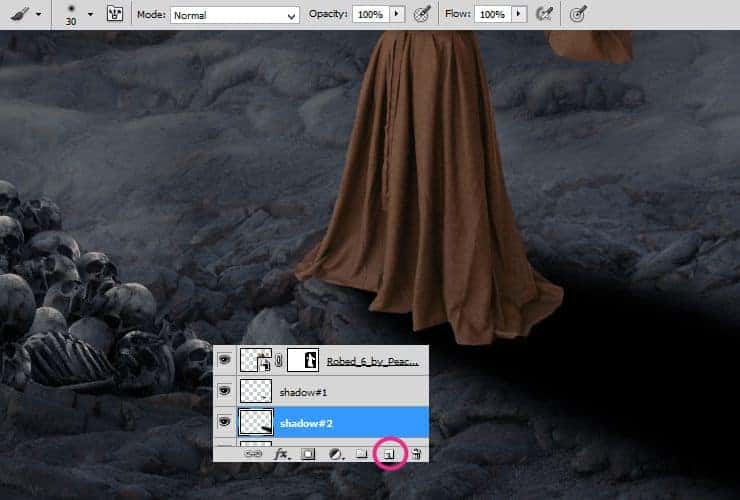
Step 34
Add Brightness/Contrast adjustment layer. Layer > New Adjustment layer > Brightness/Contrast or use marked shortcut. Then make it a clipping mask (Alt+Ctrl+G, Layer > Create Clipping Mask).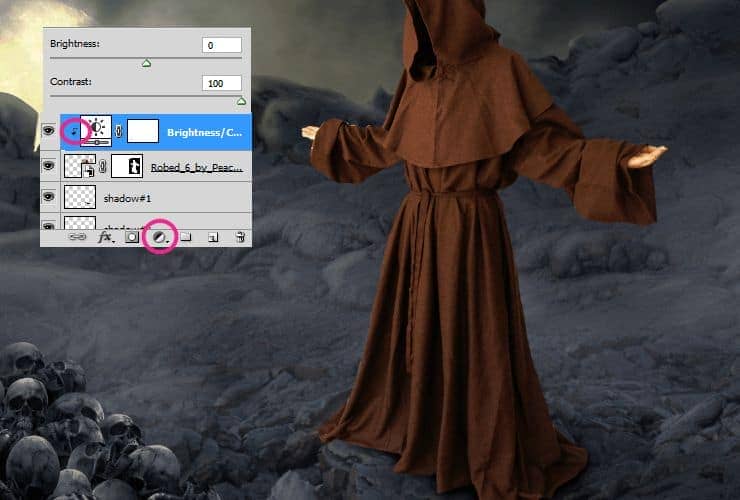
Step 35
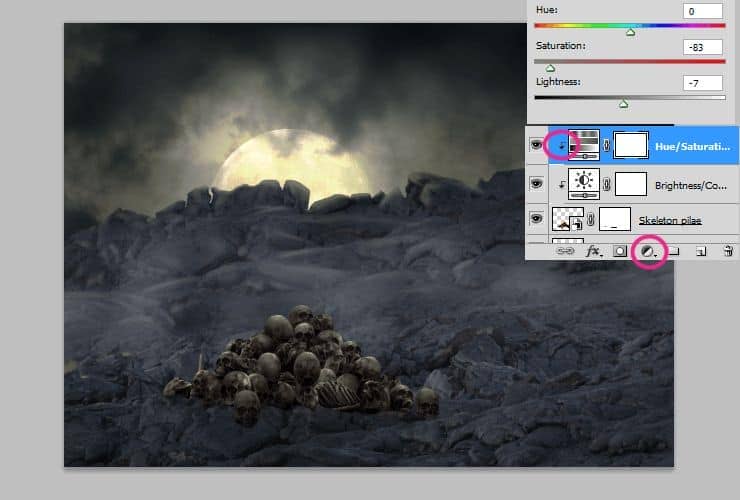
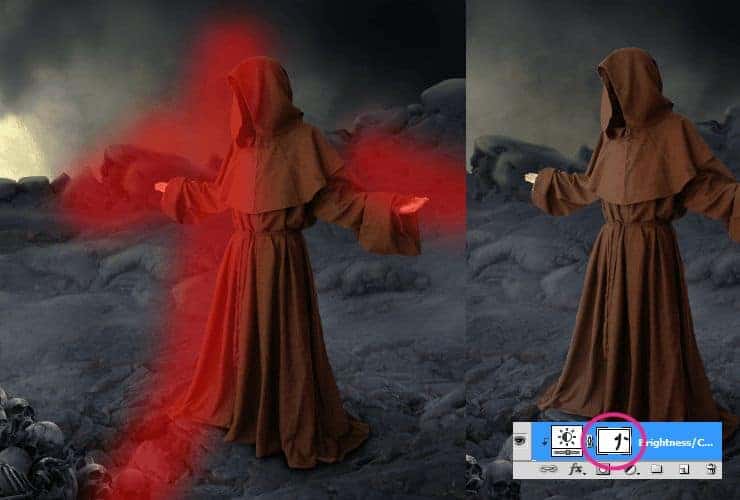
Add Hue/Saturation adjustment layer. Layer > New Adjustment layer > Hue/Saturation or use marked shortcut. Then make it a clipping mask (Alt+Ctrl+G, Layer > Create Clipping Mask).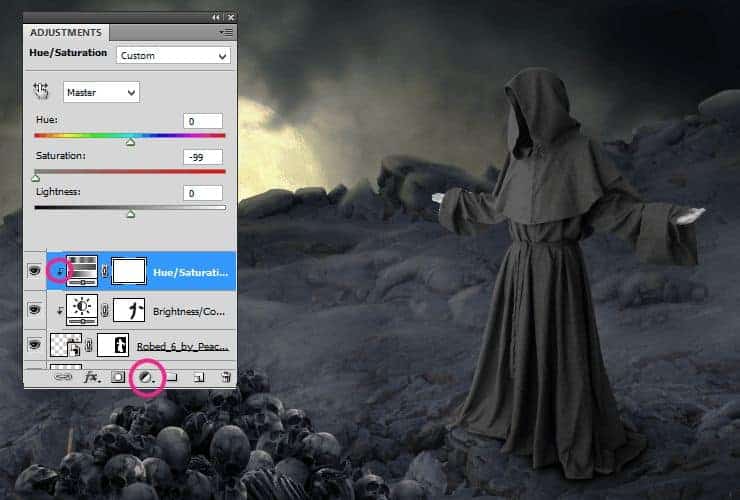
Step 36
Let's fix hands. Add Brightness/Contrast adjustment layer. Layer > New Adjustment layer > Brightness/Contrast or use marked shortcut. Then make it a clipping mask (Alt+Ctrl+G, Layer > Create Clipping Mask). Then, decrease opacity of this layer to 55%.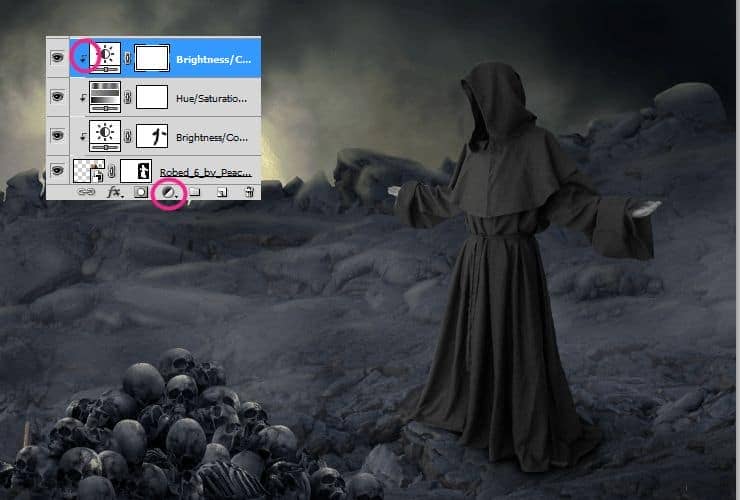
Step 37
Click on white canvas next to layer thumbnail and use hard round, small size brush. Mask everything except hands.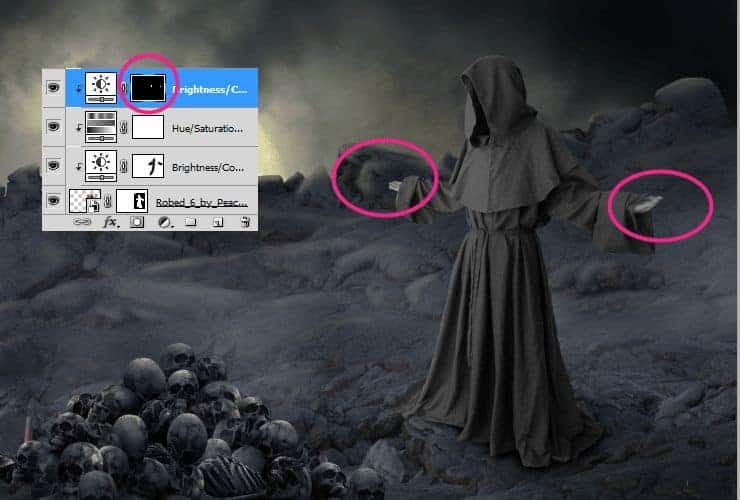
Step 38
It's time to add some colors for monk. Add Color Balance adjustment layer. Layer > New Adjustment layer > Color Balance or use marked shortcut. Then make it a clipping mask (Alt+Ctrl+G, Layer > Create Clipping Mask).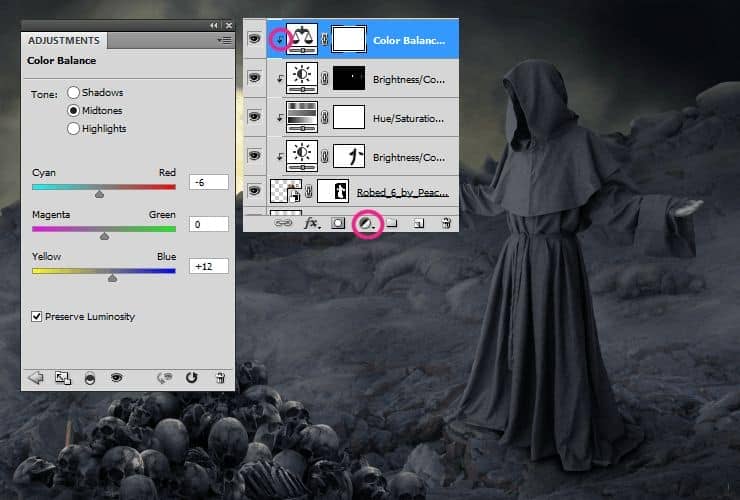
Step 39
Now you'll make lights on monk. Add new blank layer (Layer > New > Layer..., Shift + ctrl + N or shortcut). Then make it a clipping mask (Alt+Ctrl+G, Layer > Create Clipping Mask). Use soft round brush for make lights. Pick #f0e8ae color, set opacity of brush around 50%. Use pressure opacity brush.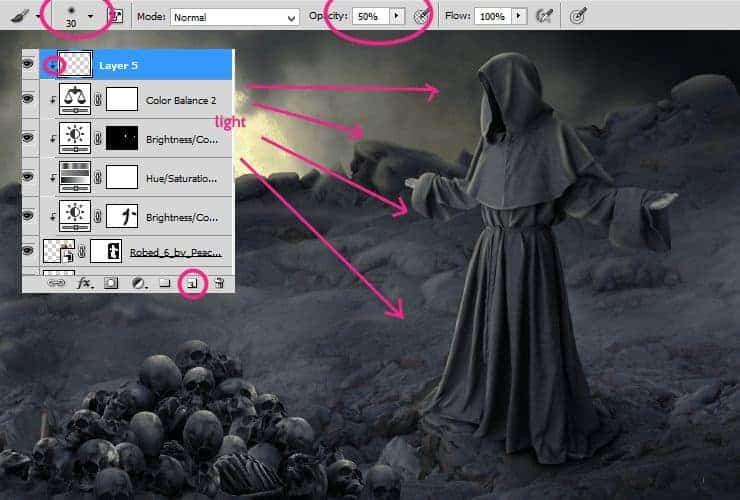
Step 40
Now you'll create rosary. Add new layer. Use small, hard round brush. Draw base for your rosary - simple dots. Use #4c4741 color.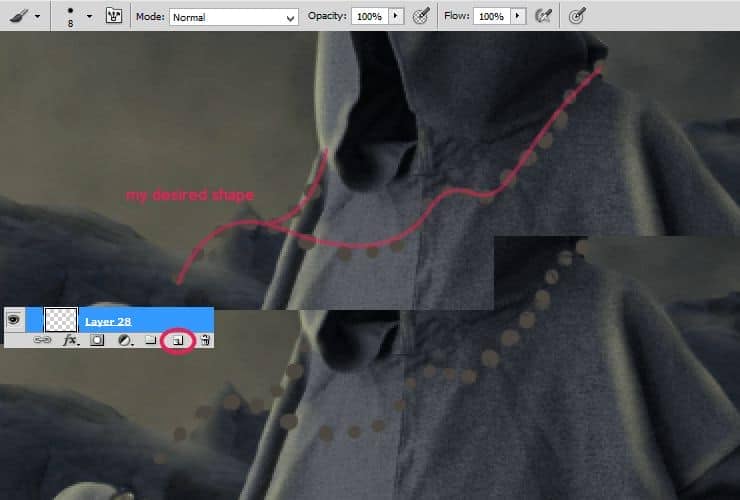
Step 41
Place wood stock to your image, then make it a clipping mask (Alt+Ctrl+G, Layer > Create Clipping Mask).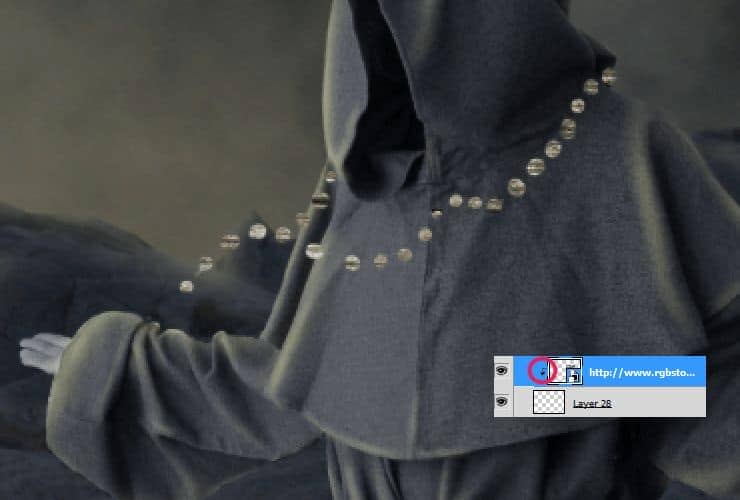
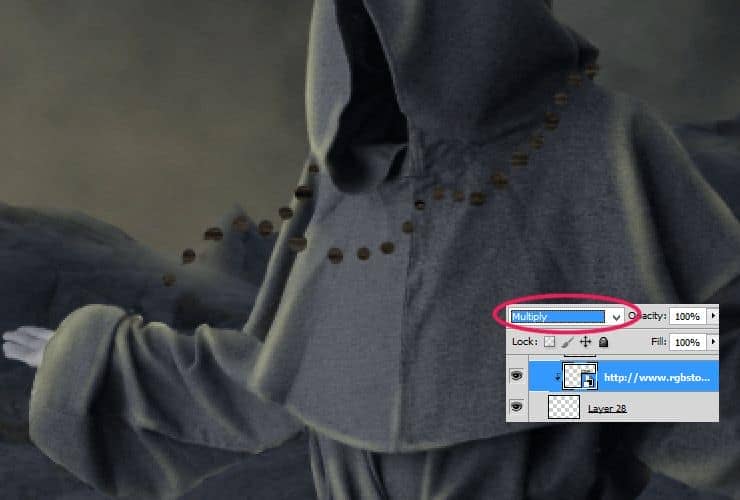
Step 42
Back below rosary layer. Add new layer (Layer > New > Layer..., Shift + ctrl + N or shortcut). Draw neck-chain as is shown - use small, soft round brush and draw base at first. Then, draw lights on base. After, you should make shadows. Remember about light source.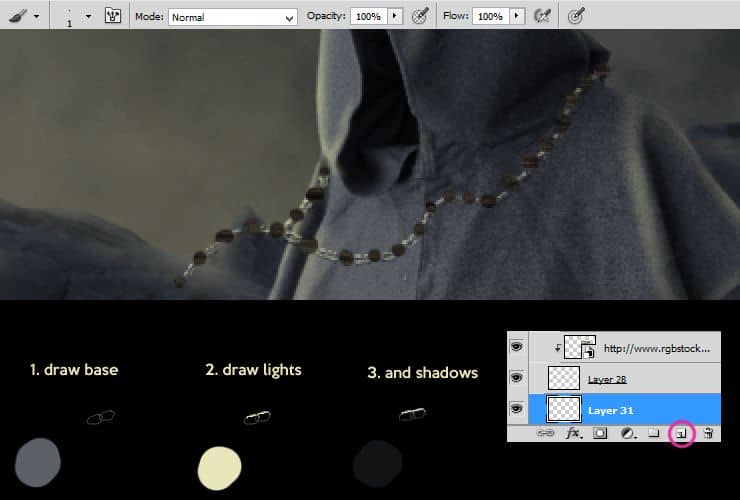
Step 43
Back to rosary layer. Add new layer (Layer > New > Layer..., Shift + ctrl + N or shortcut), then make it a clipping mask (Alt+Ctrl+G, Layer > Create Clipping Mask). Draw lights on beads. Use medium (ex. 24px.) brush with opacity decreased to around 70%. Remember about light source.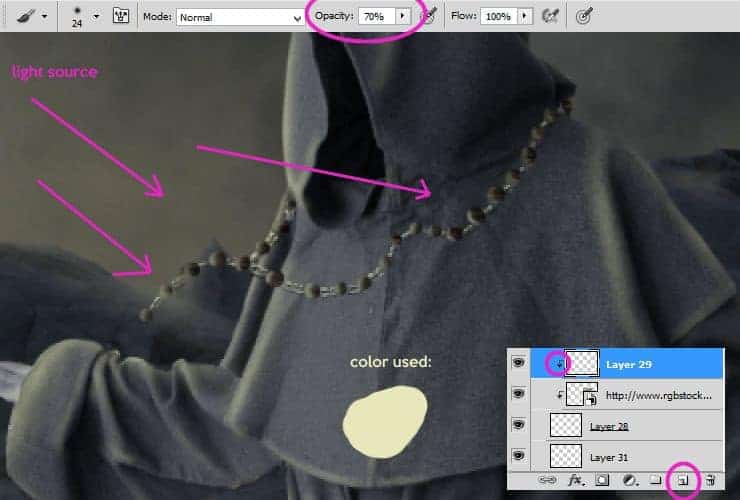
Step 44
Again add new layer (Layer > New > Layer..., Shift + ctrl + N or shortcut), then make it a clipping mask (Alt+Ctrl+G, Layer > Create Clipping Mask). Use small brush and lighter color for making highlights on beads.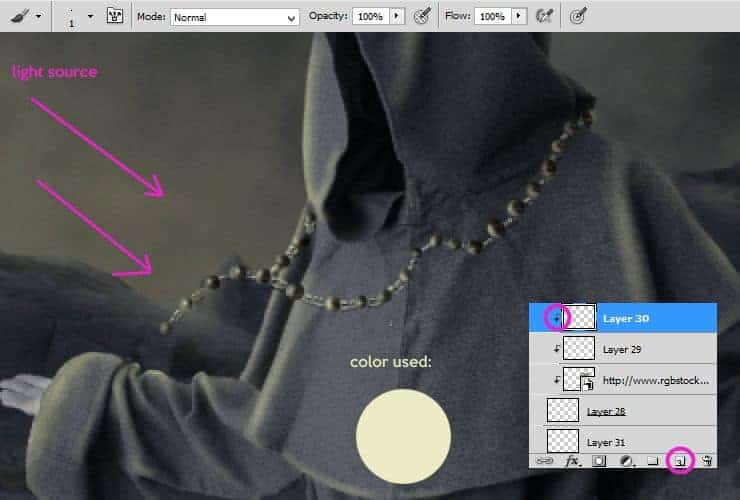
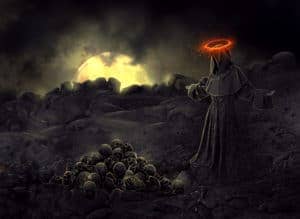

6 comments on “Create a Fantastic Photo Manipulation of a Dark Monk”
what the
This is great! ❤
really nice!!<3
really nice!!<3
would be really great if you could link ALL the different type of stocks, there's no halo ''food 012'' and the lavastone is the wrong image!!
en español