Download Lightroom presets and LUTs, absolutely free. Use the presets to add creativity and style to your photos.
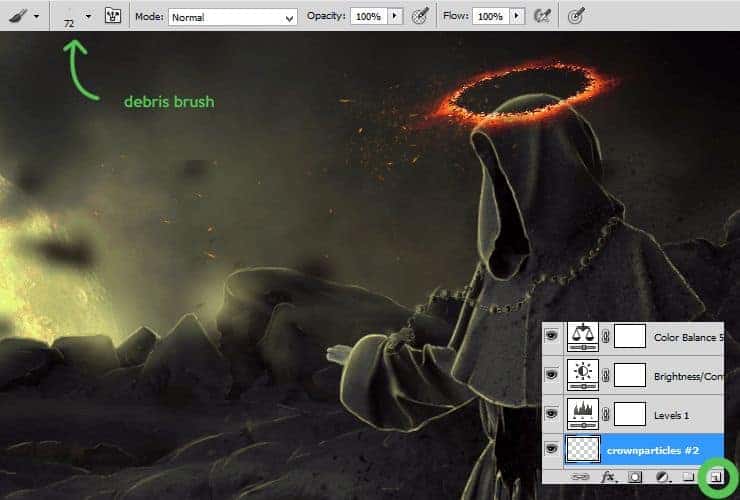
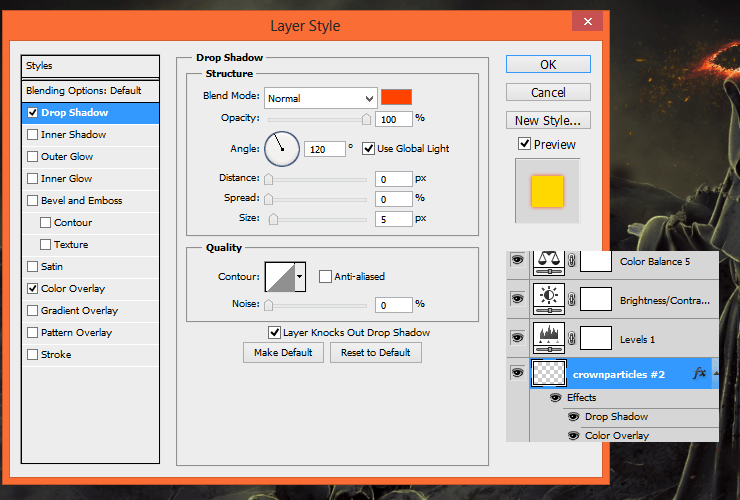
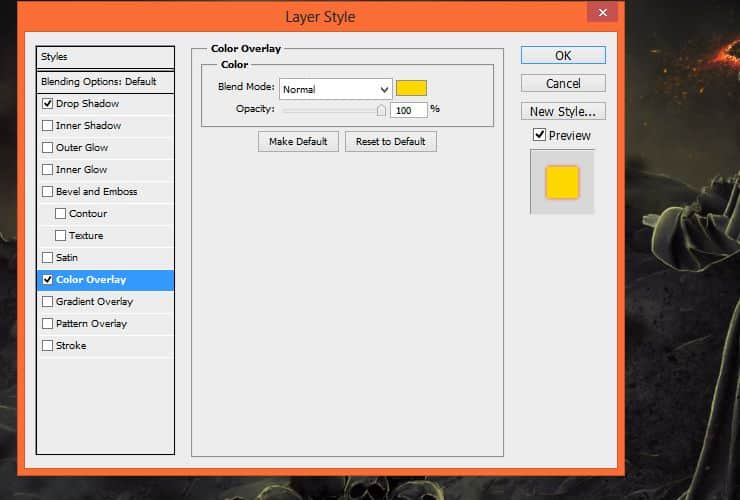
Step 72
Repeat 71 step. Then, add to created layer Motion blur. Filter > Blur > Motion blur.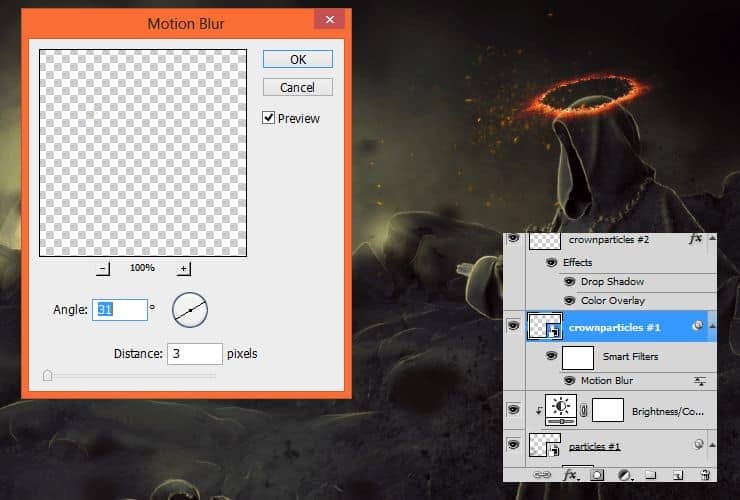
Step 73
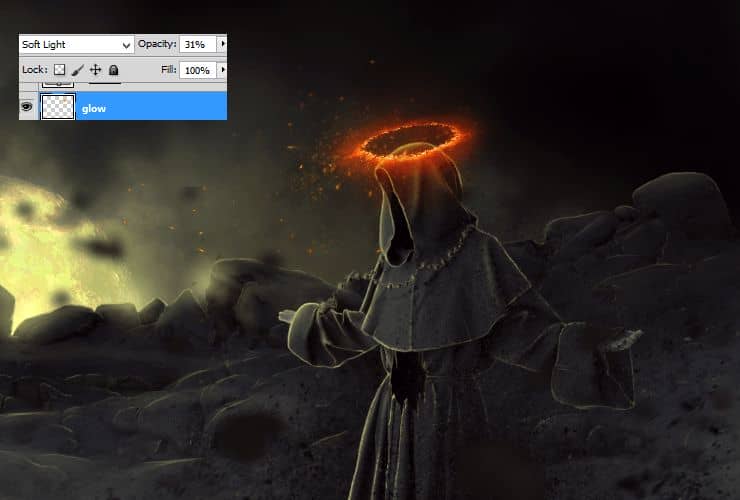
Now, glow. Below halo crown layer, add new layer (Layer > New > Layer..., Shift + ctrl + N or shortcut). Choose soft, round brush with pressure opacity. Set light-orange color and draw glow on hood.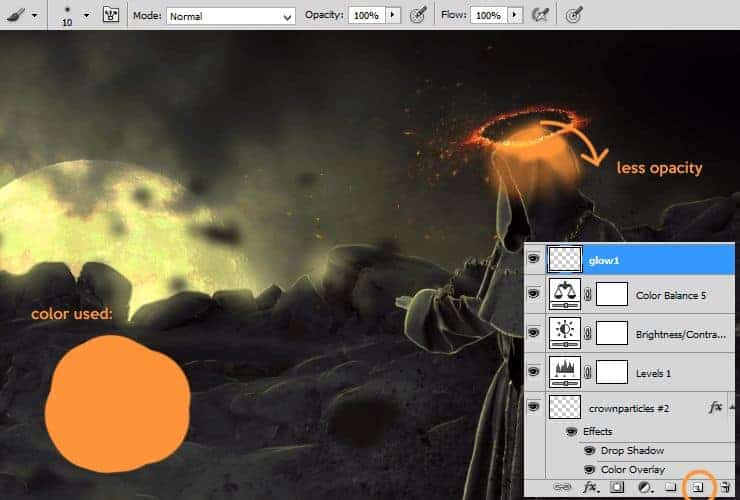
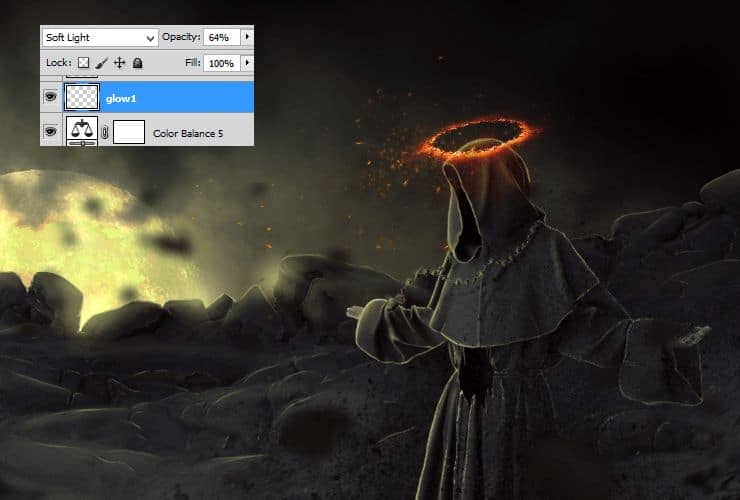
Step 74
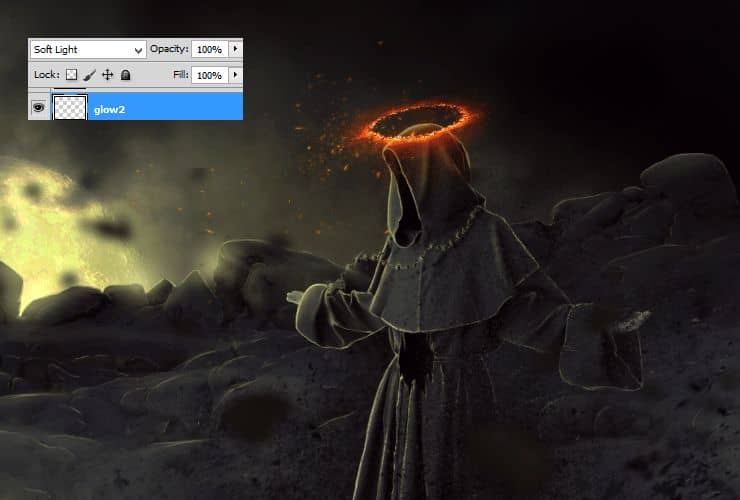
Add new layer (Layer > New > Layer..., Shift + ctrl + N or shortcut). Choose soft, round brush with pressure opacity. Set light-orange color, 60% opacity of brush and draw glow on halo.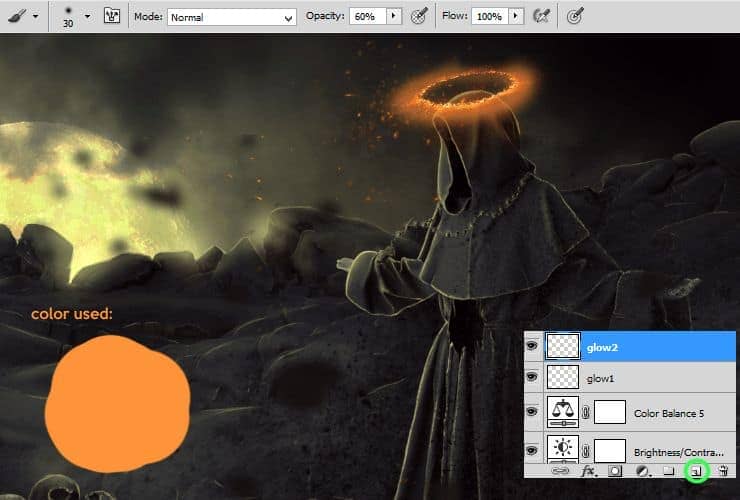
Step 75
You can duplicate created layer with second glow, for better effect.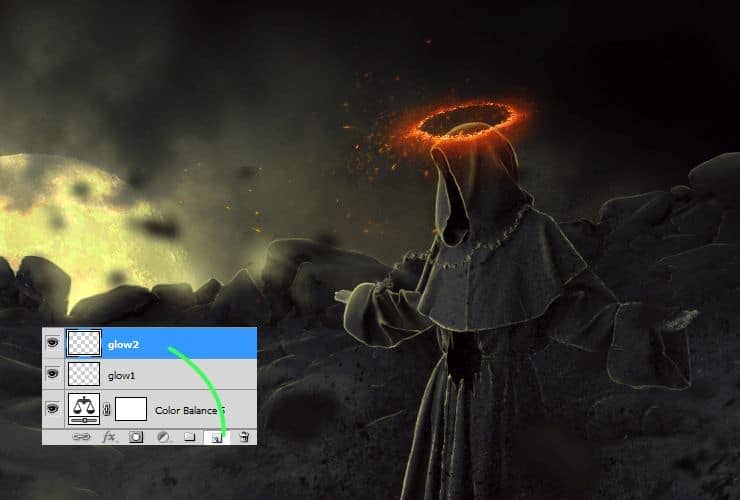
Step 76
Above layer with halo, add new layer (Layer > New > Layer..., Shift + ctrl + N or shortcut). Choose soft, round brush with pressure opacity. Set light-orange color and draw big dot around (color: ff9236).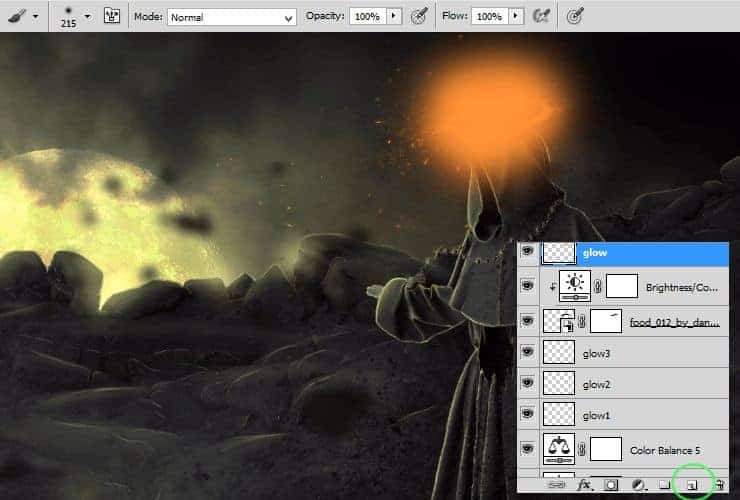
Step 77
At the end, add Color Balance adjustment layer - Layer > New Adjustment layer > Color Balance.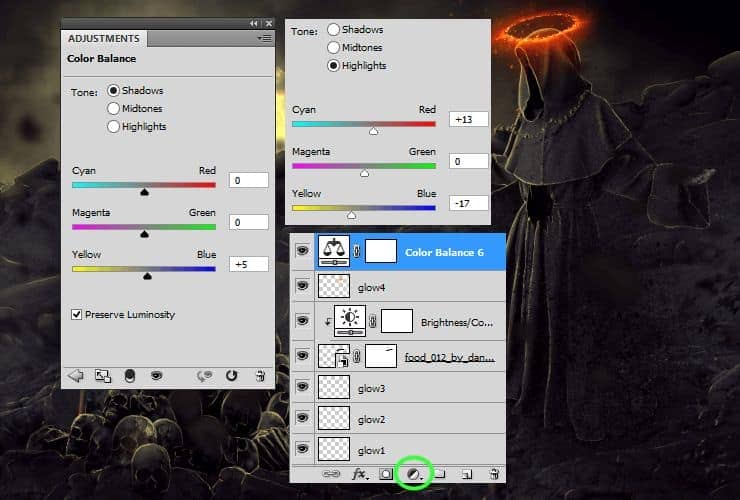
Final Results
![final-results[1] final-results[1]](https://cdn.photoshoptutorials.ws/wp-content/uploads/2014/10/finalresults1.jpg?strip=all&lossy=1&quality=70&webp=70&avif=70&w=1920&ssl=1)
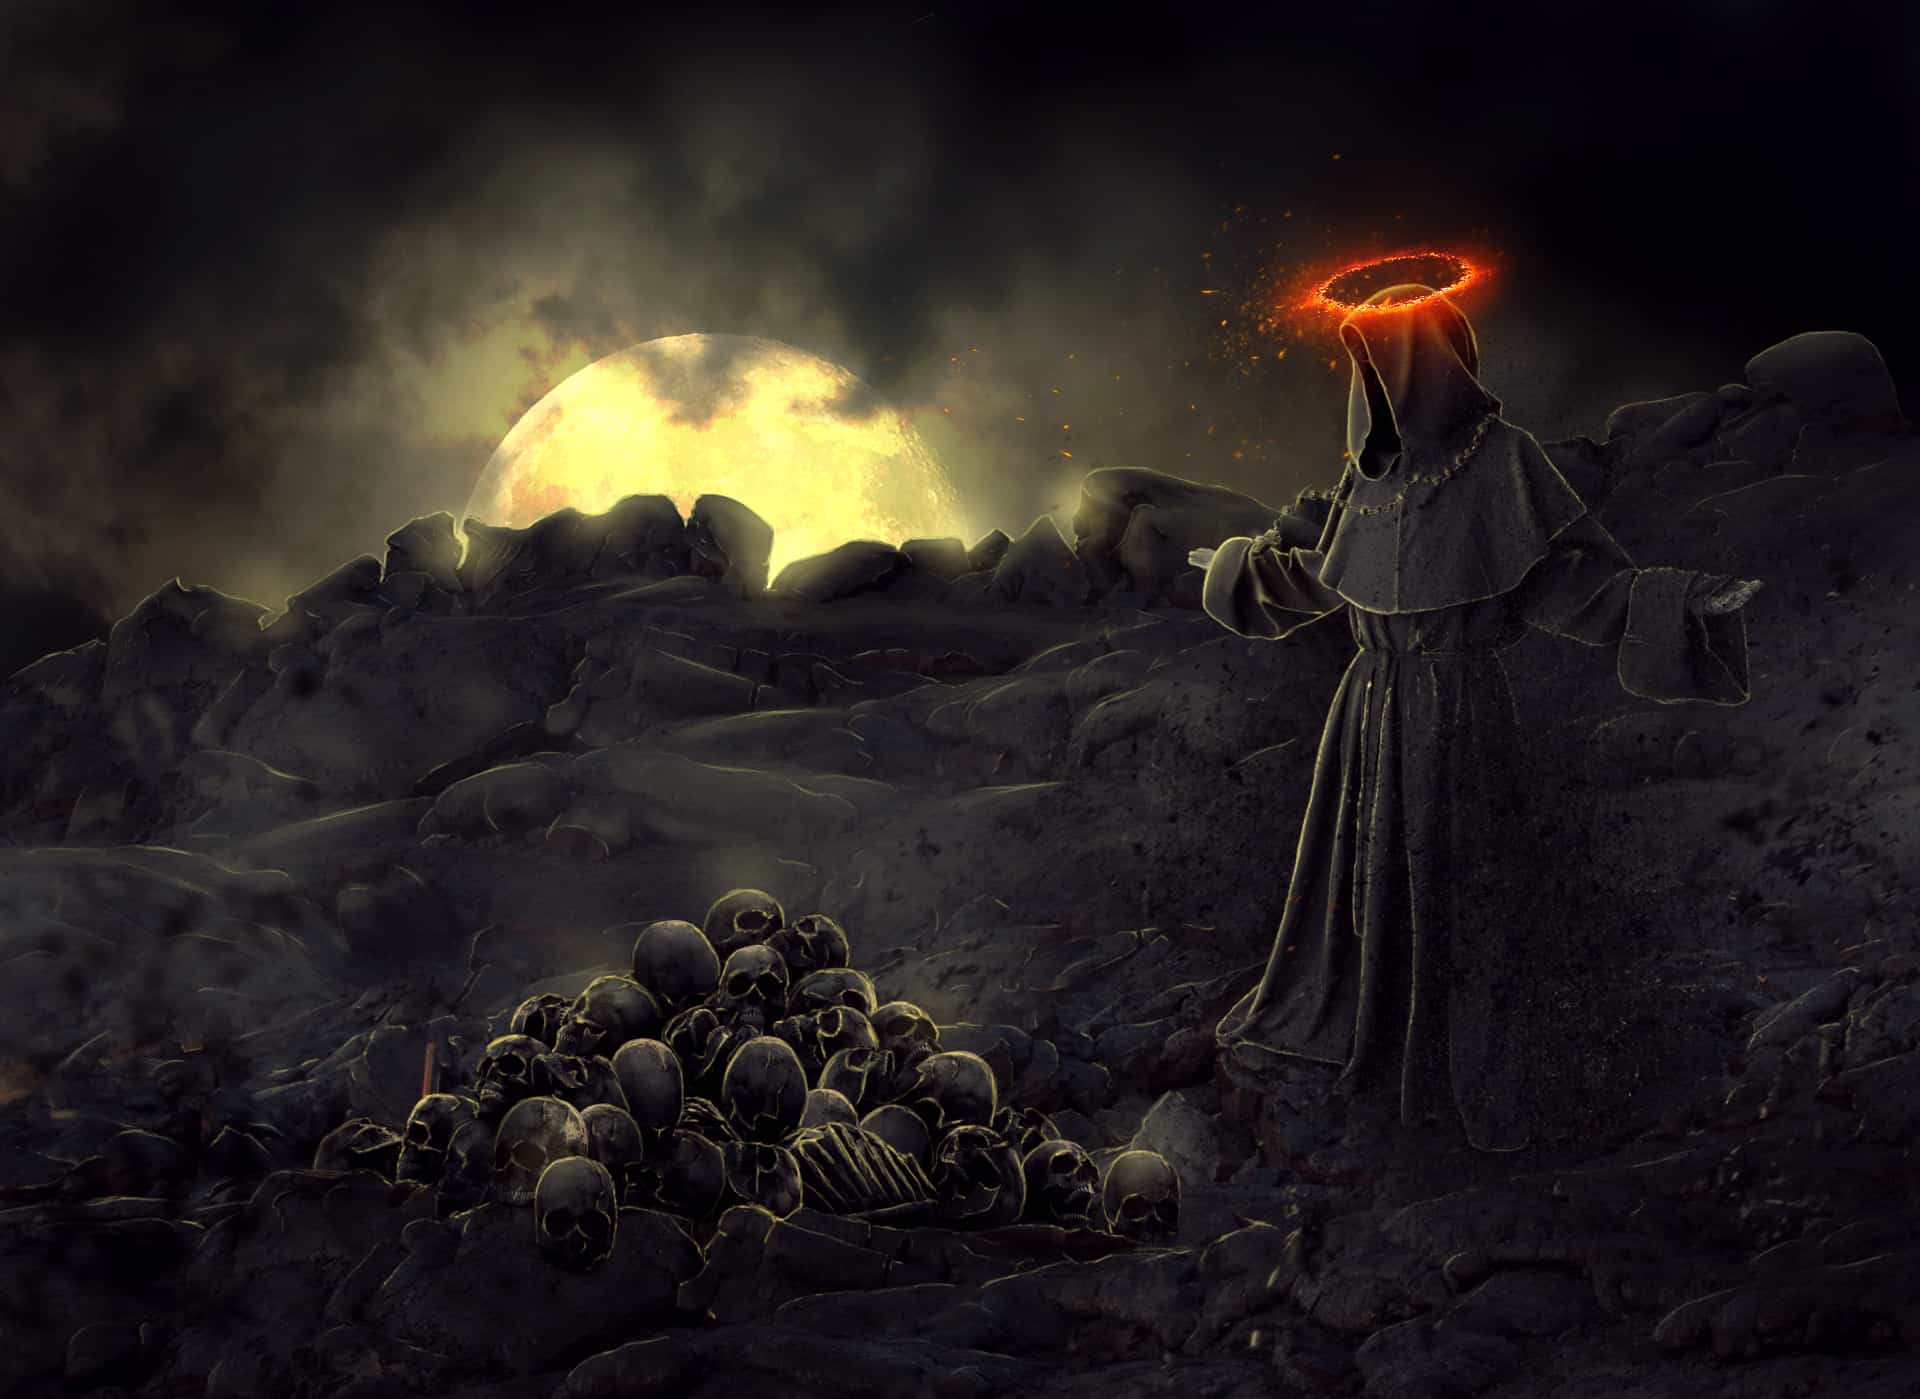
 Thank you for following this tutorial! I hope everything is clear :). I'm graphic designer and you can find me here:
6 comments on “Create a Fantastic Photo Manipulation of a Dark Monk”
what the
This is great! ❤
really nice!!<3
really nice!!<3
would be really great if you could link ALL the different type of stocks, there's no halo ''food 012'' and the lavastone is the wrong image!!
en español