Luminar AI lets you turn your ideas into reality with powerful, intelligent AI. Download the photo editor and see how you can completely transform your photos in a few clicks.
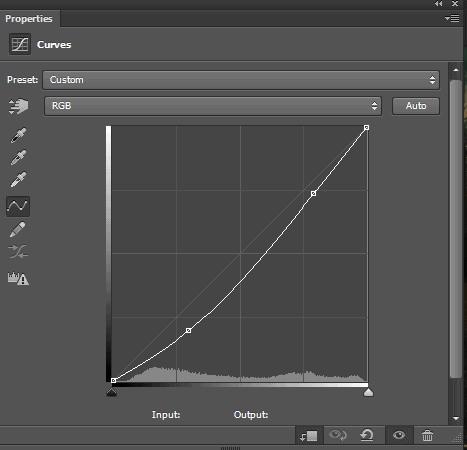
Step 18
Next I added a gradient fill adjustment layer and choose the color #133943 as shown in the image. Change the blend mode to soft light and opacity to 49%.Create clipping mask for this layer also.
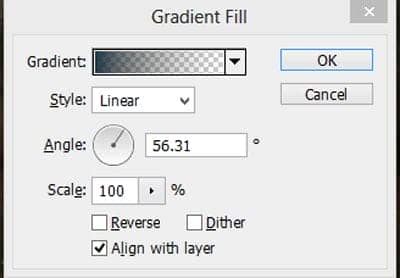
After applying gradient fill, result should be similar to this.

Step 19
Now , darken the image by applying a hue saturation adjustment layer.Set the hue to +8 , saturation to -41 and lightness to -26.Create clipping mask for this layer also.
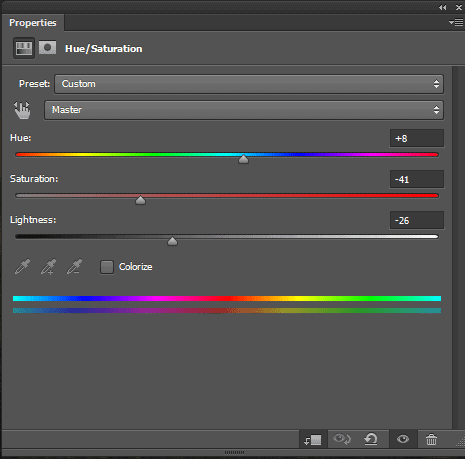
Here is the results:
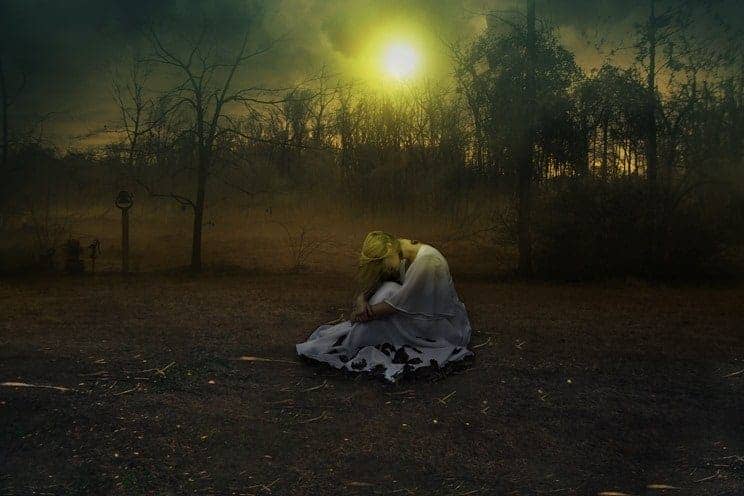
Step 20
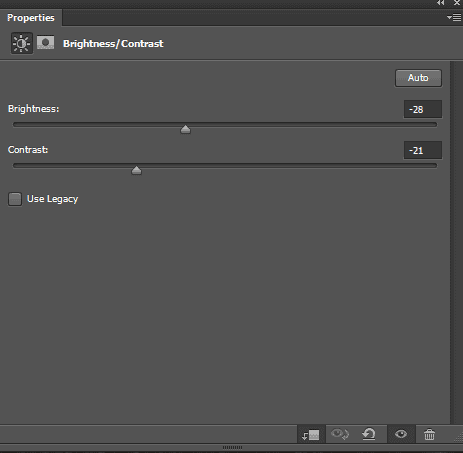
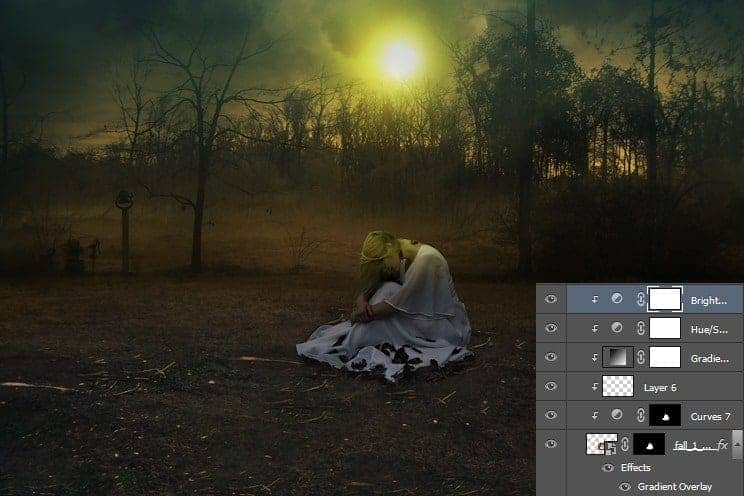
I added a Brightness and contrast adjustment layer. Set the Brightness to -28 and Contrast to -21 then reduce the opacity to 50%.Create clipping mask too for this layer
Result should be similar to this.
Step 21
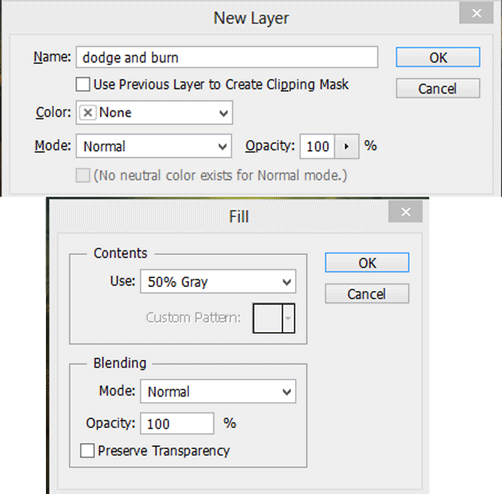
Now create a new layer by pressing ctrl+shift+N key, name it dodge and burn.Go to edit menu then fill it with 50% gray.Set the layer blend mode to overlay.
Step 22
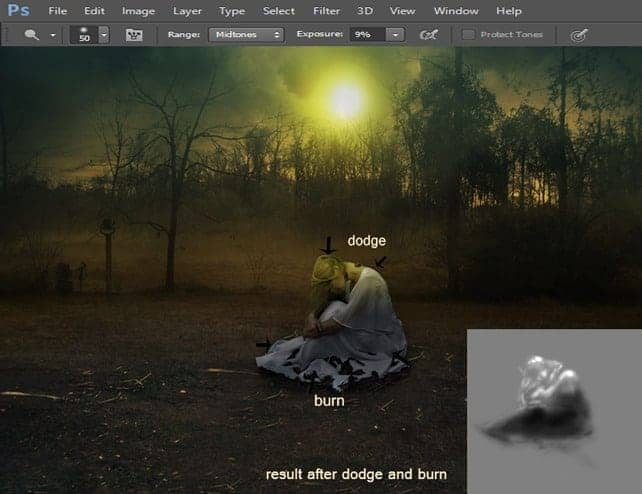
Pick the burn on tool Panel by pressing (O) on the keyboard set the the range to midtones and strength to 9% and paint the dark part on the model also set the size to 50 pixels. Then grab the dodge tool and range to midtones,strength to 9% size to 50 pixels then paint top part of the model to make highlights.Result should be similar to this
Step 23
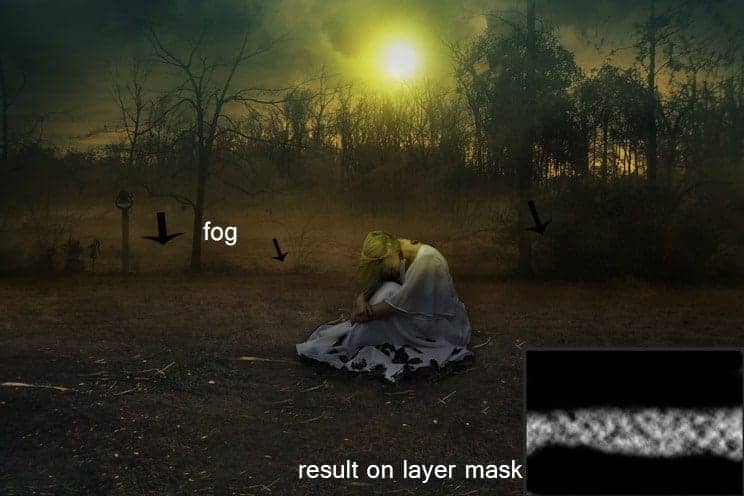
Next I created the fog by applying cloud filter. To do this create a new layer below the model layer by pressing shift+ctrl+N key, set your foreground color to #858585 and background to color #FFFFFF.Go to-filter-render-clouds and apply the clouds filter two times.

Step 24
Now apply layer mask to image and grab the soft brush and opacity to 80% as well as flow.Then paint the top and bottom part of the layer.Name it Fog.The change the blend to soft light and opacity to 40% The result should be similar to this.Before heading forward Put all the model layer into the group name that group Model.
Step 25
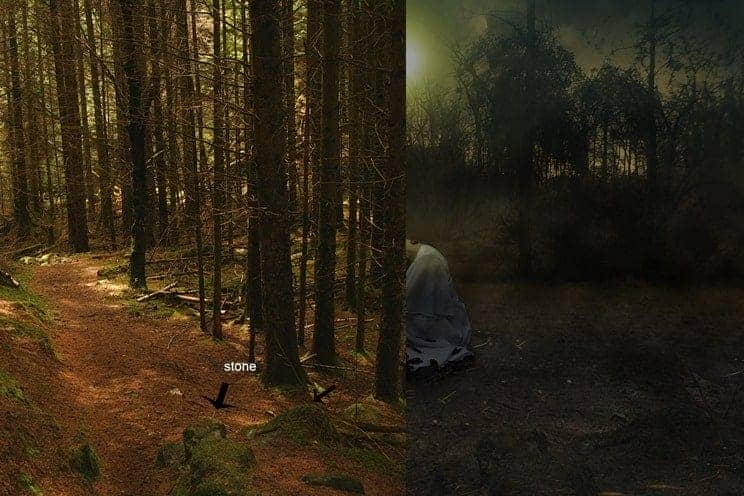
Now I added to stones to the image. Place the dark forest 6 by miranda-rose stock from deviantart above the model layer as shown below.I only want to keep the stones.
Step 26
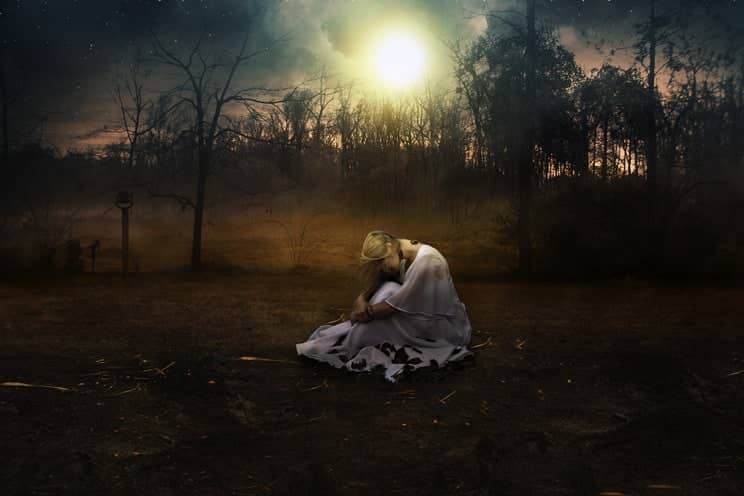
To keep the stones, We need to apply the layer mask to the image and pick soft round brush opacity & flow to 100%. Then hide the top part of the image because we only wanted the stone.

10 comments on “Create a Fantasy Moonlight Emotional Manipulation In Photoshop”
Thanks i enjoyed creating this on Photoshop.
Thank you!
This tutorial is perfect for making book covers. I'll have to try it out! Thanks!
Nice
Thank you
nice work thanks.
awesome tone!thank you :D
wow! your working process is so nice......thanks for sharing..................
Bad link Foggy Night.zip
really very nice.....i am also using photoshop and it is very usefull to me ..