Create an advertisement about LASIK laser eye surgery. In this Photoshop tutorial, you’ll be manipulating a photo of an eye to create a LASIK flap and learn techniques for drawing transparent objects.
Perform Laser Eye Surgery on a Photo with Photoshop
Preview of Final Results

What is LASIK?
LASIK stands for Laser-Assisted in Situ Keratomileusis. It is a popular type of refractive laser eye surgery generally used to help people with near or farsightedness see better. The LASIK process includes:
- Flap creation – Using a metal blade, the cornea is cut leaving a hinge on one side to create a flap.
- Laser remodeling – An Excimer laser remodels the corneal stroma by vaporizing tissue.
- Repositioning the flap – The flap is carefully repositioned back on the eye.
In this Photoshop tutorial, we’ll create an advertisement for LASIK laser eye surgery. Please enjoy the tutorial as a learning experience and not as an instructional about how to create a LASIK advertisement for real-world projects. The completed ad sends a misleading message about how LASIK laser eye surgery works. In a real LASIK laser eye surgery, it’s not as simple as what will be shown in the ad we’re making. There are many things placed on the eye or around the eye such as a device that keeps the eyelids opened; all of which will look more unpleasant than what we’ll be making in Photoshop.
Stock Photos
You may purchase the same stock photo that we used or use a similar photo of your own. Please download or use a high resolution photo at least 2000 pixels wide. Click on the image below if you would like to purchase the same stock photo that we used for this tutorial.

Step 1 – Open a photo of an eye
Start by using a photo of an eye like the image below. It should have some copy space to place the text.

Step 2 – Create a selection of the background
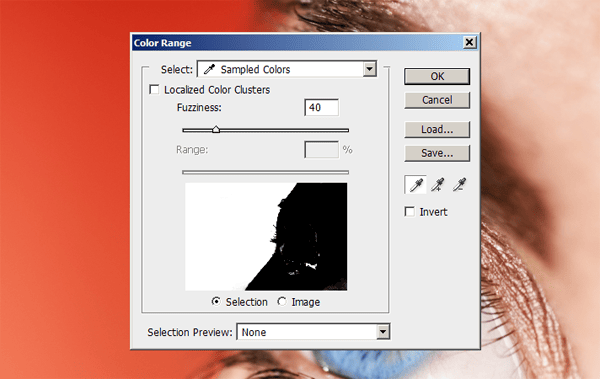
First we’ll change the color of the background to a more calming blue. To begin, use the color range tool (Select > Color Range) to create a selection of the background. To use the color range tool, hold the Alt key and click on different areas of the background until the whole background is selected.

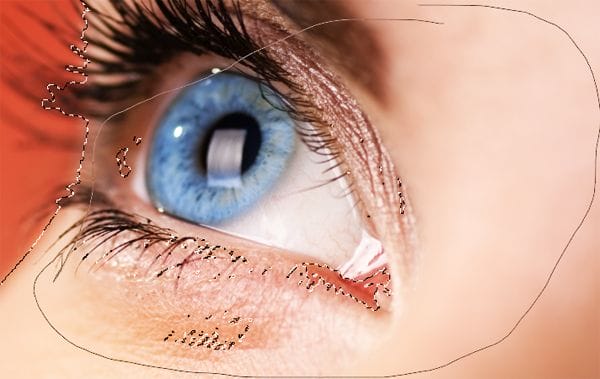
Use the lasso tool to deselect the areas that are not part of the background. Hold down the Alt key while using the lasso tool to deselect areas.

Here’s what the selection looks like so far. It doesn’t have to be entirely accurate because we will just be changing the hue of the selection. However, for other times when you will be changing the brightness of the selected area, you have to make sure that your selection is very accurate because flaws will be more visible.
2 responses to “Perform Laser Eye Surgery on a Photo with Photoshop”
-
lol someone stole your pic and it got on Digg
http://i.imgur.com/9rwYKjs.png -
can u pls send me through mail all of your tutorials.
These tutorials are more than useful for me.


Leave a Reply