Make skin look perfect in one-click with these AI-powered Photoshop actions.
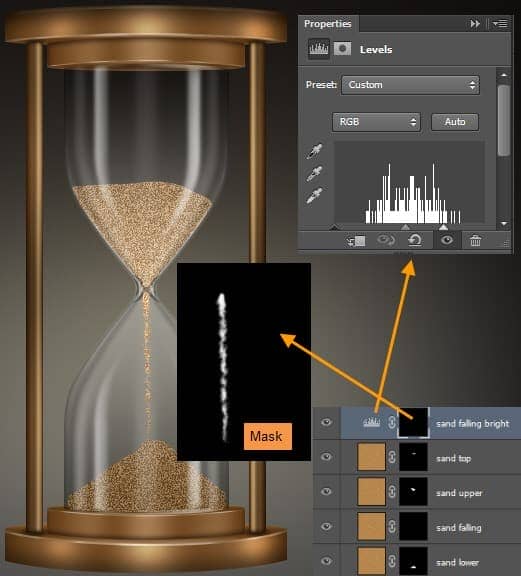
Step 56
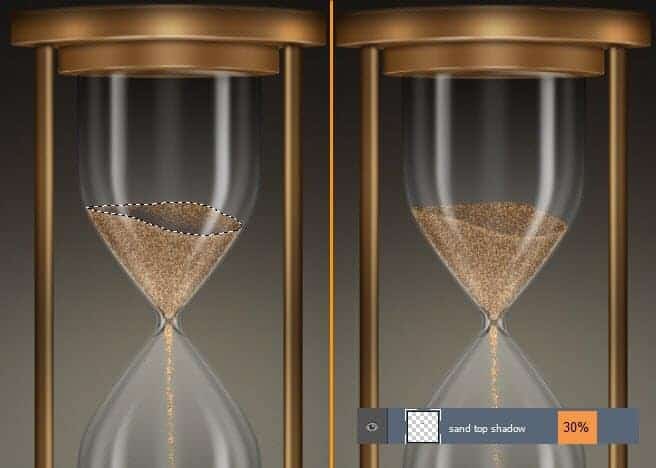
CTRL-click on the mask thumbnail of the "Sand top" layer to load that as a selection. Create a new layer on top with the name "Sand top shadow". Select a soft brush with 50% opacity and color #463f3c. Paint some shadow on the top part of the sand. Then reduce the layer opacity to 30%.
Step 57
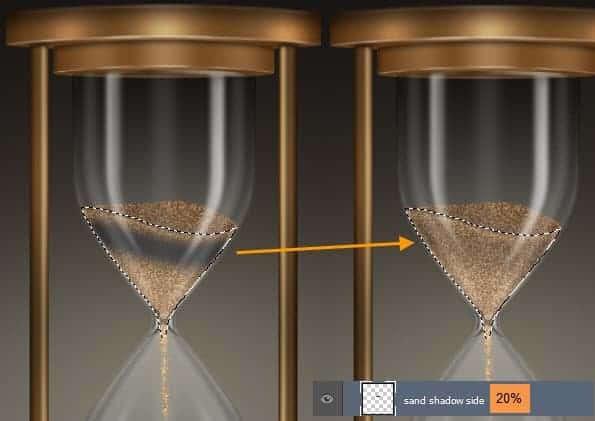
Next CTRL-click on the mask thumbnail of the "Sand upper" layer to load that as a selection. Create a new layer on top with the name "Sand shadow side". Use the same brush to paint some shadow on the upper portion of the sand. Then reduce the layer opacity to 20%.
Step 58
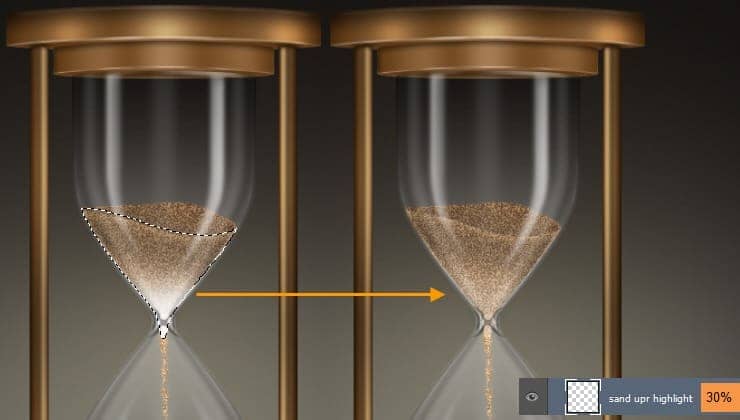
Selection still active create a new layer on top with the name "Sand upr highlight". Take a soft brush with 50% opacity and White color. Paint some highlight at the lower portion of the sand upper area. Change the layer opacity of "Sand upr highlight" to 30%. Sand is complete.
Step 59
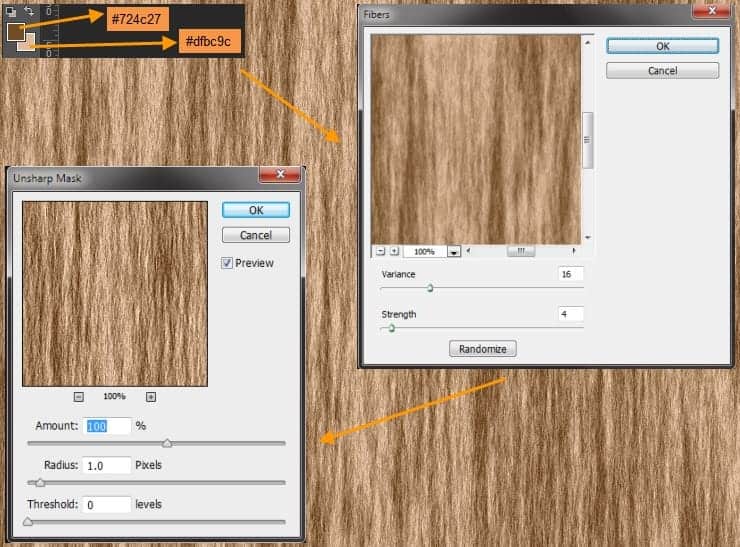
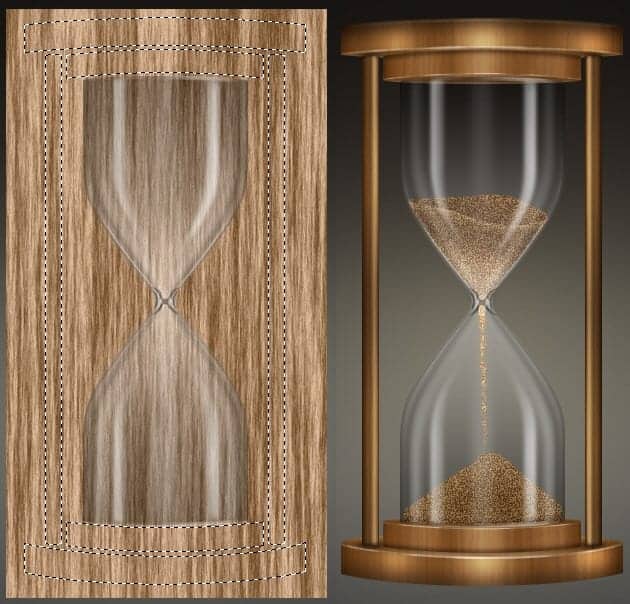
Next we will create the wood texture of the hourglass. Create a new layer group named "Wood texture" on top of the group "Sand". Create a new layer named "Base upr + lwr surface fibers" within this group. Change Foreground and Background colors to #724c27 and #dfbc9c. Then fill the layer with #dfbc9c color. Got o Filter > Render > Fibers and use 16 and 4 for Variance and Strength. Then again Filter > Sharpen > Unsharp Mask and use 100, 1.0 and 0 for Amount, Radius and Threshold.
Step 60
Resize the "Base upr + lwr surface fibers" layer with Edit > Transform > Scale. Duplicate this layer and rename to "Fibers overlay".
Step 61
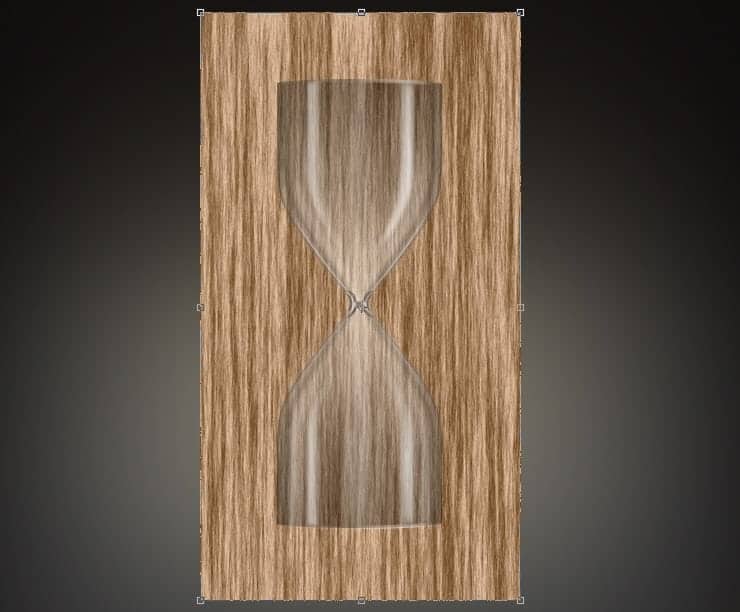
From the group "Base upr + lwr" CTRL-click on "Base upr large surface". Then CTRL+SHIFT-click on "Base upr small surface", "Base lwr large surface" and "Base lwr small surface". Now we have a combined selection of four layers. Next we will subtract the combined selection of stand layers from this. This time CTRL+ALT-click on "Stand left" and "Stand right" from the "Stands" group.
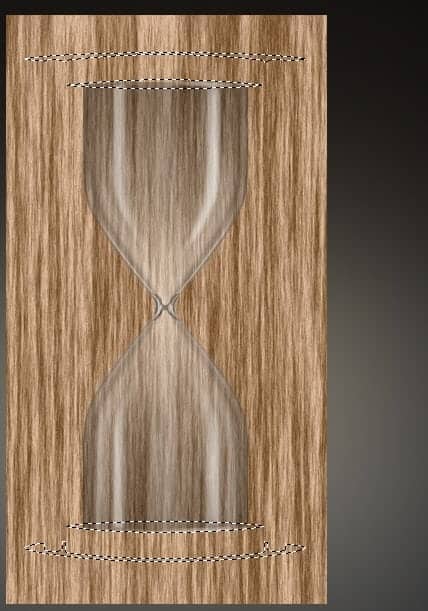
Then go back to the "Base upr + lwr surface fibers" layer and add a layer mask to it. Change the opacity of this layer to 10%.
Step 62
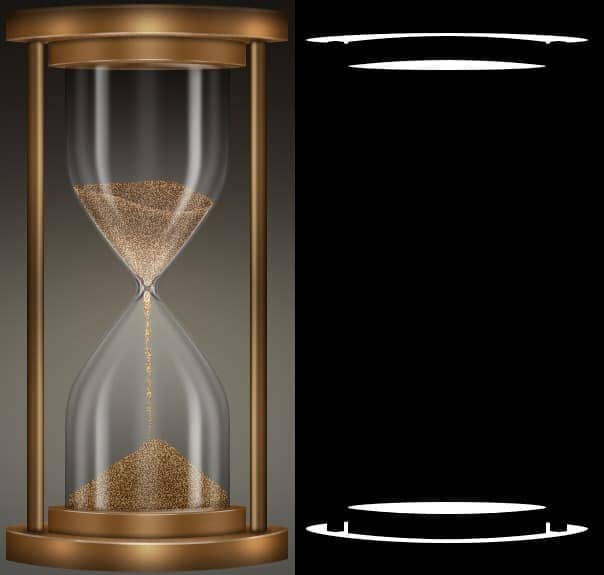
Next create a combined selection of "Base upr large side", "Base upr small side", "Base lwr large side", "Base lwr small side", "Stand left" and "Stand right". Target the "Fibers overlay" layer and add a layer mask. Change the layer opacity of this layer to 10% and Blend mode to Overlay.
Step 63
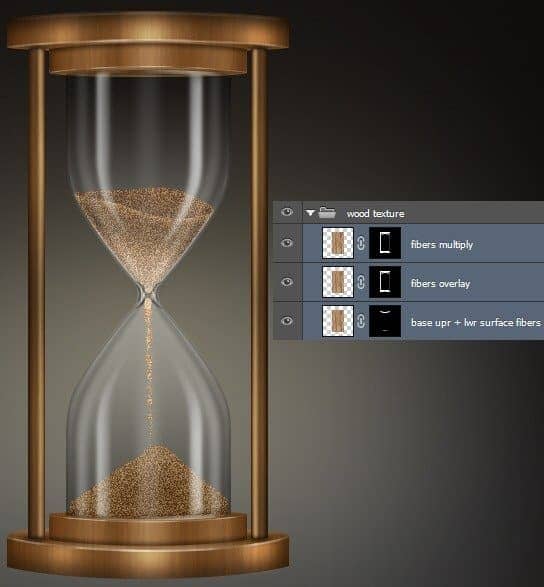
Duplicate the "Fibers Overlay" layer and rename to "Fibers Multiply". Change the Blend Mode to Multiply and opacity to 10%.
Step 64
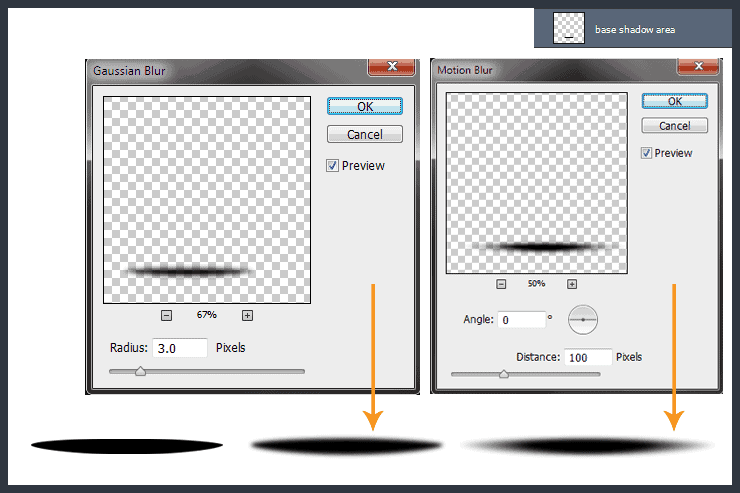
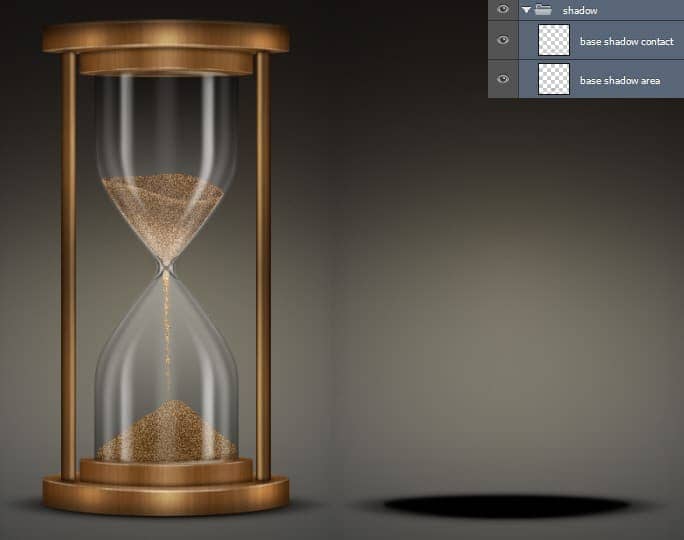
Next we will create the hourglass shadow. Create a new group named "Shadow" on top of the "Bg grd" layer. CTRl-click to select "Base lwr large surface" layer. from within the "Base upr + lwr" group. Then create a new layer within the "Shadow" group named "Base shadow area". Fill the selection with Black color. Duplicate this layer and rename to "Base shadow contact". Then target "Base shadow area" layer and Filter > Blur > Gaussian Blur then type 3 pixels and click OK. Next Filter > Blur > Motion Blur then type 100 pixels as Distance and Angle 0 degree.
Next target "Base shadow contact" layer and Filter > Blur > Gaussian Blur then type 2 pixels and click OK.
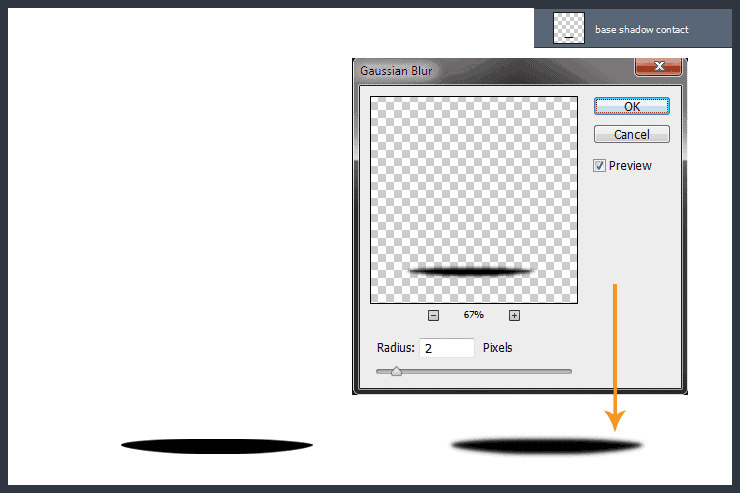
Press Down Arrow key to move down the "Base shadow contact" layer a little.
Final Results
![final-result[1] final-result[1]](https://cdn.photoshoptutorials.ws/wp-content/uploads/2014/08/finalresult11.jpg?strip=all&lossy=1&quality=70&webp=70&avif=70&w=1920&ssl=1)
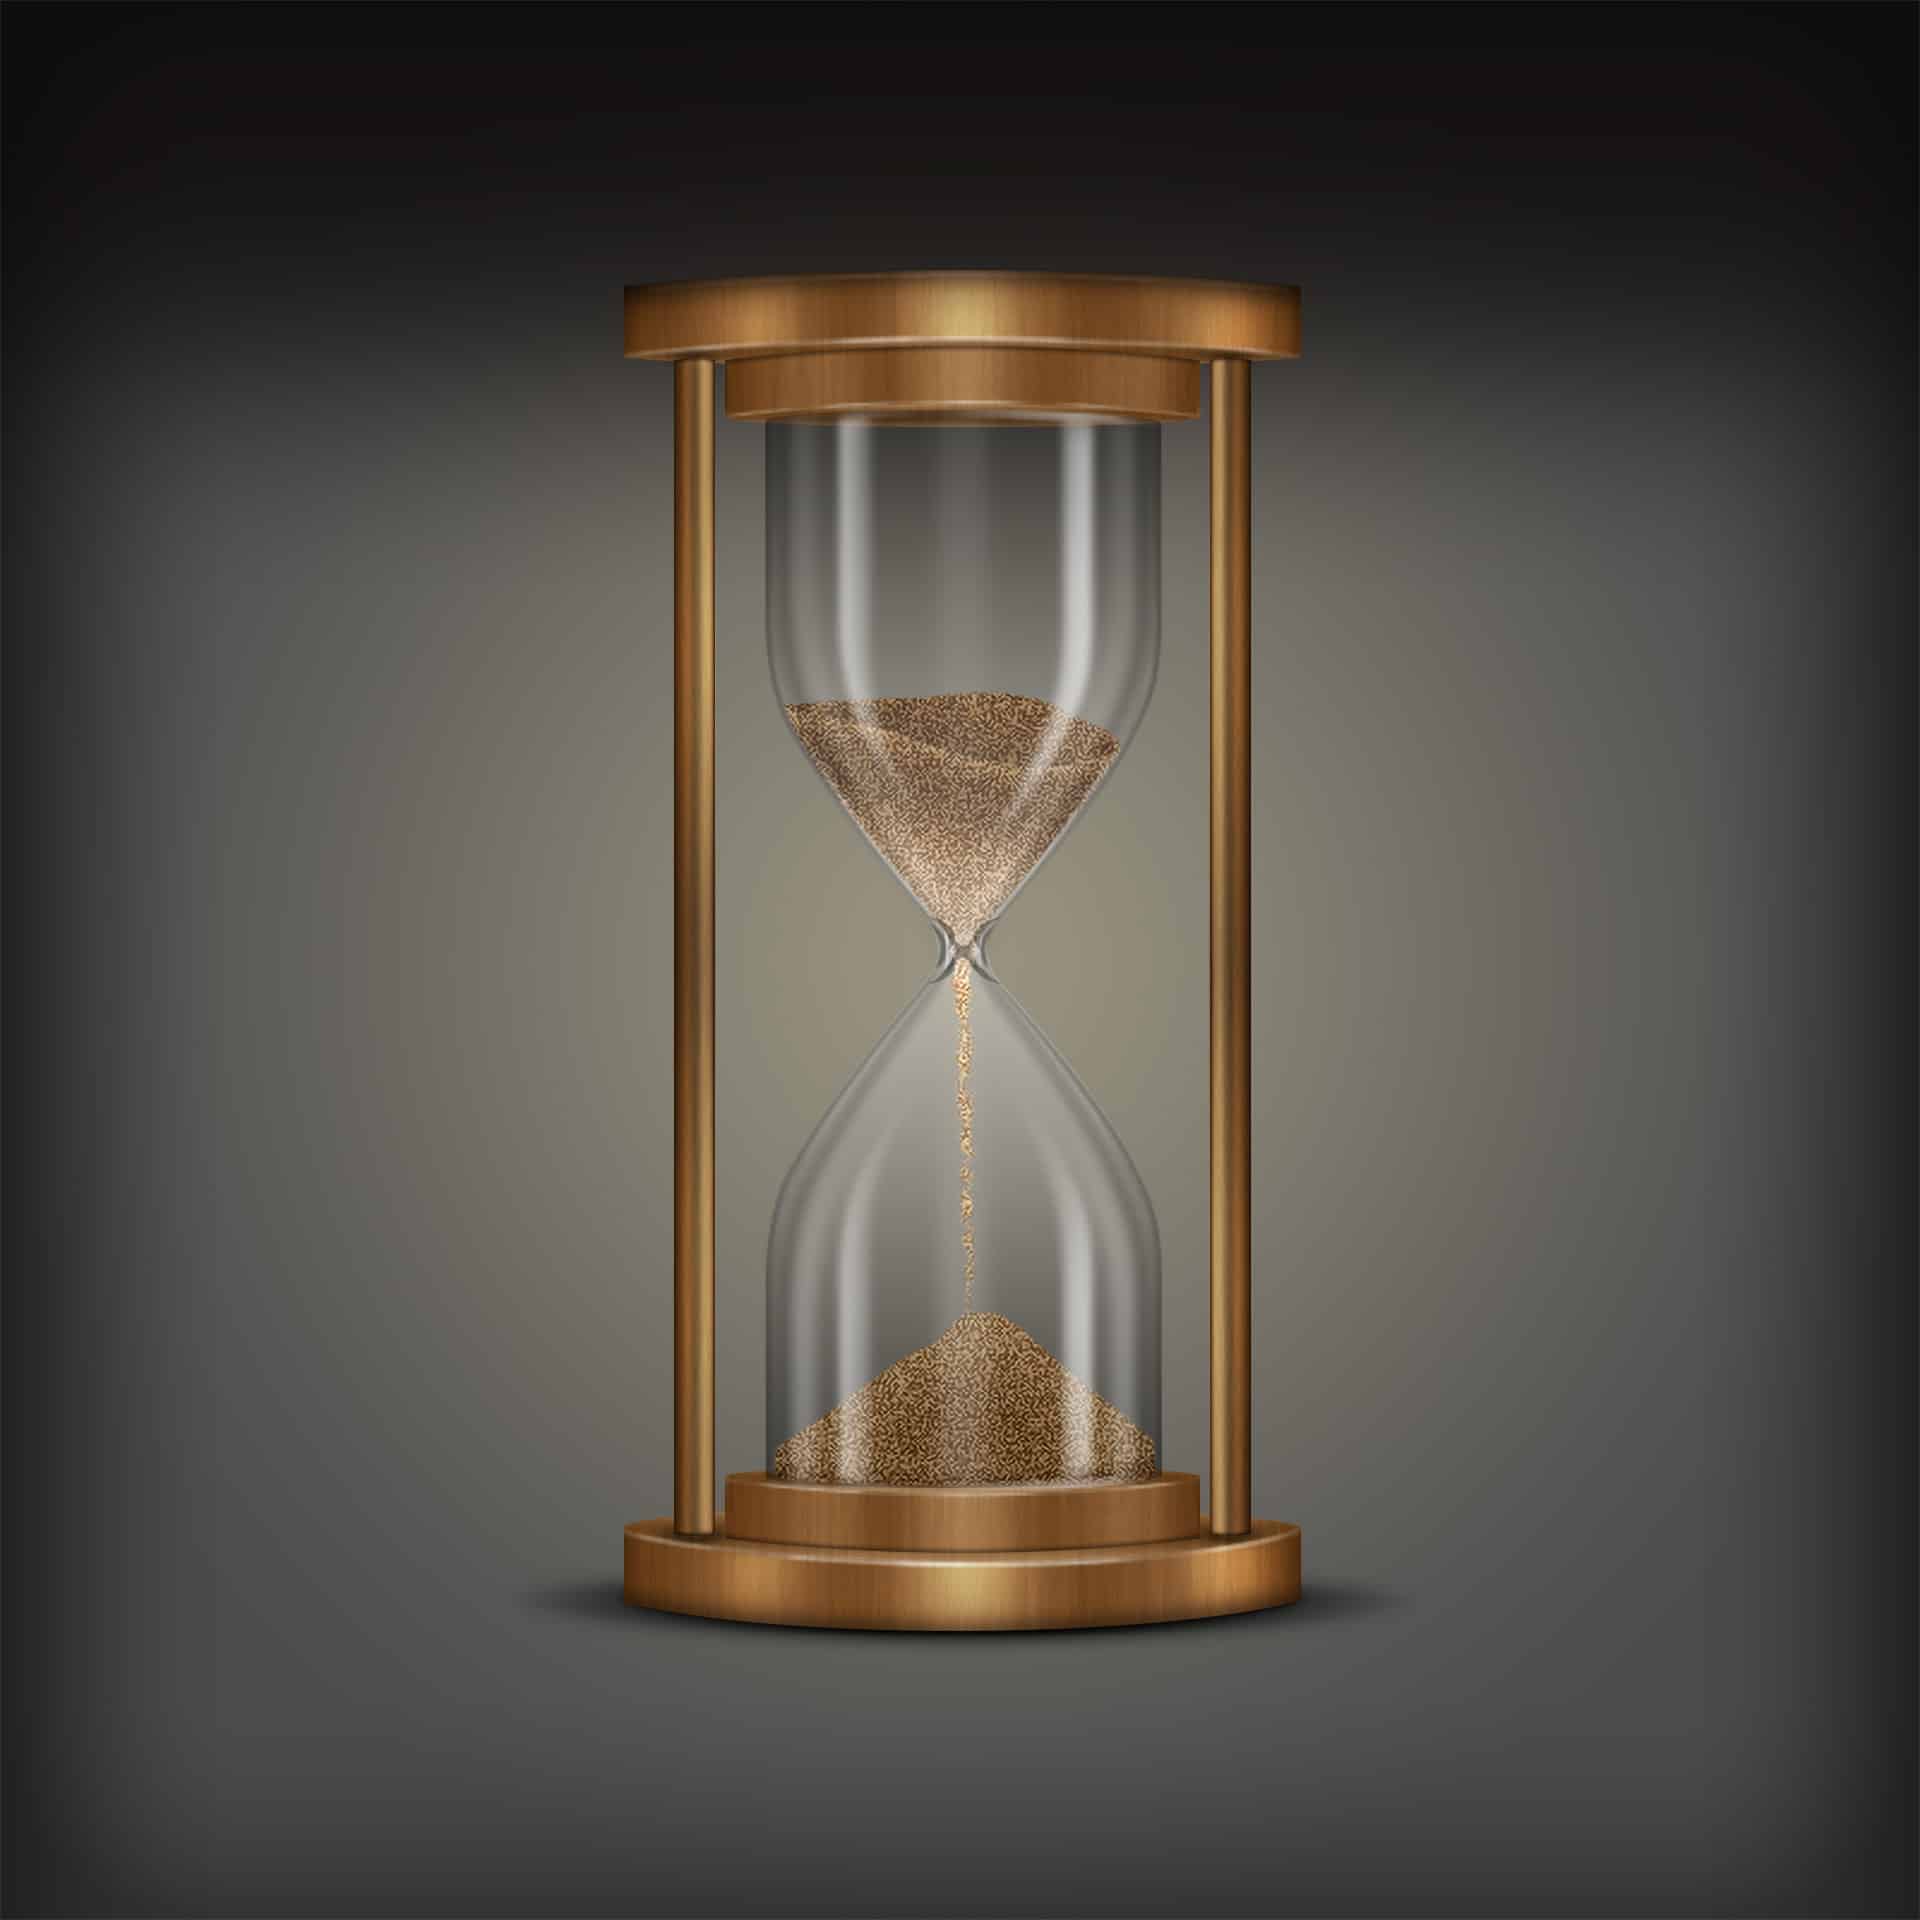
 Congratulations! You have finally completed the Hourglass project. But is it really over? I think you can still work on the glass, specially in the joint area. But I left that for you to explore. Also you can add more details in some of the areas. But don't forget to post the link of your final outcome in the comments below.
20 comments on “Create an Hourglass in Photoshop”
Awesome. Thanks for sharing
This is terrible.
i agree
Thank You so much for giving such details. I created my hour glass for my upcoming DVD. best wishes to you. I will like to explore more and purchase soon.
Interesting :p :)
Am unable to download the file.
I am stuck with step 11.when i make that new layer ''glass upper shadow edge 1'' ,i can't fill it with black,but i don't know why . Can anybody help me with that?
wow.. Fantastic steps.. I really like it. keep up :-)
Awesome... Thanks for sharing..
your welcome Hetor
Amazing, from scratch. Great work!
cool
fantastic
https://www.facebook.com/Tpsproductioncanada
here the same: link doesnt work
Problems with website
Unable to load with this link.
yes! there is also same problem in link....
This link doesnt work for me, anyone else having the same trouble?
The Link Is Not Working For Me