Make your artwork look like they're from an alternate universe. These Cyberpunk presets work with Photoshop (via the Camera Raw filter) and Lightroom. Download all 788 presets for 90% off.
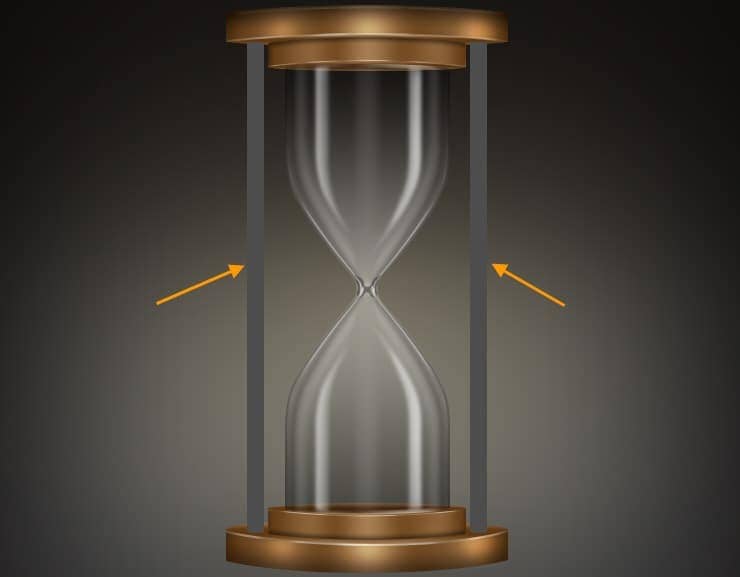
Step 46
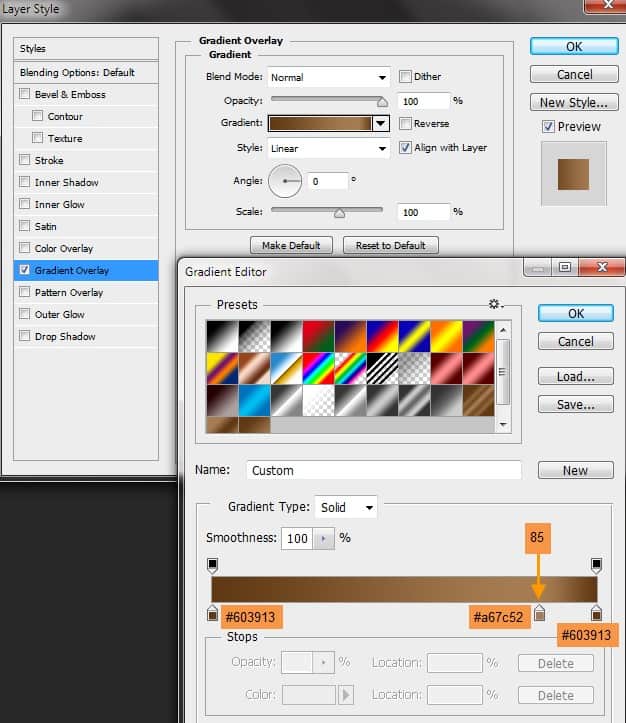
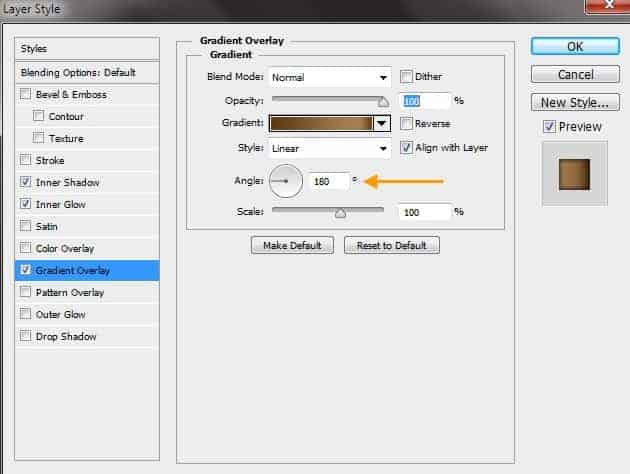
Double click on "Stand left" layer create the following layer style. First Gradient Overlay.
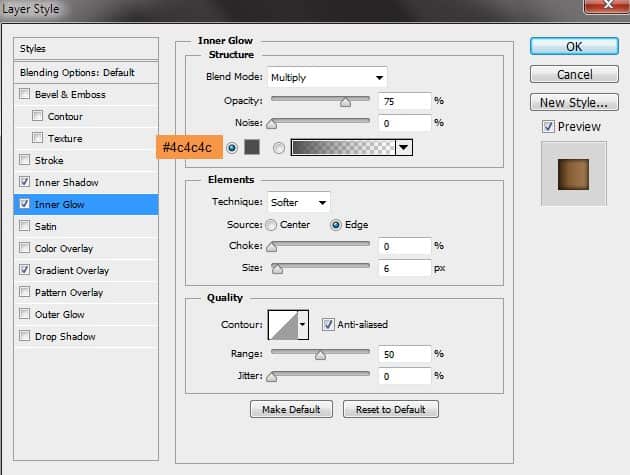
Inner Glow settings:
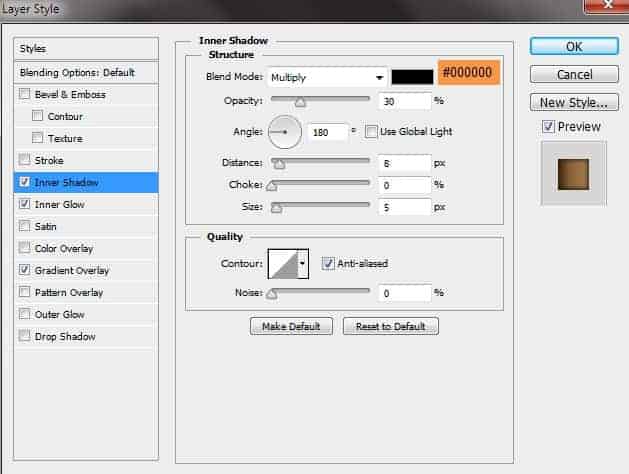
Inner Shadow settings:
Step 47
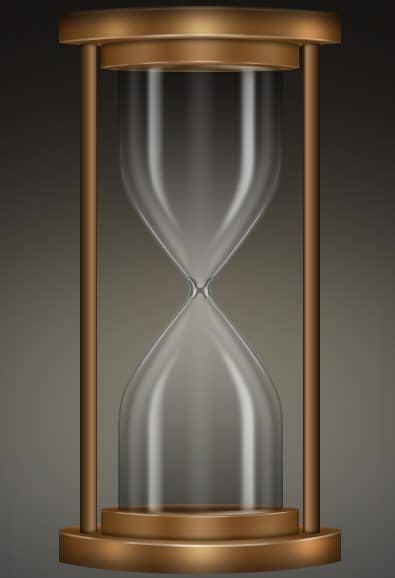
Copy "Stand left" layer style and paste on "Stand right". In the layer style only change the Gradient Overlay angle.
Left and right stand after layer style.
Step 48
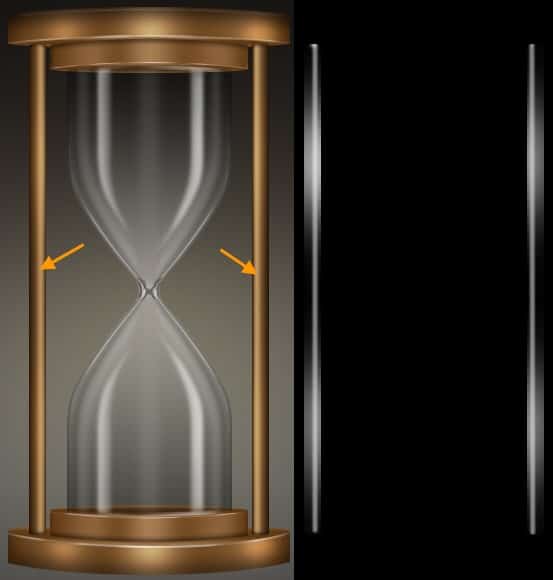
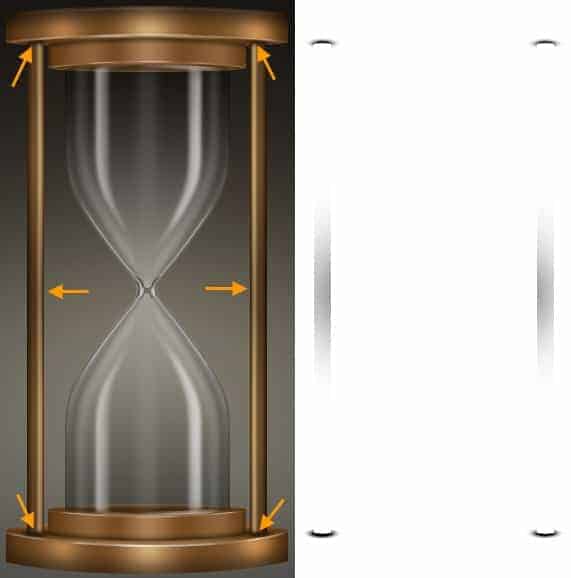
Create a new layer ("Stands left + right highlights") on top of "Stand right" layer. Select a soft brush with 50% opacity and white color. Then CTRL-click to select the stand layers and paint some highlights like the image below. Change the opacity of the "Stands left + right highlights" layer to 50% and Blend Mode to Overlay.
Step 49
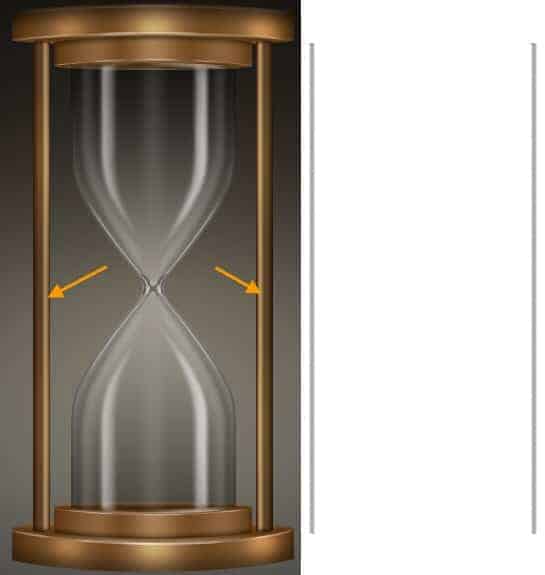
Next we will create two shadow layers for stands. First the vertical shadow. Create new layer on top of the "Stands left + right highlights" with the name "Stand shadows ver". Then with a soft black color brush with 50% opacity paint straight vertical shadows for both stands. After that change the opacity of "Stand shadows ver" layer to 70% and Blend Mode to Multiply.
Step 50
Create the second shadow layer with the name "Stand shadows" on top of "Stand shadows ver" and paint some shadows like the image below with the same brush.
Step 51
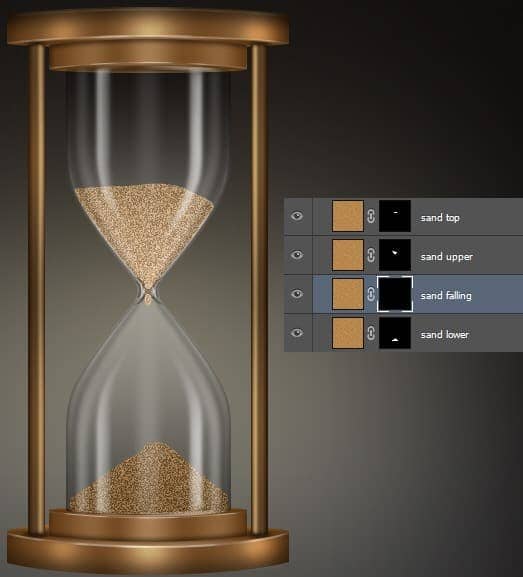
Next we will create the sand within the hourglass. Create a new layer group with the name "Sand" on top of the "Stands" group. But before starting with the sand, let's take a look at the structure first. The sand will consists of four basic shapes like the exploded view below.
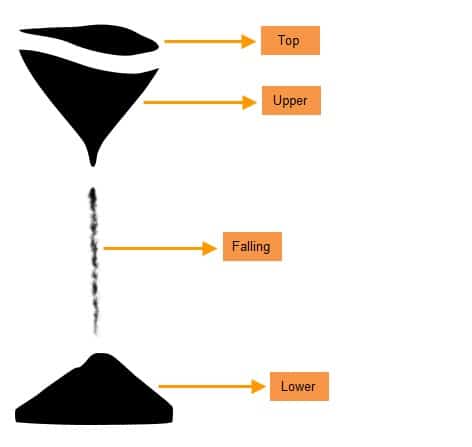
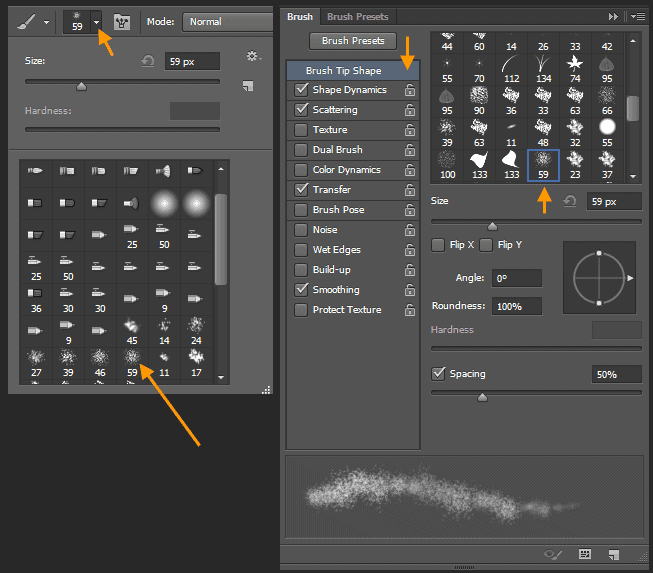
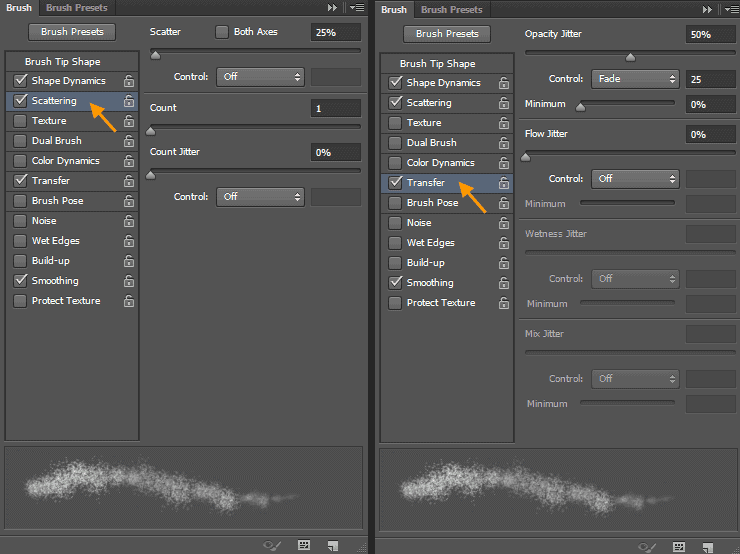
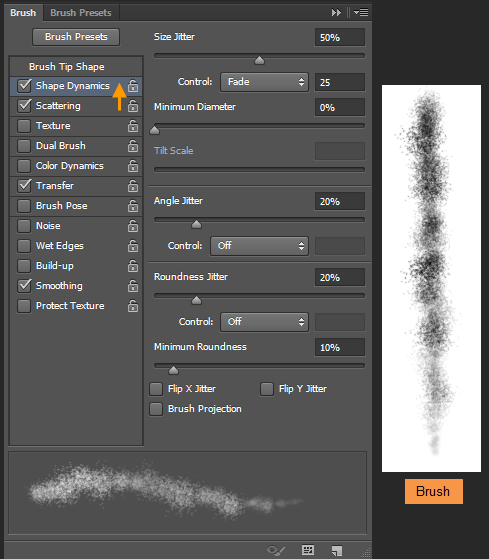
Top, upper and lower sand shapes are created with Pen Tool. But we will create the falling sand with 59 pixel Spatter brush from the Brush preset. Then modify the Spatter brush in the Brush Panel (Window > Brush). Check the image below for Spatter brush settings:
Step 52
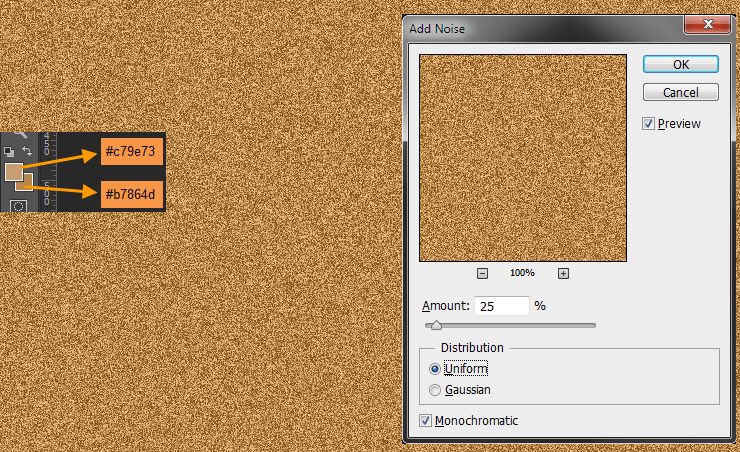
Within the "Sand" group create the top, upper and lower portion of sand as three shape layers with the Pen Tool. Shape layer color is not important as we will delete them later. Create a new layer with the name "Sand lower". Chang your Foreground and Background colors to #c79e73 and #b7864d. Now fill the "Sand lower" layer with the #b7864d color. Then Filter > Noise > Add Noise. Type 25% as the amount, select uniform as distribution and check monochromatic. After that duplicate this "Sand lower" layer three times. Rename them "Sand falling", "Sand upper" and "Sand top".
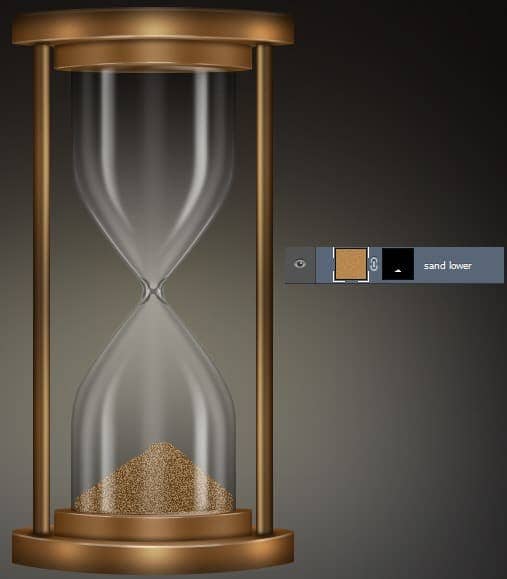
CTRL-click on the sand lower shape layer to select. Selection still active target the "Sand lower" layer and add a layer mask.
Step 53
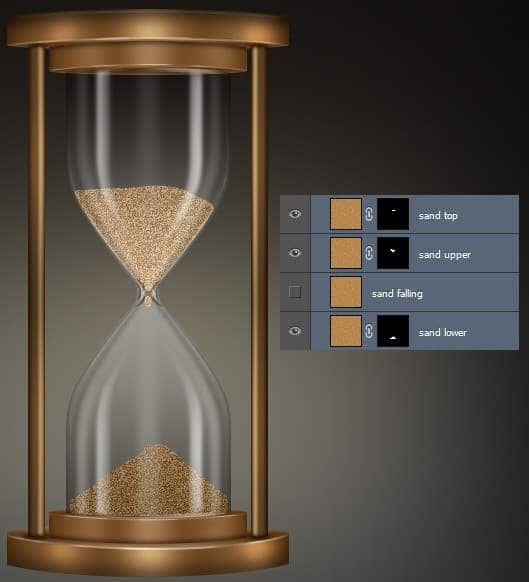
Similarly mask the "Sand upper" and "Sand top" layer. In the image below the visibility of "Sand falling" is turned off. You can delete the sand upper and sand lower shape layers now. Next we will create the mask of the "Sand falling" with the Spatter brush we created earlier.
Step 54
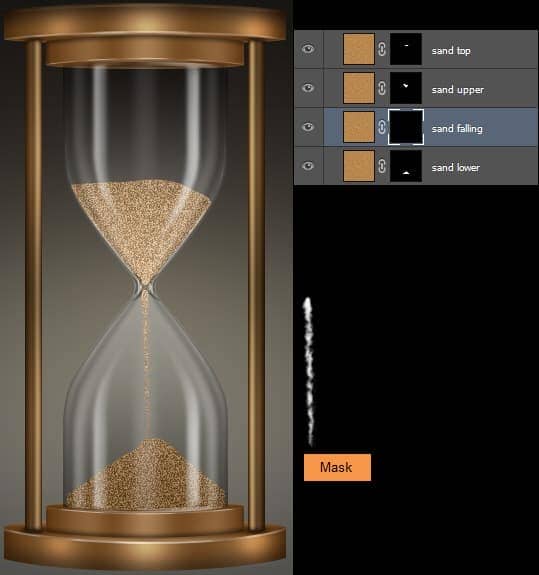
Target the "Sand falling" layer and from Layer > Layer Mask > Hide All. This will create a black mask. Now the "Sand falling" layer is completely hidden.
Select the Spatter brush and White as the brush color. Then paint within the mask to reveal the sand texture.
Step 55
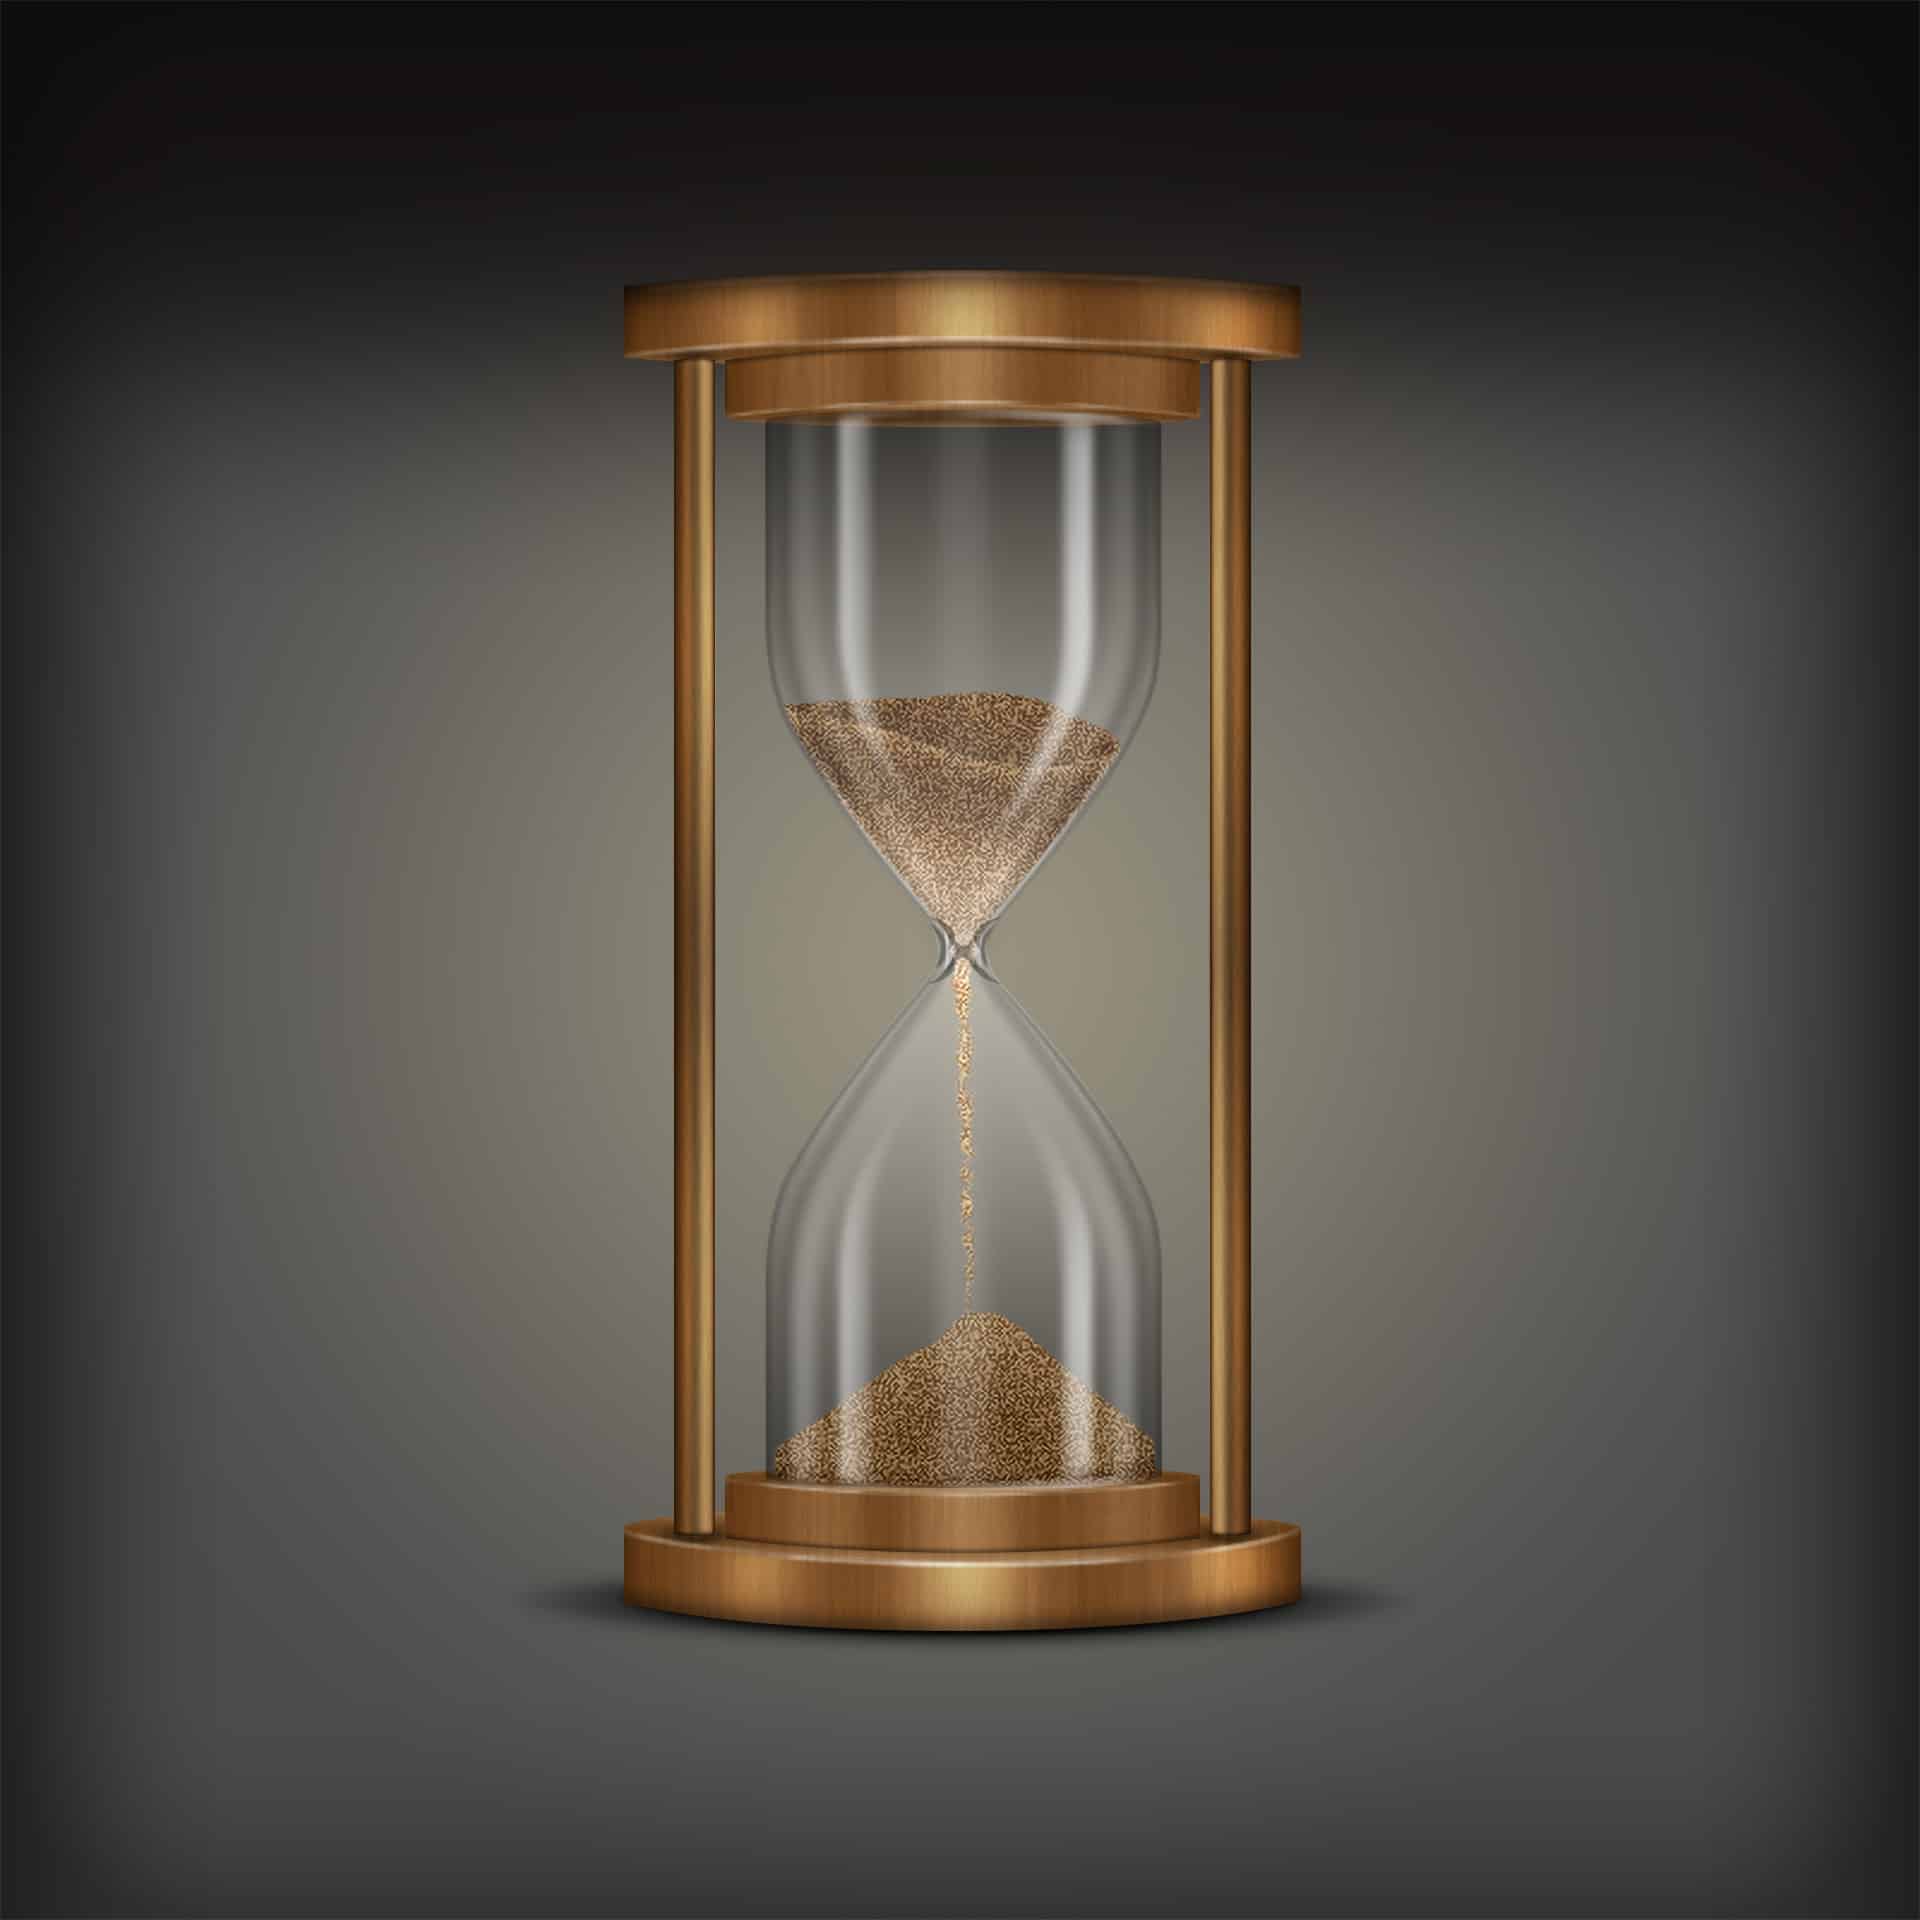
Next we will add a Level Adjustment layer to brighten the falling sand more. But we need the Adjustment layer to effect the falling sand only not everything. To take care of that, first CTRL-click on the mask thumbnail of "Sand falling" layer. This will load the "Sand falling" layer mask as a selection. Selection is active go to Layer > New Adjustment Layer > Levels. The level adjustment layer will create a mask from that selection. So only the falling sand is brighten. Rename the level adjustment layer to "sand falling bright".

20 comments on “Create an Hourglass in Photoshop”
Awesome. Thanks for sharing
This is terrible.
i agree
Thank You so much for giving such details. I created my hour glass for my upcoming DVD. best wishes to you. I will like to explore more and purchase soon.
Interesting :p :)
Am unable to download the file.
I am stuck with step 11.when i make that new layer ''glass upper shadow edge 1'' ,i can't fill it with black,but i don't know why . Can anybody help me with that?
wow.. Fantastic steps.. I really like it. keep up :-)
Awesome... Thanks for sharing..
your welcome Hetor
Amazing, from scratch. Great work!
cool
fantastic
https://www.facebook.com/Tpsproductioncanada
here the same: link doesnt work
Problems with website
Unable to load with this link.
yes! there is also same problem in link....
This link doesnt work for me, anyone else having the same trouble?
The Link Is Not Working For Me