Paint some hair strands on the top of the head and on the back:

On a new layer, change the color of this brush to #f5f2e6. Paint the bigger, flying strands and remember to use the [ and ] key to decrease and increase the size of the brush while painting:

I used a new layer and white color for the brush to paint some highlights for the hair:

Step 26
Merge the model layer, the clone and the hair ones. Place her in the middle section of the current image:

Create a new layer (Clipping Mask) and use a soft brush with the color #ccc8cb to paint on the model dress to reduce the light there. I set this layer mode to Multiply 70%:

Step 27
I used a Hue Saturation adjustment layer to reduce the saturation of the model:

Step 28
Make a Color Balance adjustment layer to add some blue to the model. Use a soft black brush to reduce this effect on the model skin:

Step 29
Add a Photo Filter adjustment layer to the model and use a soft black brush to reduce the effect on the skin:


Step 30
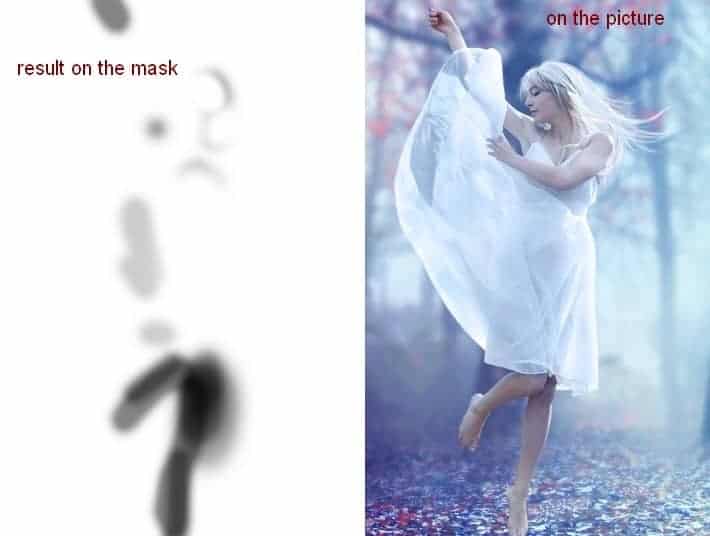
I used Curves to reduce the light on the model and apply brushing on the mask:


Step 31
Add a Levels adjustment layer to brighten the right of the model and work on this layer mask after adjusting:


Step 32
In this step I used a soft brush with the color #6e8799 to paint on the hair to add more cyan to it. Set this layer mode to Color 100%:

Step 33
Make a new layer (Clipping Mask), change the mode to Overlay 100% and fill with 50% gray:

Take the Dodge and Burn Tool (O) with Midtones Range, Exposure about 20% to refine the shade and light on the model. You can see how I did it with the Normal mode and the result with the Overlay mode:

Step 34
To enhance the lips, on a new layer I used a soft brush with the color #bc8a78 to paint there. Set this layer mode to Soft Light 100%:

Step 35
To make the background light reflected on the legs I created a new layer with a soft brush and the color #6e9299 to paint there. Turn this layer mode into Vivid Light 100%:

Step 36
Open the light 1 texture pack. Choose the starry 6 image and position it at the top right of the scene. Change the mode to Screen 100%:


Add a mask to this layer and use a soft black brush to remove the hard edges of this texture.
24 responses to “Create a Photo Manipulation of an Emotional Dancer in a Forest”
-
ok
-
The color choices are spectacular!! Great JOB!
-
NICE AND GREATE TUTORIAL
-
NICE GREAT EXPLAINE THE TUTORIAL
-
I’m only new to composites and just came across this by a fluke. Just what I was looking for to learn and practice.
Thanks so much… -
hi!could you tell me how to extract a model from its original photo?
-
I like this because it shows skills and it shows emotion
-
very good!
-
It’s my creation http://j-p-g.net/if/2015/08/13/0540766001439480057.jpg
Thanks for this divine lesson.It’s a miracle -
The most amazing lesson!!!!! better seen.Thank you for this fab ripping tutorial
-
Amazing Tip i like your steps
-
Thank!!!
-
Thanks. Your tutorial is great as well as the other is. Keep going. But you didn’t say how you removed the model from it’s original background!!!!
-
Amazing. . Very nice,
-
A very smart approach to explain the things, Ilike your step by step tutorial.
-
Thank you for this great achievement and tutorial that I had fun to be completed in 2 different versions:
http://cartes-mireilled.eklablog.com/photomontage-scene-de-foret-en-automne-a109215440 -
Emotional model and emotional background scenery very pretty with tutorial.
-
Wow , very inspiring Shows that I still have a long way to go Thanks though for sharing your brilliant work
-
very good
-
I will use this one for my girl photo.
-
Beautiful work. Thanks so much for sharing.
-
I am highly inspired by your tutorials.As a learner,I found it very helpful.Thank you very much.
-
Looks like something I should try now. Thank you for the step by step Tutorial. I’ve book marked your post. :) Keep Going!!!
-
thanks for your tutorial, I really learned a lot


Leave a Reply