Make your artwork look like they're from an alternate universe. These Cyberpunk presets work with Photoshop (via the Camera Raw filter) and Lightroom. Download all 788 presets for 90% off.
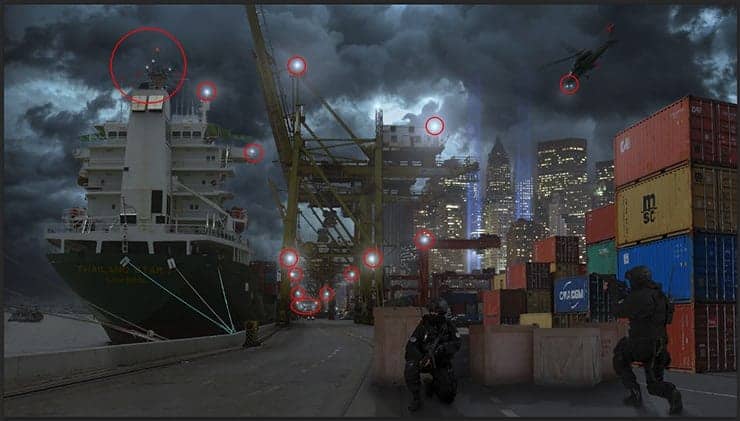
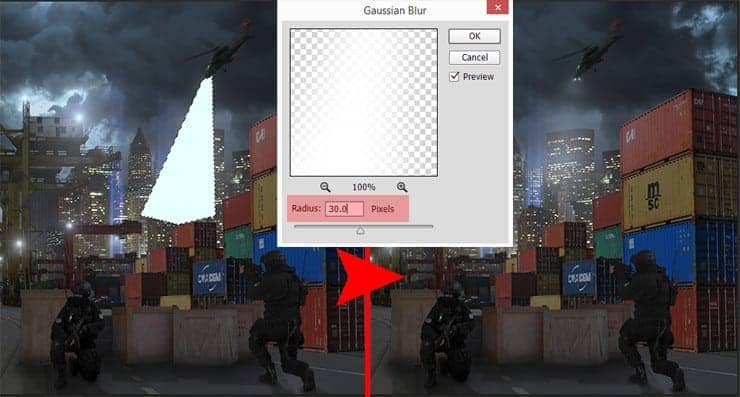
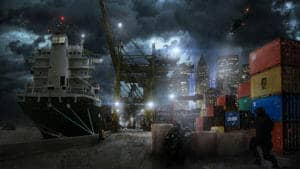
Take a Polygonal Lasso Tool (L) and on a new layer make a selection in the shape of an elongated triangle from the helicopter. Fill it with white color (D to set default colors then Cmd/Ctrl + Del), use Cmd/Ctrl + D to deselect. Blur this layer to get a soft diffused light. Go to Filter > Blur > Gaussian Blur... and change Radius to 30 pixels. As a result, we get a good flow of light. You can boost the light source using Brush Tool (B).
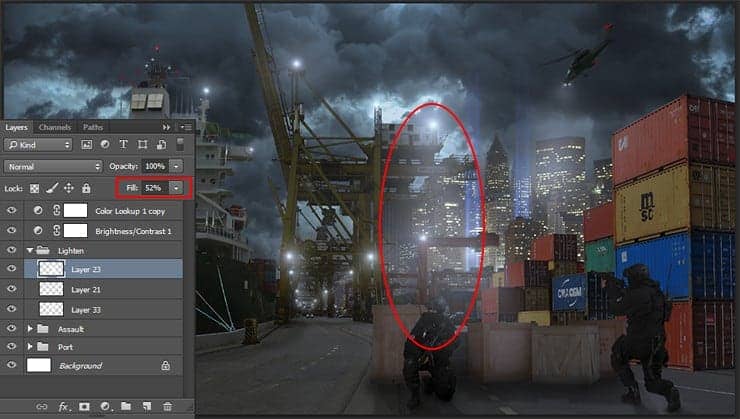
Repeat the same process to create light from the lantern on the house at the top of the image. Since at this point we had smoke background, it is necessary to reduce Fill to 52% for this layer.
Step 13
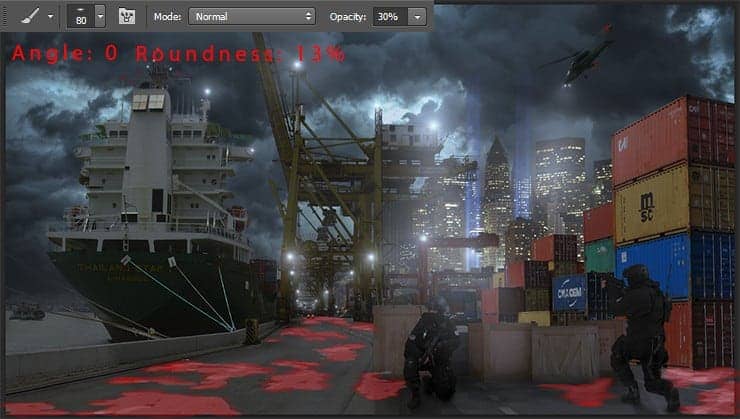
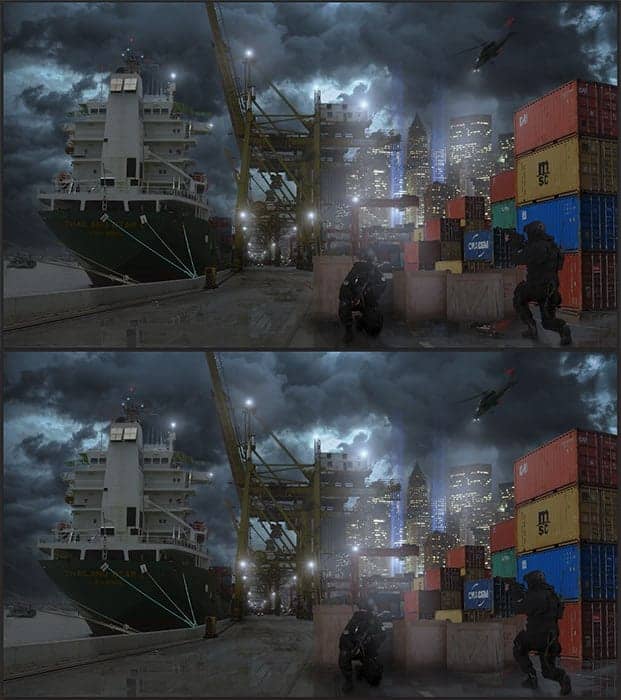
Would be more interesting to add rain and puddles to enhance the mood of the picture. Let's start with puddles. With soft round brush (Size: 35-80px, Opacity: 30%, Roundness: 13% (F5 to change it in brush settings), color: #ffffff), draw in places where you want to see the puddles. Try to make abstract forms in different places, change the brush size to make small puddles and in some places, apply the colors more vivid to create depth for puddles.
Go to Layer Palette and select all groups except light group and adjustment layers. Use Cmd/Ctrl +J then Cmd/Ctrl + E to duplicate and merged of whole picture, flip it vertically (Edit > Transform > Flip Vertical) move it above puddles layer and clip it (hold Opt/Alt + click between layers). With Move Tool (V) move this image to find a suitable reflection. Remains one problem - how to make a reflection of boxes because no matter how you move the image, any variant lacking the necessary details. Duplicate this layer (Cmd/Ctrl + J) and clip it again. Move the image to find reflection form boxes. then add a layer mask and with black soft brush remove all except reflection.
Step 14
Then I added the rain itself. The principle is the same as with the creation of the snow. So we need a new group "Rain" above lighting group and new black fill layer (background color to black > Cmd/Ctrl + Del). Go to Filter > Noise > Add Noise... Set Amount to 30% then add another one filter "Motion Blur" (Filter > Blur > Motion Blur...). Change Angle to -75 degrees and Distance to 15 pixels. Set layer Blending Mode to "Screen".
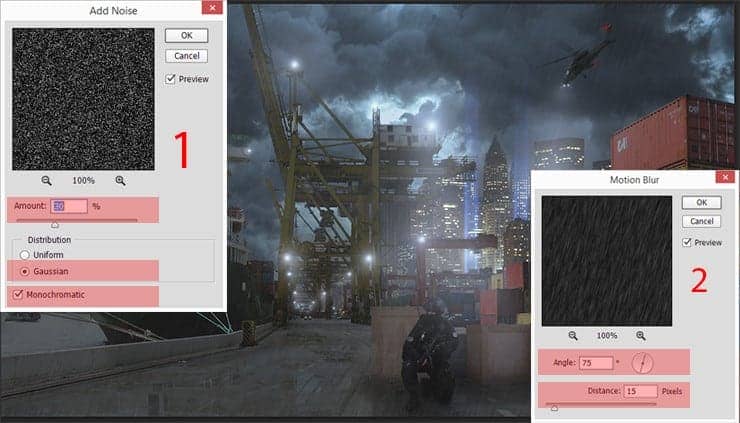
One layer is not enough to make realistic rain, so duplicate this layer (Cmd/Ctrl + J), Set Fill to 50%. Try to mentally divide the image into 4 equal parts, use Free Transform Tool (Cmd/Ctrl + T) with pressed Shift key and reduce size to fit one of the four parts. Take Move Tool (V) and with pressed Opt/Alt key drag and drop this layer to make remaining three copies in its place.

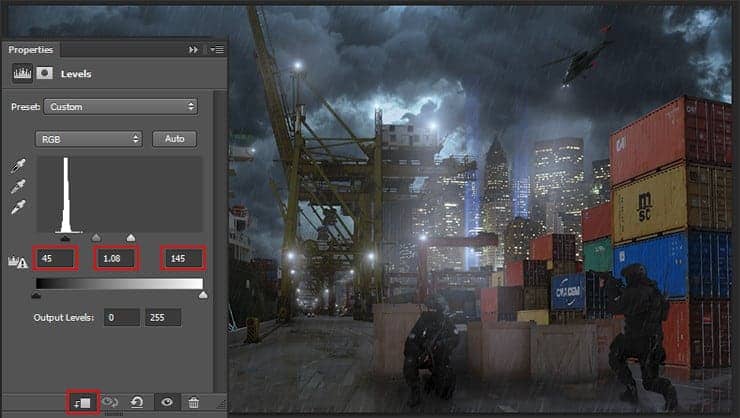
Change Blending Mode of whole group to "Screen". After adding more layers with rain the entire image with a gray haze, to clean it, use an adjustment layer "Levels" ("Create new fill or adjustment layer" icon at the bottom of the Layers panel > "Levels"). Set for black slider value 45, for gray slider 1.08 and for white slider 145. This layer has increased the amount of black, which helped to remove haze and make more visible drops.
Step 15
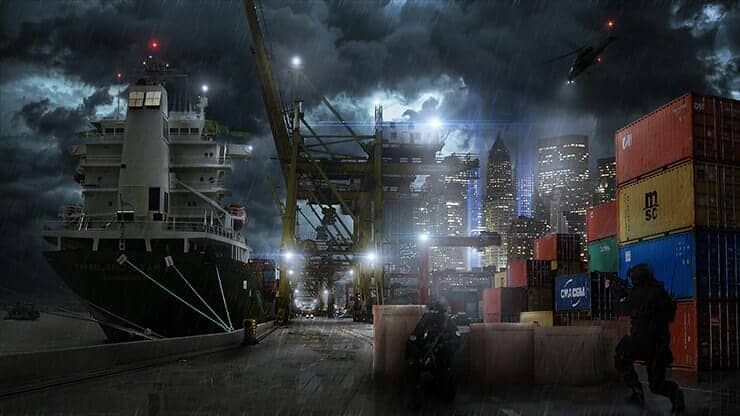
Create a more realistic light for our picture. Hold Opt/Alt and click on "create new layer" button. Create a new layer with a Blending Mode "Overlay", check box on "Fill with Overlay-neutral color (50% gray)". Now, use Dodge Tool (O) and hold Opt/Alt to switch to Burn Tool (O) with the settings for both tools - Range: Midtones/Shadows, Exposure: 5 - 10%. Optionally, you can use Brush Tool (B) with black/white color and low values of Opacity. To create light and shadow for specific objects, simply select them by holding Cmd/Ctrl and click on a layer thumbnail.

7 comments on “Create a Surreal Secret Mission Scene in Photoshop”
This is a GREAT tutorial! I’ve already started working with your tutorial and learning new things , thanks a lot
Great ! Thank you, Maria !
A very big "thank you" for your tutorials. I wrote you on DA to give you credit as well. I changed the military men to zombies just for fun. Learned an incredible amount from this. You do such mind-blowing work!!!
Very well done. I've been using Photoshop for many years but I learned a few new tricks from this Tutorial. Thanks for posting, and the great instructions.
perfect
Thank you for this tutorial. I really enjoyed and makes me improve my use of photoshop.
Thank you for this tutorial. I really enjoyed and makes me improve my use of photoshop.