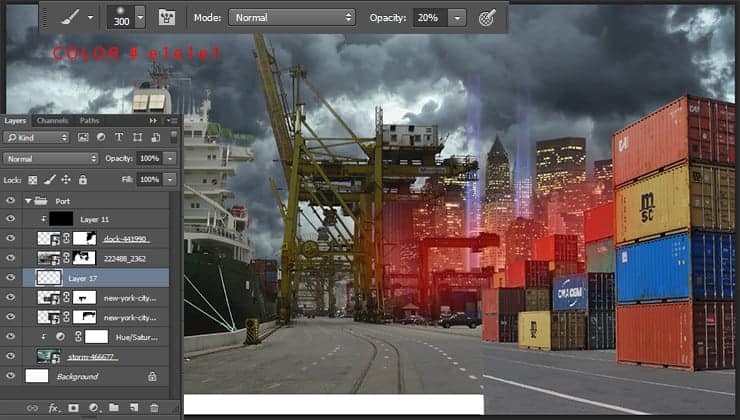
I have done the same thing with the city on the left side of the image and in the center, near the house on the crane (here I reduced layer Fill to 71%). So, we got misty city that blends well with the port and the sky. According to the idea my picture to be severe weather to transfer the tension and danger of the situation.

Step 7
To variety of cover elements and complement the landscape by using the boxes. Place “Boxes” image, resize and flip it horizontally. With Polygonal Lasso Tool (L) select only do not cut boxes and with layer mask separate boxes from the background.

Now there’s a logical question about the correctness of inscriptions. Not long thinking, I took Clone Stamp Tool (S) and set following settings for this tool – Size: 35px, Opacity: 100%, Soft round brush, checkbox on “Aligned” and Sample: All Layers. On a new layer paint on the all the inscriptions. Try to vary the texture on the boxes to create a realism (use as a donor other boxes) and try to use a stamp in accordance with the location of cracks and edges of the box, do not take away them with this tool. Clip this layer to boxes (Opt/Alt + click between layers).

Create a new black fill layer (set background color to black + Cmd/Ctrl + Del) and clip it to boxes layer. Set Fill around 40%. Select boxes by holding Cmd/Ctrl and click on layer mask thumbnail. Create a new layer, use using soft round black brush (Size around 100px) I brushed these parts with lower opacity (around 30%) to make a small shadow at the bottom of boxes. Use only the edge of the brush to shade was not strongly hard.

Step 8
Now it’s time to stamp! Now that all the key elements of the composition in place, you can begin to work on the details. Create a new layer under boxes layer, take a Clone Stamp Tool (S) (Size: 50 – 100px, Opacity: 60 – 100%, checkbox on “Aligned”, Sample: All Layers). Next to “Mode” list there is thumbnail folder icon with a stamp, by clicking on it will take you to “Clone Source” tab. Set Scale to 120%. Stamped all empty spaces continuation of the road. Use different pieces of asphalt to a variety of textures. To boxes do not interfere with the process, hide them by clicking on the eye icon, and do not forget to return them when you are finished stamping.
7 responses to “Create a Surreal Secret Mission Scene in Photoshop”
-
This is a GREAT tutorial! I’ve already started working with your tutorial and learning new things , thanks a lot
-
Great ! Thank you, Maria !
-
A very big “thank you” for your tutorials. I wrote you on DA to give you credit as well. I changed the military men to zombies just for fun. Learned an incredible amount from this. You do such mind-blowing work!!!
-
Very well done. I’ve been using Photoshop for many years but I learned a few new tricks from this Tutorial. Thanks for posting, and the great instructions.
-
perfect
-
Thank you for this tutorial. I really enjoyed and makes me improve my use of photoshop.
-
Thank you for this tutorial. I really enjoyed and makes me improve my use of photoshop.


Leave a Reply