

Download Lightroom presets and LUTs, absolutely free. Use the presets to add creativity and style to your photos.
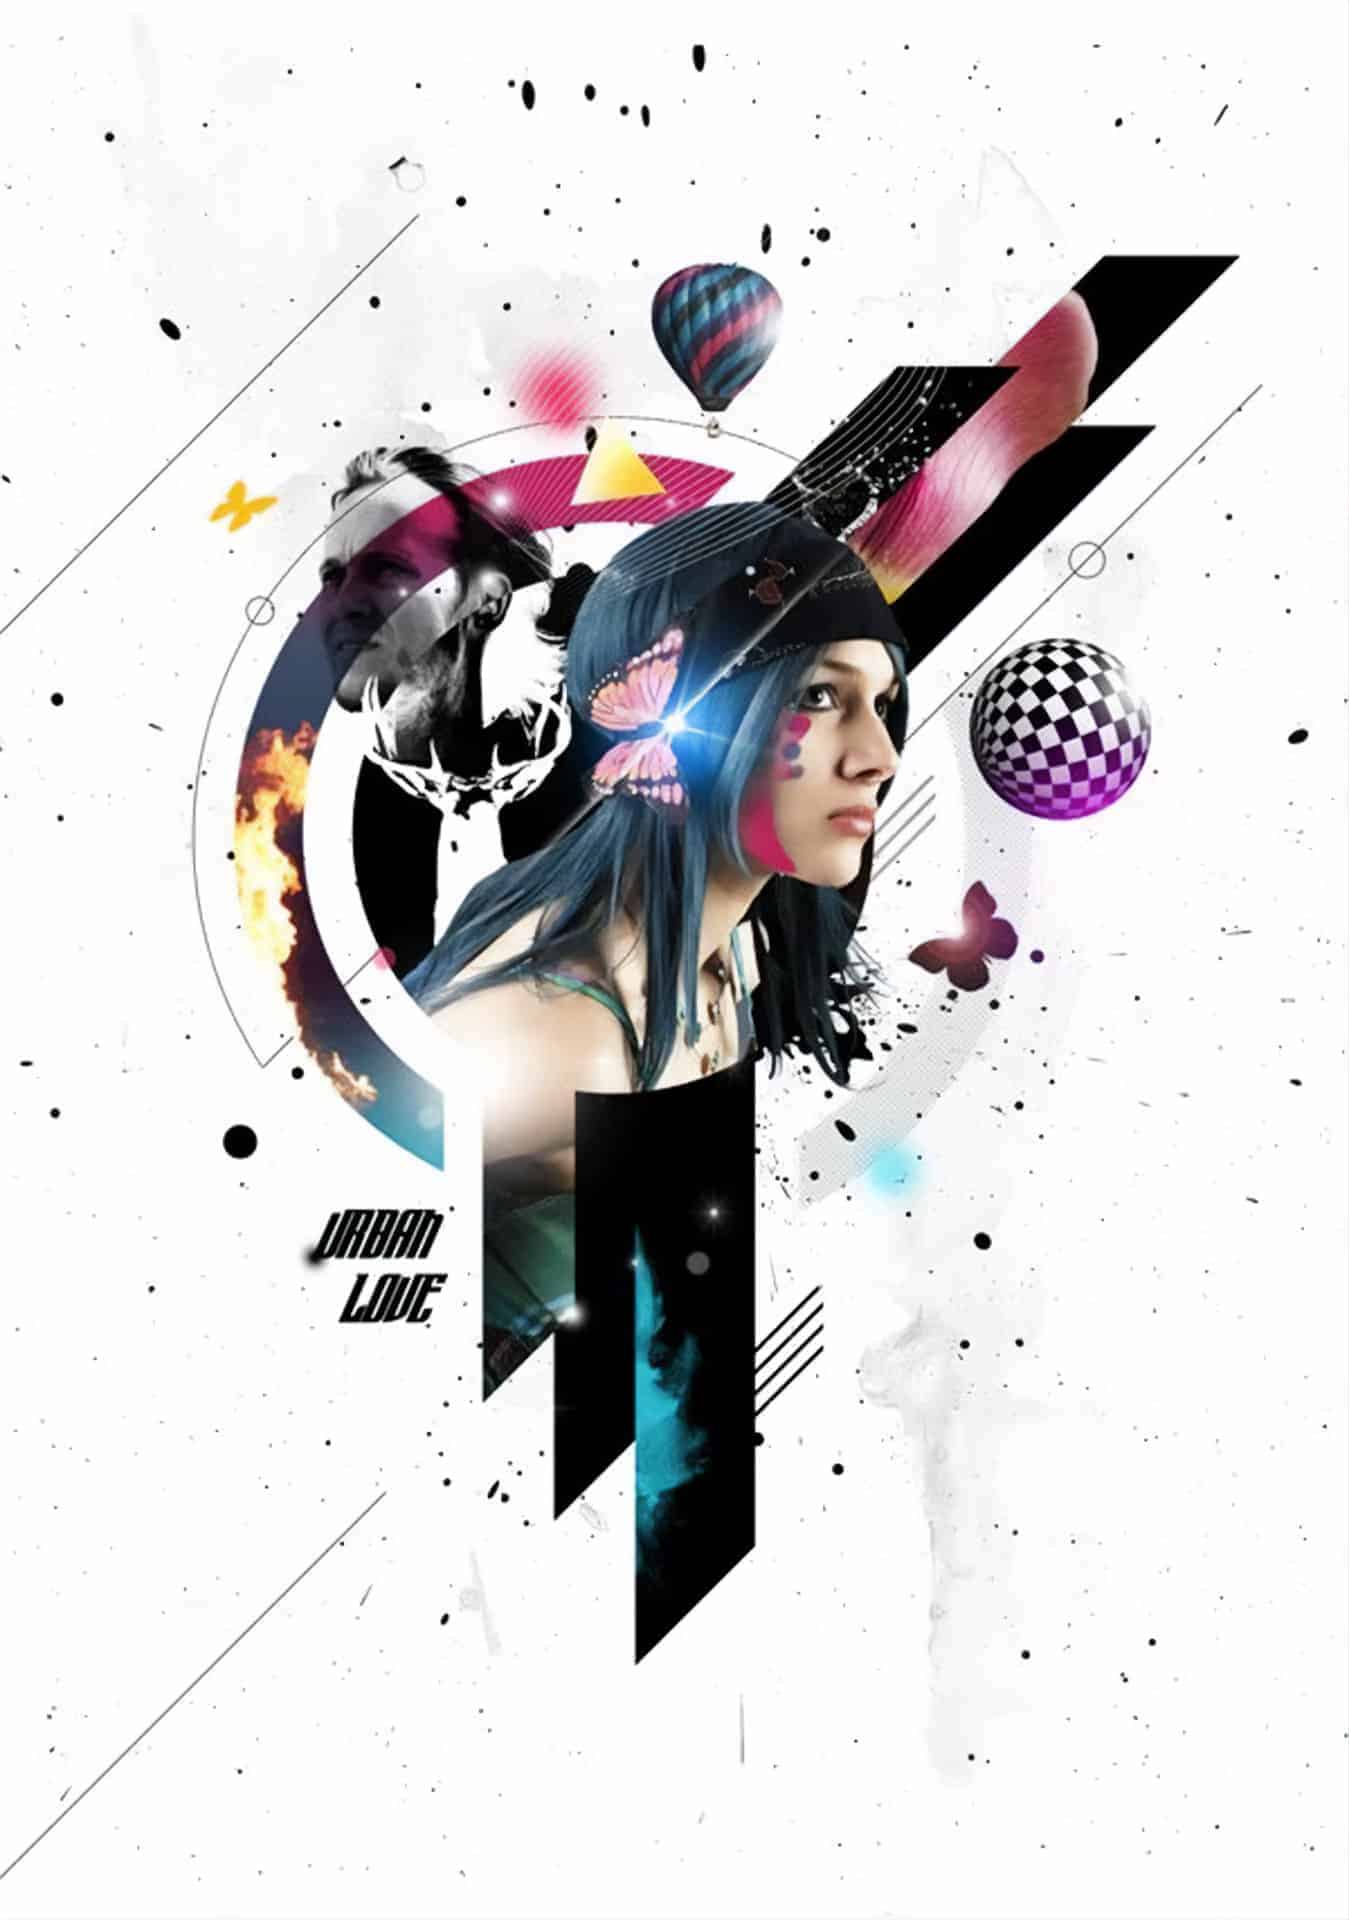
Preview of Final Results

Tutorial Resources
- Water SplashSXC (Alternative)
- Male Head- SXC
- Paint Splatter - SXC
- Tulip Petals - SXC
- Star Brushes- Qbrushes
- Grunge Brushes - Qbrushes
- Patterned Spheres- Media Militia
- Hot air Balloons- Media Militia
- Stag- Mediamilitia
- Paint texture- Mediamilitia
- Model- Deviantart
- Flames- Deviantart
Step 1
Let's create a blank document similar to these dimensions.")
Step 2
A subtly textured background works well than a plain one. Locate the paint texture and bring it into Photoshop. Drag and drop it into the composition.")
")
")
Step 3
We now need to create several shapes that will define the overall design and contain other graphic elements. Set the color to #000000. Let's Start off from the middle by drawing a circle with the Ellipse Tool. Choose the Shape layers option on the Options panel. Working with shape layers is very productive and time saving. They are resolution independent and can transform them without losing any quality.")
")
")
")
")
Step 4
Create another circle outside the main circle. Duplicate the circle ( Ctrl+J). Scale it approximately by 145%. Hold Alt+Shift while scaling to maintain the center point.")
")
")
")
Step 5
Create another circle bigger than the outer one. Just as before, duplicate the middle circle, place it below the rest.")
")
")
")
")
")
")
")
")
Step 6
Open up the model stock image in Photoshop. Isolate the subject from the background. Use the Pen Toolto select the subject, pay some attention while selecting the hair.")
")
")
29 comments on “How to Create an Amazing Mixed Media Poster in Photoshop”
This is cool looking but i hate the ones that got no downloads.
Thank you for this tutorials. I get some problems in step 8. I change the blend mode to Multiply and duplicate the head layer and invert it. But it't not work. It becomes draker. I try many ways. But it dosn't show like that.
I really enjoyed this tutorial.thanks
thank'ssssssssssssss
It's always helps when I visit your site and I always learn some new stuffs from you. Thanks a lot
man this is really cool
good job ,, thanks
I loved this tutorial. Some parts were hard to understand but searching for the answer got me more familiar with Photoshop. The only thing i really didn't like was the section where you make a blend in Illustrator. I don't know enough about the program to know how to do that. I had to leave it out because I couldn't figure it out. A little more detail on that part would really help. Other than that, great job. Thank you
A very smart approach to explain the things,like your step by step tutorial.
Amazing! I am a beginner in photoshop and I was able to create an exact look alike thanks to your tutorial!
Thank you for this tutorials.
**** you for this this is so badly written!
bruh
nice...welldone
Thanks 4 this amazing tutorial, if u leave dl sorce link it was very good:d
SUCH! an interesting and informal tutorial, I know so much more now and first thing tomorrow will design my own version of this and try and expand upon techniques. Brilliant! Thanks for all your effort in preparing this.
excellent...........i love it
THANKS ^^
I enjoyed your tutorial. A few of the steps were confusing as I am learning some of the tools. A few things were not explained, like having to take off the multiply blend mode from the second male head so the invert worked. All in all very nice job!
getting a lil bit of problems in step four but i'll get it
Great tutorial. Thanks.
Love it. This website always has the best tuts
https://www.facebook.com/photo.php?fbid=10201138425681956&set=a.4294894569778.186305.1208980994&type=1&theater
Omg, thank you so much for this tutorial. How awesome! I love it. :D
your welcome
y
This actually isnt that bad.
Like
Niceeeeeeeee!