How to Create a Psychedelic Tiger Illustration in Photoshop

How to Create a Psychedelic Tiger Illustration in Photoshop

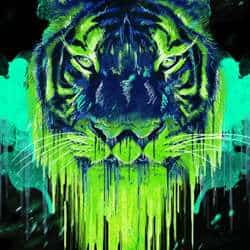
Learn how to create this super cool neon tiger poster in Photoshop! You’ll learn how to get neon colors using Gradient maps and learn some over-painting techniques to bring the whole image to life.

Preview of Final Results
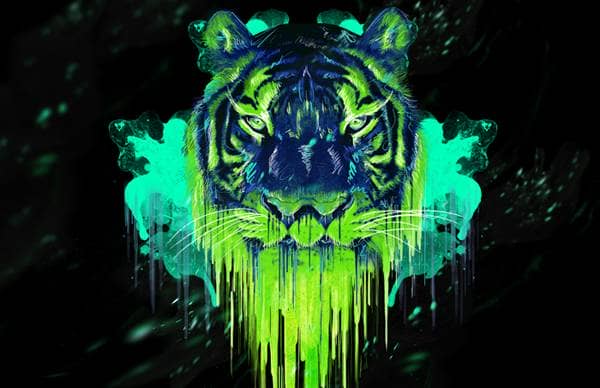
final-results

Download the PSD

Neon Tiger.zip | 4.26 MB

Download from Website


Psychedelic Tiger Illustration Photoshop Tutorial


Resources


Step 1

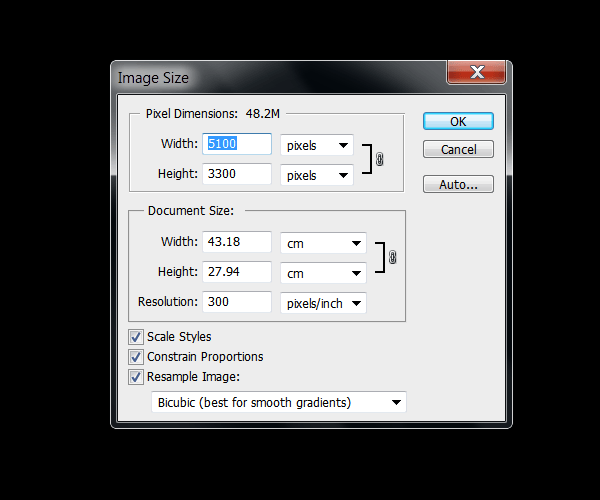
Open a new file in Photoshop.It should be 5100x3300 pixels with a resolution depth of 300dpi.This size is perfect for keeping as much details as possible.
step-001

Unlock the background layer by double clicking on the layer thumb and using the Paint Bucket tool (G) select black as your foreground color and fill the layer.


Step 2

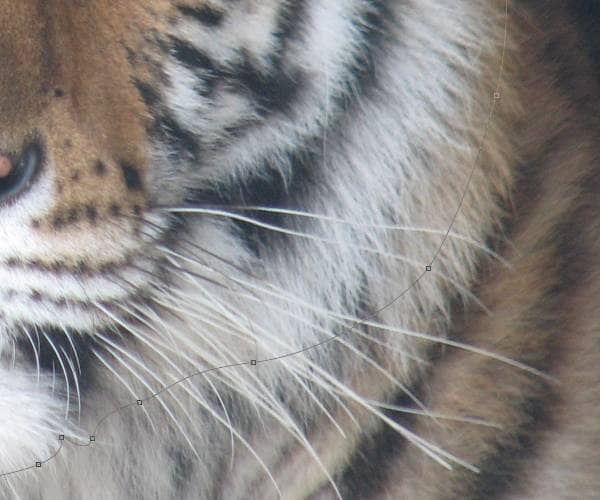
Drag the Tiger stock image to your canvas.Using the Pen tool (P) we are going extract the animal from the background.Draw the path a little bit inside of the tigers face.We don't need to be specifically exact here because we are going to draw all the hair we cut out again.
step-002

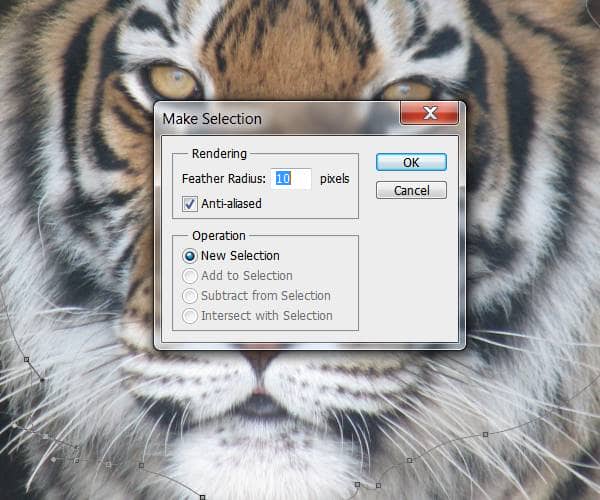
Once you close the path, right click and select:Make selection. On the feather radius use an amount of 10 pixels.This feather will make it easier for us to blend the hair we are going to paint on the sides of the face.
step-002a

Step 3

Now we are going to manipulate the head to deform it so that the tiger appears more symmetric and so it has a double snout that goes with our psychedelic concept.Select the head layer and duplicate it. Then go to Edit>Transform>Flip Horizontal.
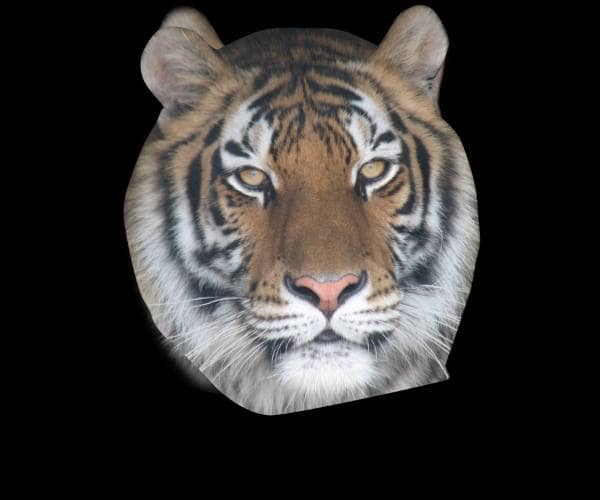
step-003

Add a layer mask on the duplicated layer and using a soft (0% hardness) medium (300 px) Brush (B) with Black selected as your foreground color,paint over the left side of the face to reveal the other layer under it until both faces are blended.
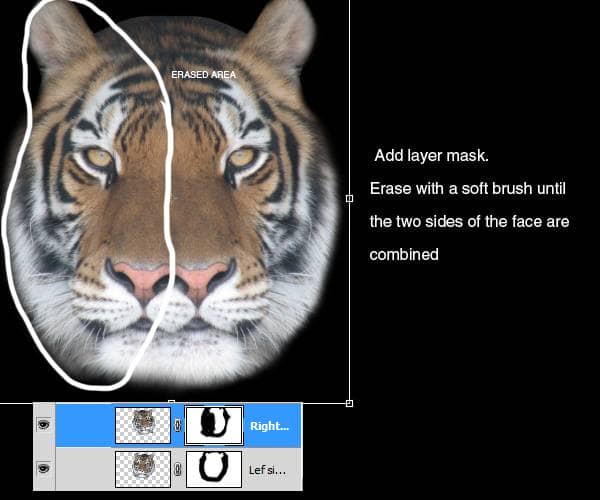
step-003a

Step 4

Select both layers and merge them together (Ctrl+E). Now we are going to do a few adjustments to the tiger face before we add our gradient map and star painting over it. Go to Filter>Sharpen>Sharpen and apply the filter 3 times (Ctrl+f) to remove most of the blur on the image.
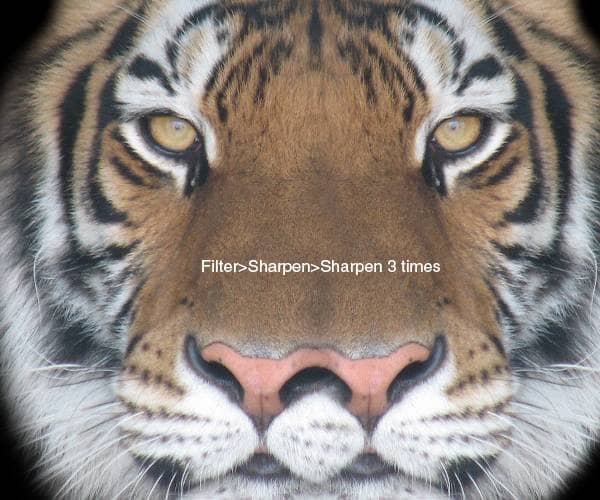
step-004

Now add some contrast by going to the menu Image>Adjustments>Brightness and Contrast and apply the next settings:
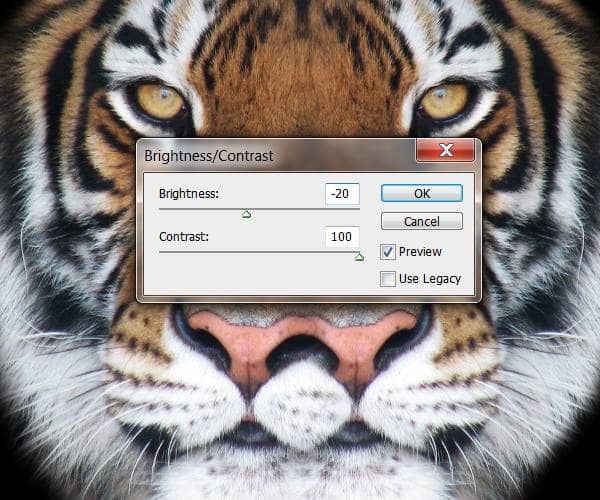
step-004a

Our image now has better contrast but still need to be darkened a little bit more.Go to Image>Adjustments>Levels (Ctrl+L) and apply these next values:
step-004b

I suggest you play around with this settings to get different results when adding your gradient layer because it will act directly on how dark or bright the image is.


Step 5

Create a new Gradient Map layer (Layer>New Adjustment Layer>Gradient Map) on top of the head layer and click on the Gradient to go to the Gradient editor menu.

step-005

I selected a cold color palette I thought would go nicely with the theme (Black for the shadows #000000, Dark Blue for the midtones #04225e and a bright green for the highlights #62e121).I suggest you experiment using very contrasting colors to get a trippy feeling on the illustration.As we go along with detailing the illustration,we are going to use different variations in tone of this same colors.

step-005a

We need to clip mask the Gradient Map layer to the Tiger head so the effect is only visible on that layer and to do that we are going to click between the two layer thumbs while holding Alt to clip mask them:

step-005b

This is how the tiger head should look like with the gradient map clip masked:

step-005c

Step 6

We are now going to star painting all the details on the tiger's face to make it pop.But first we need to go through some color and brush setting before we start. I'll be using a Digital tablet for this part of the tutorial because of the pressure sensitivity settings,but you can very well imitate them by using the Pen tool and stroking the paths using the "Simulate pressure" option (it will take more time but the final result will be similar to the one using a tablet). Create a new layer and select the brush tool with a basic round shape %100 hardness and about 4 pixels wide.Under the Brush presets menu, check the option "Shape Dynamics" and make sure to have the control set to "Pen Pressure".(This settings are also needed if you are using the Pen tool instead of a tablet).

step-006

As we go painting the details,try changing the size of the brush to get different results. For the colors we will be using,You can enter a quick eyedropper mode if you hold Alt while on the Brush tool and click on any color on you canvas to sample it.Sample 4 different hues of the main colors (2 greens and 2 blues) we originally had to start filling up the parts of hair we erased while we were extracting the image.

step-006a

We are going to start on the edges of the face.making short quick strokes taking as a reference the direction of the fur and the color.

step-006b

Try changing the to lower sizes of the brush to get more detail.Remember to have patience while doing this step.The more hair you paint,will make the blending look better.

step-006c

If you are using the pen tool in this step,I suggest you stroke different parts of the hair, then duplicate the layers and change their positions slightly to create clusters of hair you can easily move around,copy and paste around the face to speed up the process.

step-006d


Step 7

Once you have the edges of the tigers face filled with hair,we are going to start painting the face.First we are going to fill the face and defining it with the colors we sampled and then we are going to add details and accentuating them with another set of contrasting hues. Create a new layer,sample the bright green color and start stroking small indications of fur where the blue color is.

step-007

Now select the blue and paint to fill the parts that need more detailing.

step-007a

You can create new layers for every color or sector of the face you paint to keep things in order.Slowly fill the face with short paint strokes but be sure not to over do it! (We are trying to give it more detail without taking away the main composition of the tigers face).

step-007b

Pay attention on the direction of the fur,that will help you guide the way you should do the strokes.


Step 8

Now we need a selection of brighter color to paint the accents and detailing on the face.

step-008

Create a new layer.Starting with the bright green color,paint over the the darker shade of green to accentuate it.

step-008a

I want the main focus of the face to be the eyes,so I will especially add more detailing here.

step-008b

Keep painting more detailing on the face changing the hue of the colors:

step-008c
step-008d

Use white to give the accents on the highlights of the image and accentuate the features of the tiger like the eyes and the nose.

step-008e

Increase the size of the brush by a couple of pixels and paint the whiskers.

step-008f

To give the finishing touches,I used a light blue shade and using different brush sizes, I scribbled some details along the face.

step-008g

Step 9

In this step we are going to apply all the dripping effect that give a melting look to the image.To achieve this effect first we need to apply some different presets to our brush.Select a round large brush and under the Brushes presets,check the Shape Dynamics (Make sure again to have the control set to "Pen pressure").

step-009

Now check the "Color dynamics" box and apply the next values:

step-009a

Do the same with the "Transfer" option:

step-009b

Select the original shade of green (#62e121) as your foreground color and white as your background color.The variation of the size and the color will now be ruled by the pen pressure.This means the harder you press while doing your stroke,will make it bigger and it will also paint with a greener hue,if you press lightly as you stroke,then it will be smaller and the color will be lighter.

step-009c

Paint on a new layer that should be on top of all the tiger face detail layers and while holding SHIFT,stroke starting on the lower part of the face towards the bottom,pressing hard on the starting point and releasing it at the end.

step-009d

Change the size of the brush as you add more detail on the drips.Decrease it until you have very fine lines running across the dripping paint effect.

step-009e
step-009f

If you used multiple layers to do this step,merge them at this point.Drag the paper texture to your document and place it over the Dripping paint effect we just did.Change this layer blending mode to "Overlay" and clip mask it.

step-009g

Add more drip details around the snout and the nose.Use a small round brush this time and a Dark blue shade as your foreground color and black as your background color.

step-009h

Step 10

Load the brush set of Ink and Bleach splatters (Or a similar one you have).Create a new layer behind the tiger and paint a couple of shapes around the head.

step-010

Once you have something nice,Duplicate the layer and flip it horizontally.Center both layers around the head.

step-010a

Now we are going to paint some dripping effects on the stains.Use the same settings as the step before on your brush but now set its opacity to about 30%.I used a dark blue as my foreground color and a lighter shade as my background color.

step-010b

Step 11

For the finishing touches, we are going to add some firework sparks to brighten up the whole composition. Drag the Fireworks stock image to your document and select the Lasso Tool.Draw a random selection on some of the sparks and copy them into a new layer.

step-011

Go to Image>Adjustments>Hue and saturation and change the hue to a matching light blue color:

step-011a

Set this layer blending mode to "Screen".Now duplicate it and resize it several times and place the layers across the canvas.

step-011b

Final Results

final-results[1]

Download the PSD

Neon Tiger.zip | 4.26 MB

Download from Website


Authors Comment

profileThis is all for this tutorial. I hope you learned some new techniques while making it.Remember to experiment around with the colors and values using this tutorial as a base.Hope you enjoyed it!

- Edmar Cisneros

Download Free Presets
Sponsored

Download Lightroom presets and LUTs, absolutely free. Use the presets to add creativity and style to your photos.

24 comments on “How to Create a Psychedelic Tiger Illustration in Photoshop”

  1. Half the files are not available anymore and one you have to purchase. If the tutorial is out of date, then remove it. Frustrating!

    1. Sorry for the broken links JRitchie! As you probably know, free resources typically become unavailable over time. You're welcome to let us know in the comments if you would like us to update them.

      We try to make everything free, from the tutorial to the resources. Regarding the brushes, it's actually free. You'll need to create an account but the download is free.

      I know it's frustrating that free resources are a hassle to deal with, and that's the tradeoff with free vs paid resources. I'm sure you will be grateful for the free content so many people have put out there for you.

  2. Es ist sehr schwierig, solche Linien ohne Zeichentablett nur mit der Maus zu malen,
    das Tutorial ist total klasse und auch für mich als Noch-Anfänger super, nachzubauen.

    Danke vielmals !!!

  3. Sir, Please specify the setting for the shape dynamics as brush set darker in the middle and fade in the first and last corner, please also specify setting for shape dynamic of brush tool at the time of creating dripping effect.

    Thanks

  4. I used this tutorial for a class assignment.
    came out great!!
    I had a hard time with the dripping effect, but played around with some brushes till I got something realistic!

    Thanks so much!

  5. WOA! This is the stuff client are willing to pay for! Awesome and inspiring! One of the best tutorials out there on this site! Thanks for sharing!

  6. very very well written tutorial! it's not confusing at all... basic photoshop knowledge is required though.
    learnt new techniques..thank you for taking the time to make this !

    1. its been 11 years since you commented this, think back. did you waste themj

Leave a Reply

Your email address will not be published. Required fields are marked *

cross