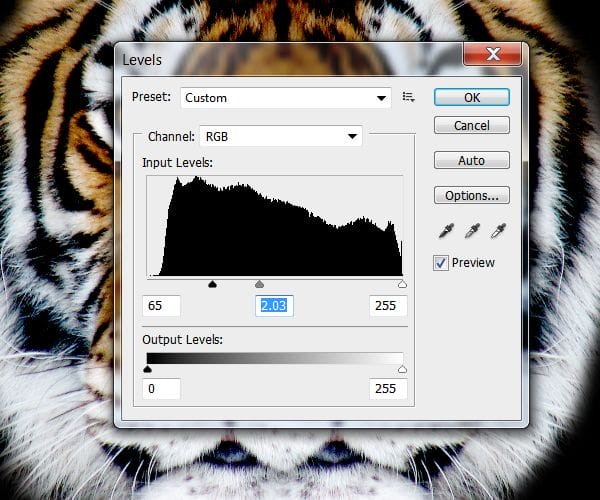
I suggest you play around with this settings to get different results when adding your gradient layer because it will act directly on how dark or bright the image is.
Step 5
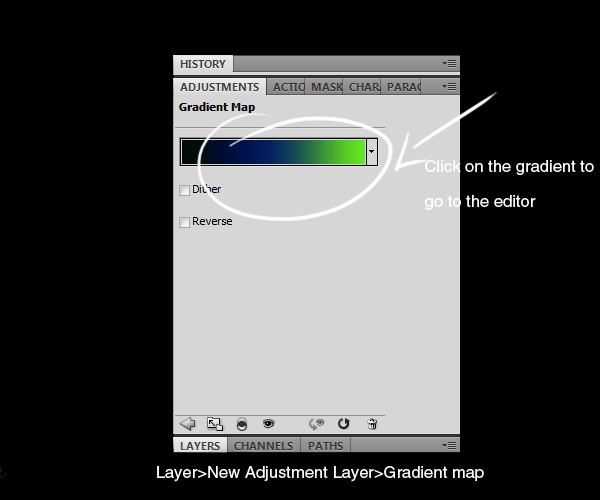
Create a new Gradient Map layer (Layer>New Adjustment Layer>Gradient Map) on top of the head layer and click on the Gradient to go to the Gradient editor menu.
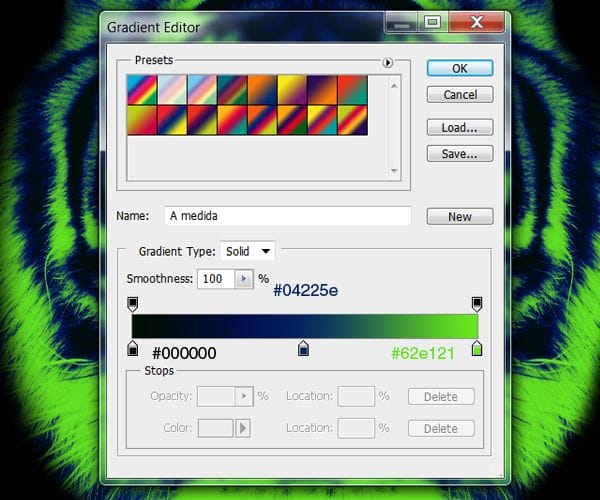
I selected a cold color palette I thought would go nicely with the theme (Black for the shadows #000000, Dark Blue for the midtones #04225e and a bright green for the highlights #62e121).I suggest you experiment using very contrasting colors to get a trippy feeling on the illustration.As we go along with detailing the illustration,we are going to use different variations in tone of this same colors.
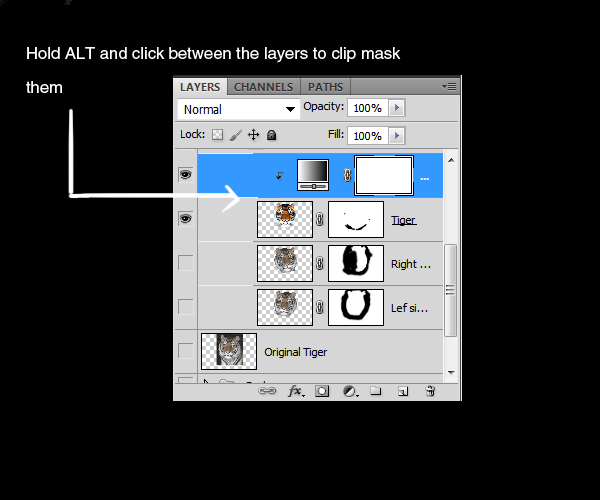
We need to clip mask the Gradient Map layer to the Tiger head so the effect is only visible on that layer and to do that we are going to click between the two layer thumbs while holding Alt to clip mask them:
This is how the tiger head should look like with the gradient map clip masked:

Step 6
We are now going to star painting all the details on the tiger’s face to make it pop.But first we need to go through some color and brush setting before we start. I’ll be using a Digital tablet for this part of the tutorial because of the pressure sensitivity settings,but you can very well imitate them by using the Pen tool and stroking the paths using the “Simulate pressure” option (it will take more time but the final result will be similar to the one using a tablet). Create a new layer and select the brush tool with a basic round shape %100 hardness and about 4 pixels wide.Under the Brush presets menu, check the option “Shape Dynamics” and make sure to have the control set to “Pen Pressure”.(This settings are also needed if you are using the Pen tool instead of a tablet).
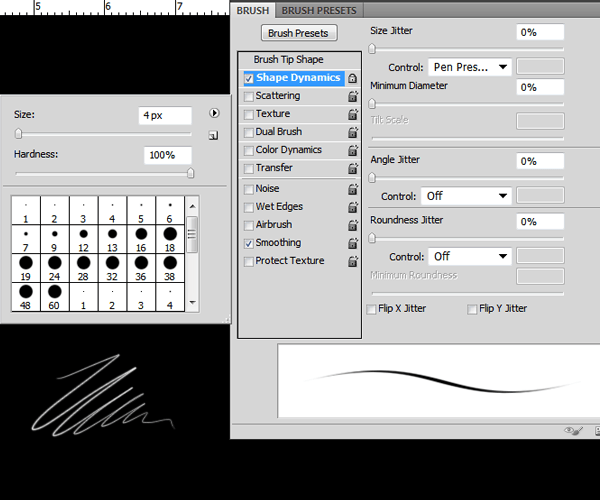
As we go painting the details,try changing the size of the brush to get different results. For the colors we will be using,You can enter a quick eyedropper mode if you hold Alt while on the Brush tool and click on any color on you canvas to sample it.Sample 4 different hues of the main colors (2 greens and 2 blues) we originally had to start filling up the parts of hair we erased while we were extracting the image.
24 responses to “How to Create a Psychedelic Tiger Illustration in Photoshop”
-
Half the files are not available anymore and one you have to purchase. If the tutorial is out of date, then remove it. Frustrating!
-
Sorry for the broken links JRitchie! As you probably know, free resources typically become unavailable over time. You’re welcome to let us know in the comments if you would like us to update them.
We try to make everything free, from the tutorial to the resources. Regarding the brushes, it’s actually free. You’ll need to create an account but the download is free.
I know it’s frustrating that free resources are a hassle to deal with, and that’s the tradeoff with free vs paid resources. I’m sure you will be grateful for the free content so many people have put out there for you.
-
-
WOW just what I was searching foг. Ϲame here Ƅy searching fߋr soccer tricks rainbow
-
DAAAAAAAAAAMN!!!
-
yo this is gr8 I learn lots new stuff I’ve already mastered photo shop and English skills
-
wow its coollllllllllll ***** more stare
-
yeah i bet
-
Wow, these are really creative! They remind me of those Chip Fosse drawings from Overhauling’. Great work!
-
Es ist sehr schwierig, solche Linien ohne Zeichentablett nur mit der Maus zu malen,
das Tutorial ist total klasse und auch für mich als Noch-Anfänger super, nachzubauen.Danke vielmals !!!
-
Wow, it is wonderful tips.
-
Sir, Please specify the setting for the shape dynamics as brush set darker in the middle and fade in the first and last corner, please also specify setting for shape dynamic of brush tool at the time of creating dripping effect.
Thanks
-
very nice article
-
I used this tutorial for a class assignment.
came out great!!
I had a hard time with the dripping effect, but played around with some brushes till I got something realistic!Thanks so much!
-
THIS IS THE HARDEST THING IN THE WORLD PLEASE BE MORE HELPFUL. THE PHOTO IS PRETTY
-
WOA! This is the stuff client are willing to pay for! Awesome and inspiring! One of the best tutorials out there on this site! Thanks for sharing!
-
im not getting the the melting effect with brush, what brush did you choose?
-
The psd is only 72dpi…
-
this ISH is difficult
-
very very well written tutorial! it’s not confusing at all… basic photoshop knowledge is required though.
learnt new techniques..thank you for taking the time to make this ! -
how do i get the grunge loooook!!!!!!!
-
Be more specific this is confusing.
-
i agree
-
-
Wooaahhhh this is rad! thanks for the instruction!
-
its been 11 years since you commented this, think back. did you waste themj
-


Leave a Reply