Luminar AI lets you turn your ideas into reality with powerful, intelligent AI. Download the photo editor and see how you can completely transform your photos in a few clicks.
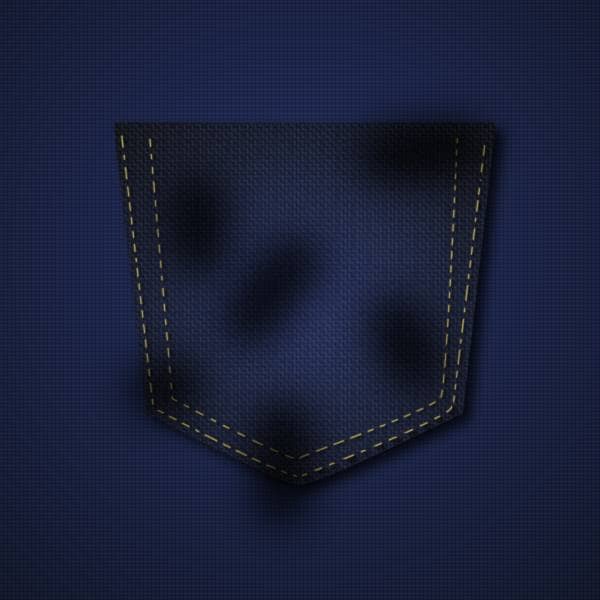
Step 13 - Blur Texture
On your 'Texture' layer go to Filter > Blur > Motion Blur and apply these settings.
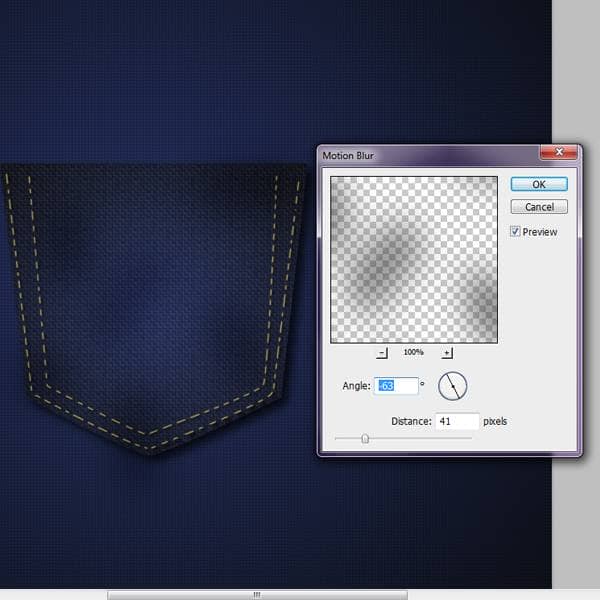
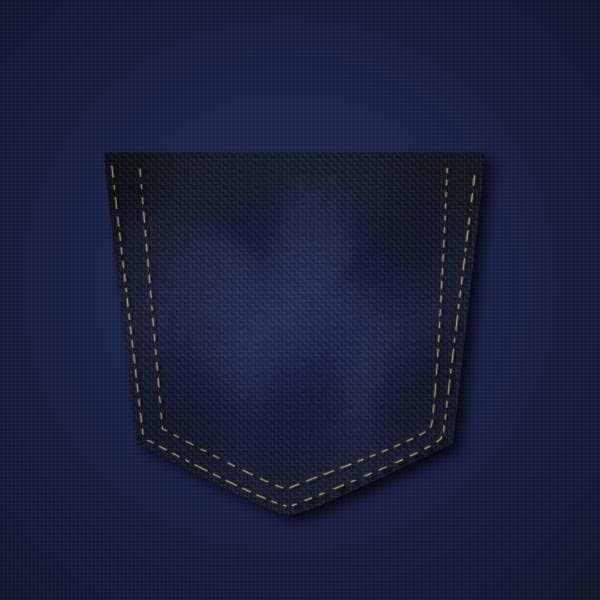
Step 14 - Smudge Texture
To give it more of a random effect grab your smudge tool (40px soft round brush, Strength: 50%) and spread the texture around a bit, so that it looks like the image below. Erase the parts that go outside of the pocket.
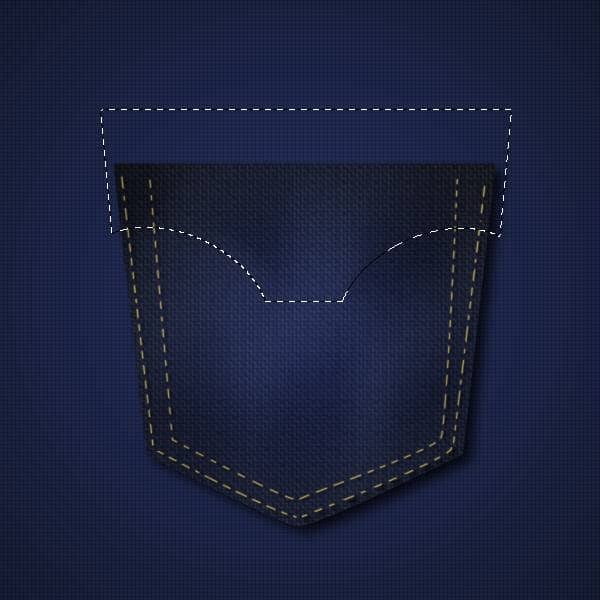
Step 15 - Pocket Flap
Create a new layer and name it 'Flap'. Grab your pen tool and make a shape like the one below make sure to fill it with #ffffff. Duplicate this layer.
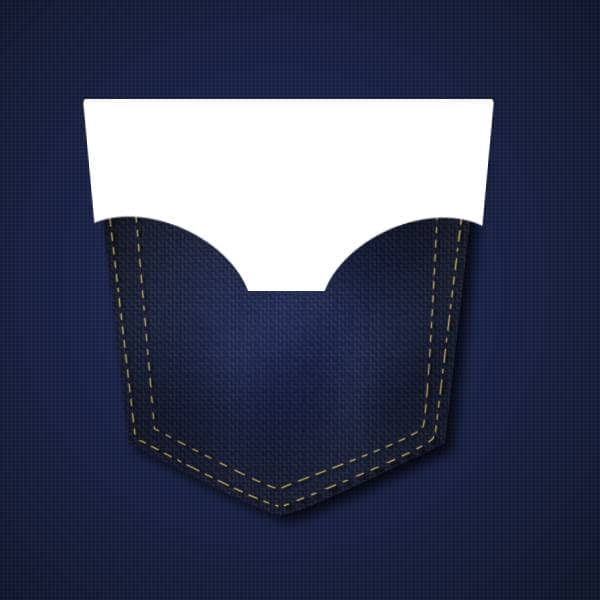
Step 16 - Apply these settings
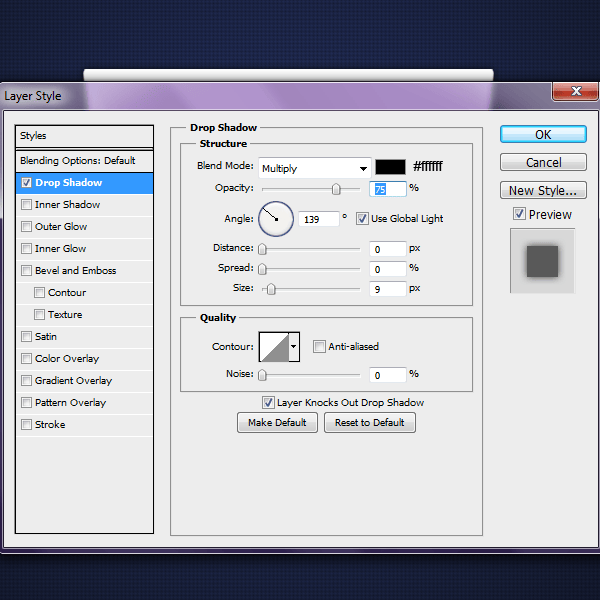
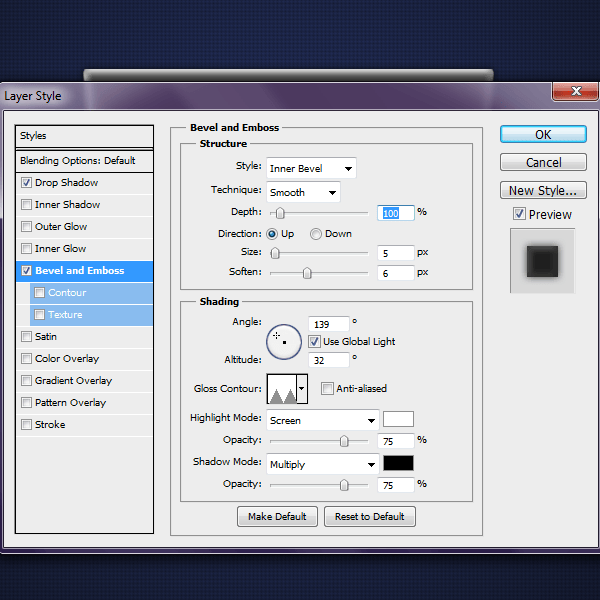
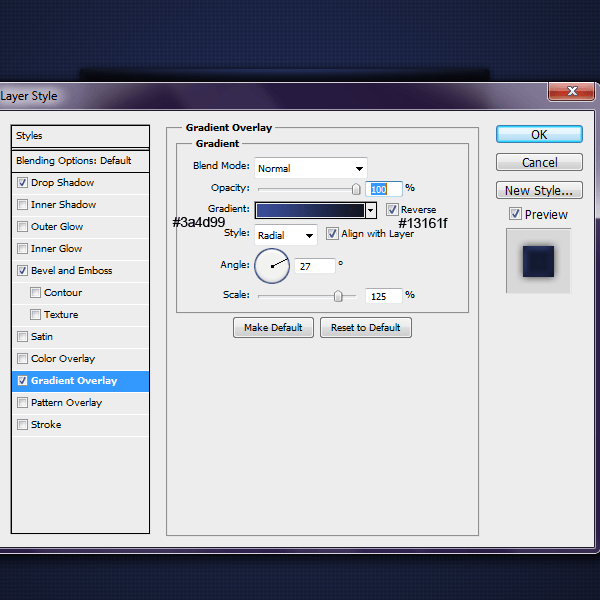
On your first 'Flap' layer apply these settings.
Bevel and Emboss
Gradient Overlay
Step 17 - 2nd Flap Layer
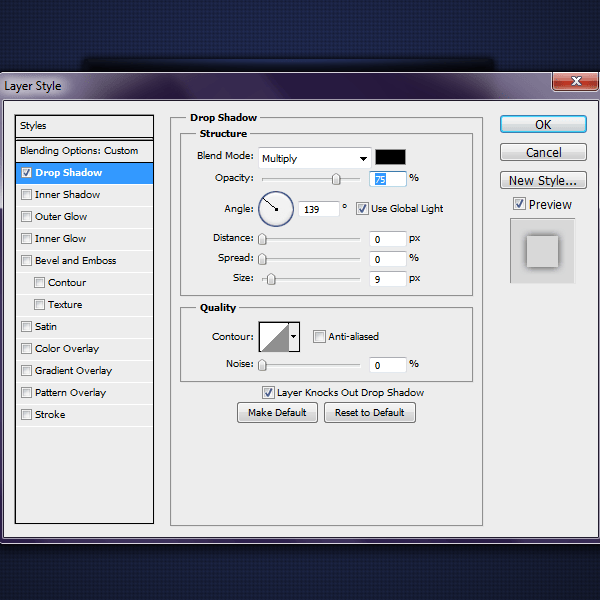
On your 'Flap Copy' layer add these layer styles starting with the Drop Shadow.
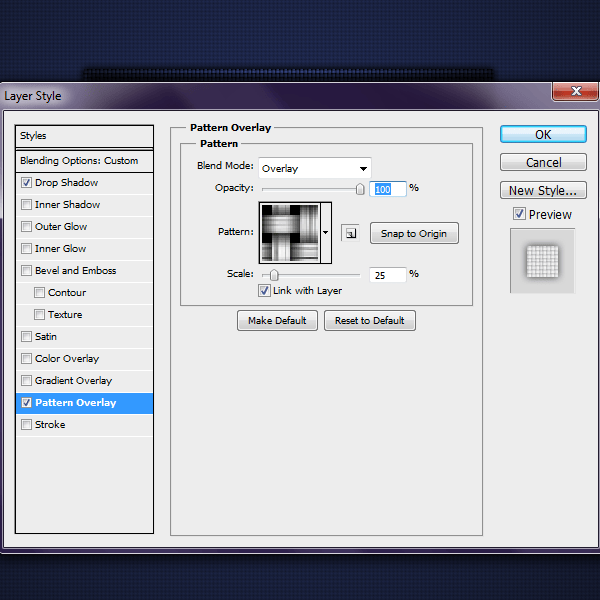
Pattern Overlay
Step 18 - Flap Texture
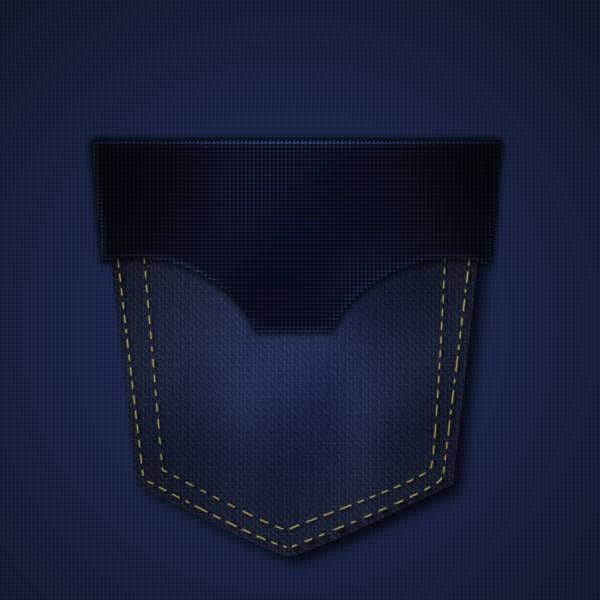
Your image should now look like the image below. Now lets add some texture to the flap. Create a new layer and name it 'Flap Texture'. Select a 77px soft round brush with a Flow of 50% #000000. Make some random marks on the flap.
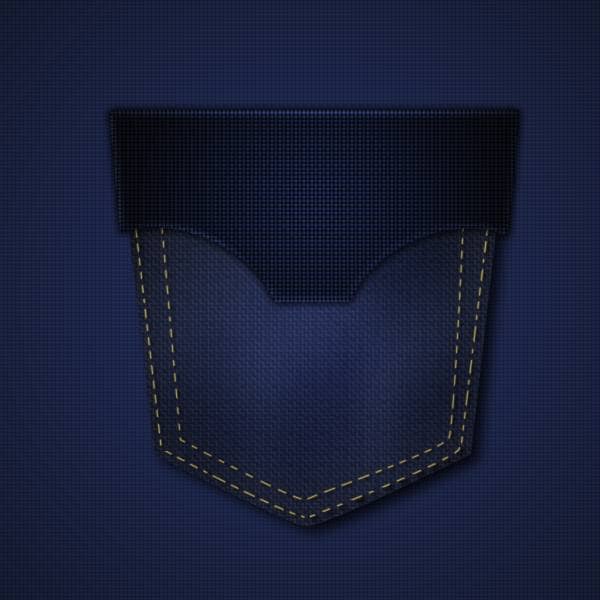
Also change this layer to 'Soft Light' with an Opacity of 50%. Erase the parts that go off of the flap. Use the Smudge Tool if need be.
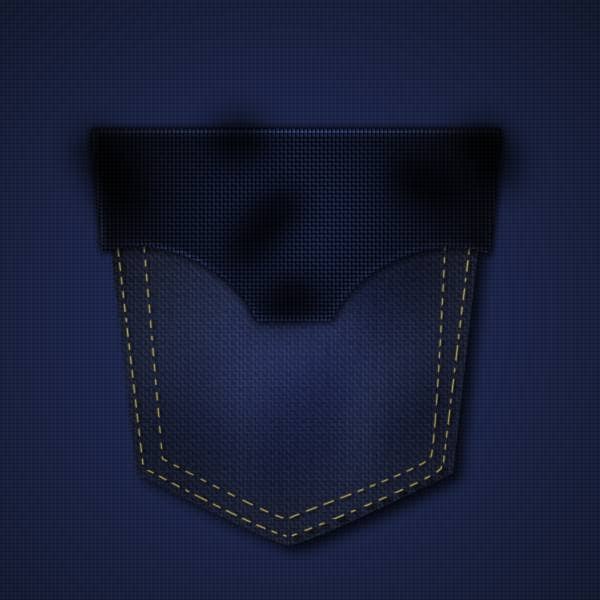
Step 19 - Flap Stitching
Make a new layer and name it 'Flap Stitching.' On the 'Flap Copy' layer make that layer a selection by clicking the little box of the image while pressing 'ctrl.' Once you have done this Select > Modify > Contract 10px
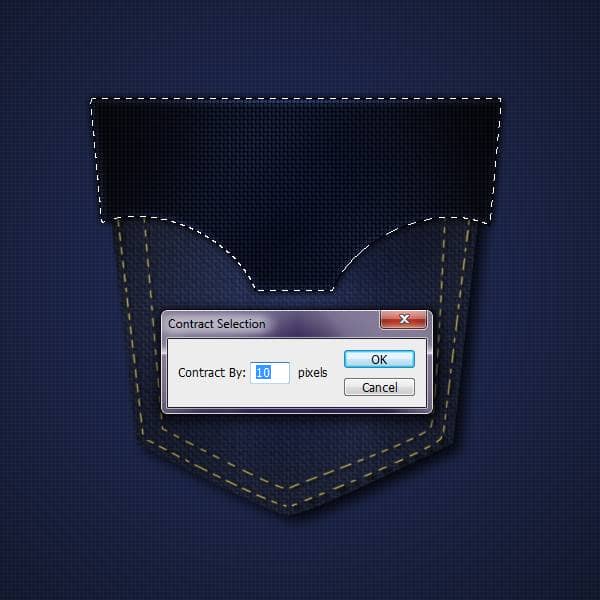
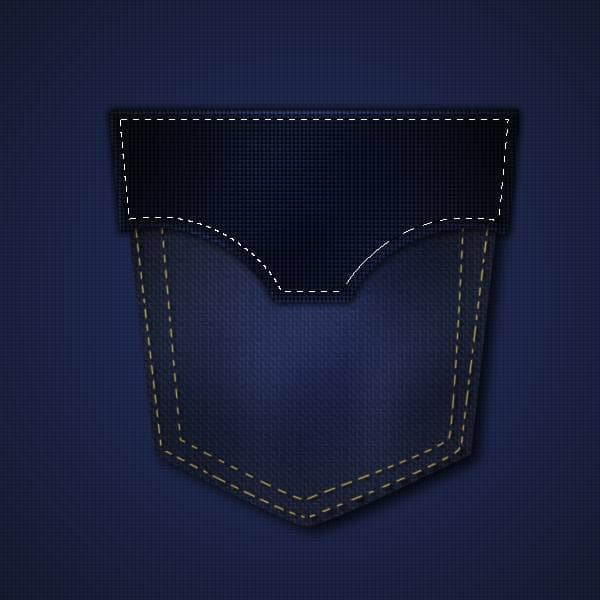
On the 'Flap Stitching' layer go to Edit > Stroke 1px #bba958 Inside
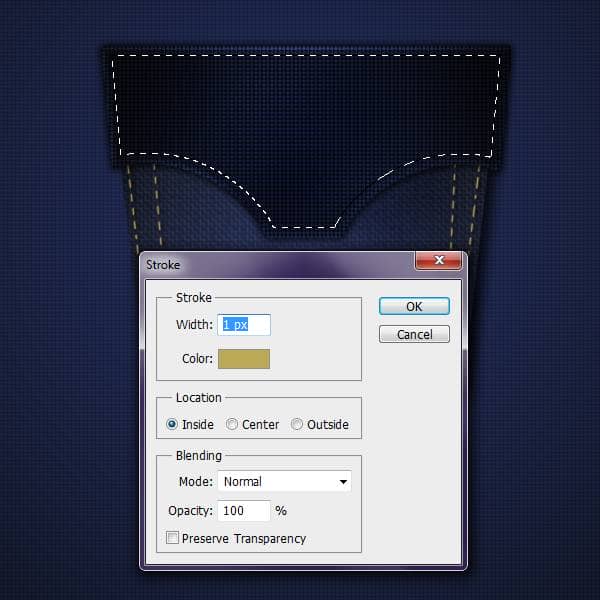
Step 20 - Flap Stitching effect
On this 'Flap Stitching' layer add a layer mask and erase until it looks like the image below. Note: I used a 5px hard round brush
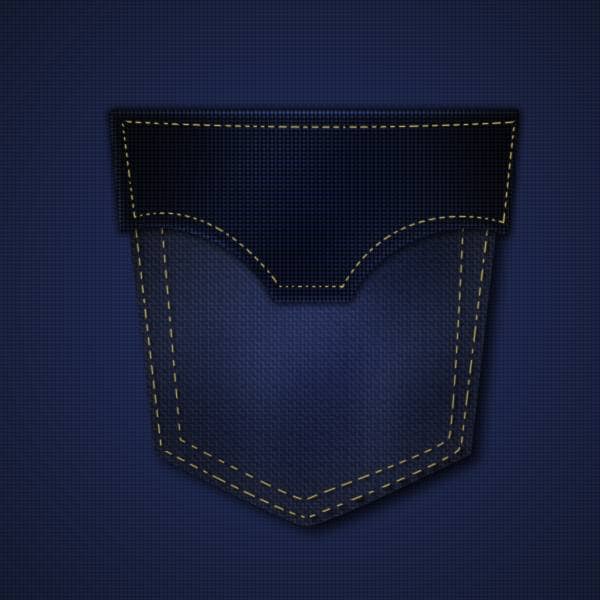
Change this layer to 'Color Dodge'
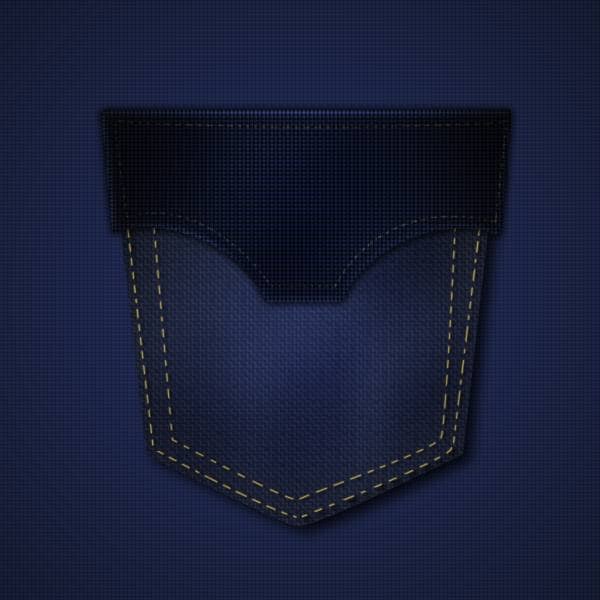
Step 21 - Small Buttons
Click on the folder icon to 'Create a New Group'. Name this folder 'Small Button.' Create a New layer inside of this folder name it 'Circle' or whatever you like. Grab your Elliptical Marquee Tool and make a circle like the size below and fill it with any color (we will change the color later).
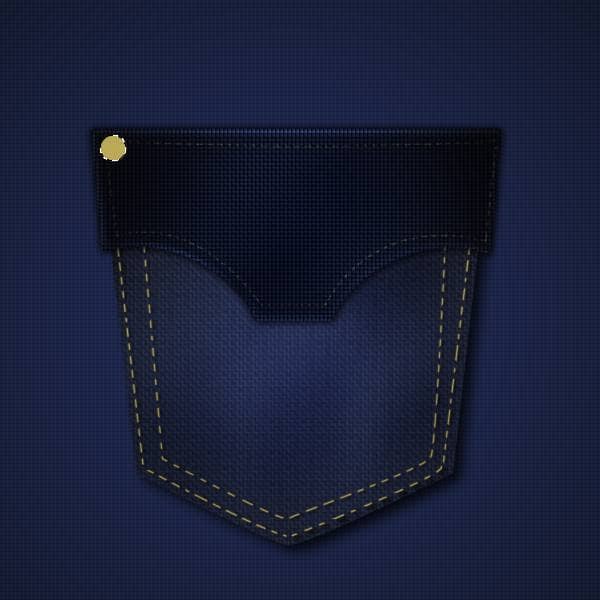
Step 22 - Circle layer styles
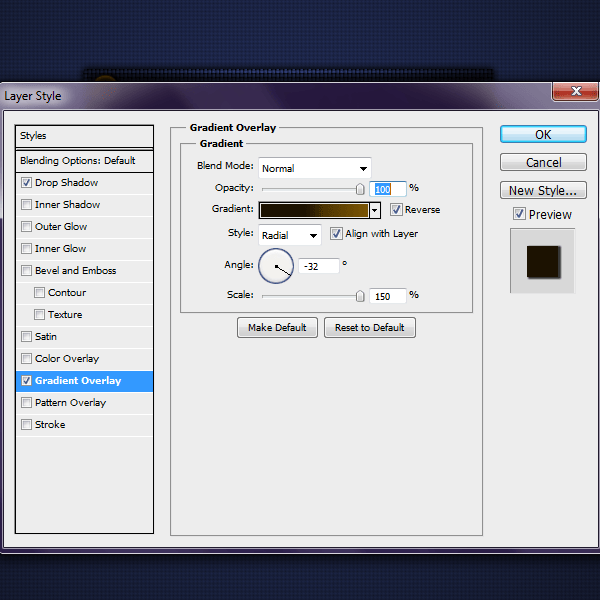
Add these settings to the 'Circle' layer. Drop Shadow
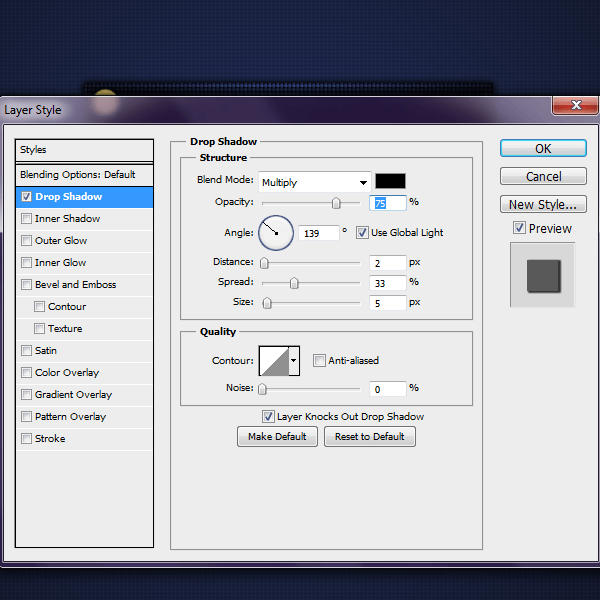
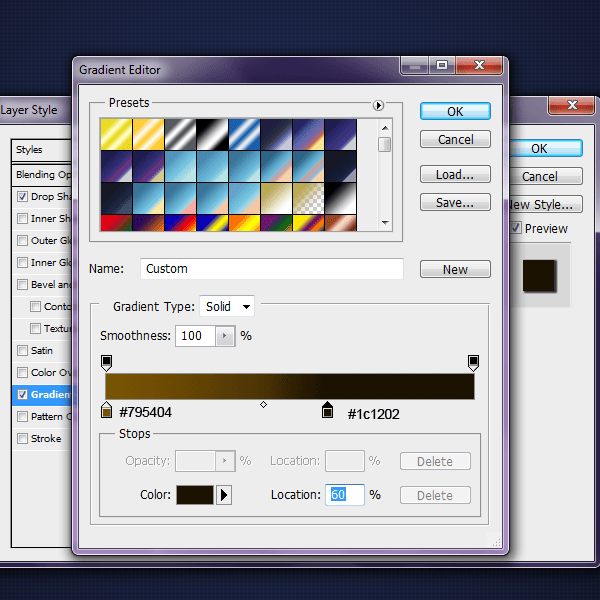
Gradient Overlay
Step 23 - Highlight
Create a New layer and name it 'Circle Highlight'. Grab your Paint Brush Tool (5px soft round brush, #ffffff) and paint a highlight around the edge of the circle, like the image below.

