Turn any photo into a dot grid artwork with these Photoshop actions. You'll get great results with dots that change size. They get larger in brighter areas and smaller in darker areas. Free download available.
Learn how to create a photo realistic iPod Shuffle from scratch with Photoshop! This in depth tutorial is recommended for experienced Photoshop users. A PSD is included with this tutorial.
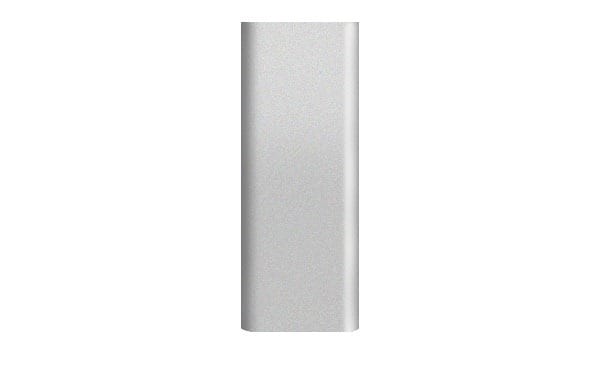
Preview of Final Results
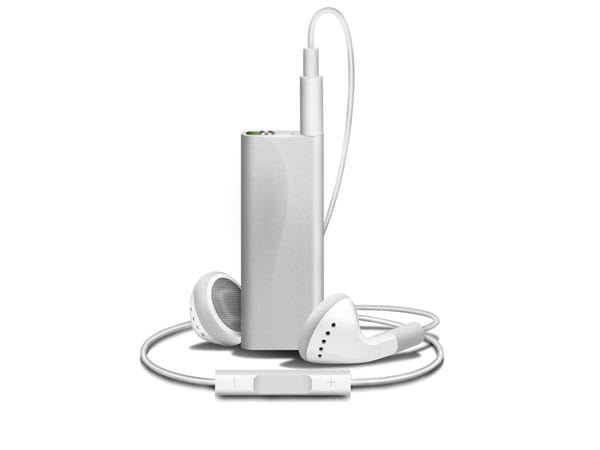
Draw a Realistic iPod Shuffle Photoshop Tutorial
Step 1
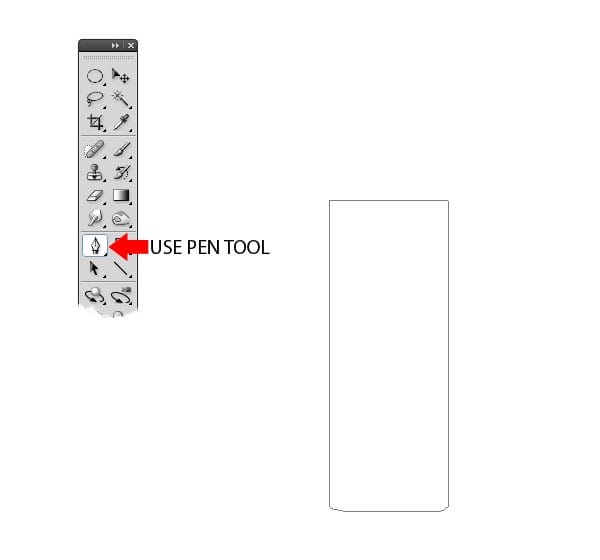
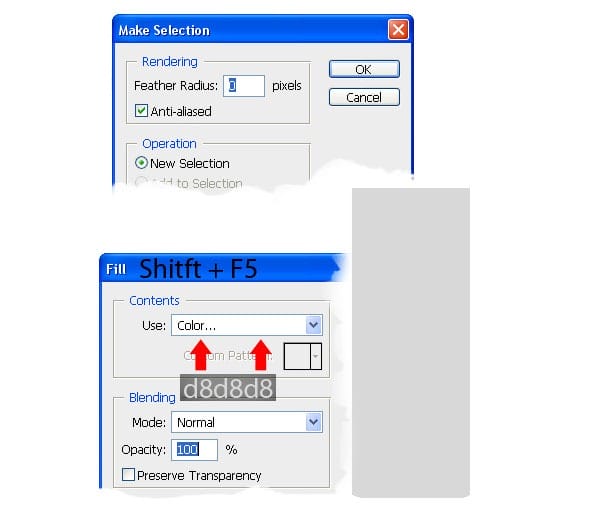
Create New Document ( Ctrl+N ) 1600x1200 pixels at a resolution of 300 pixels/inch. Make new layer and change the name of the layer in "face" and create the same shape as I did using Pen tool ( P ) and fill (Shift +F5) the selection with #d8d8d8 color as in the image below .
Step 2
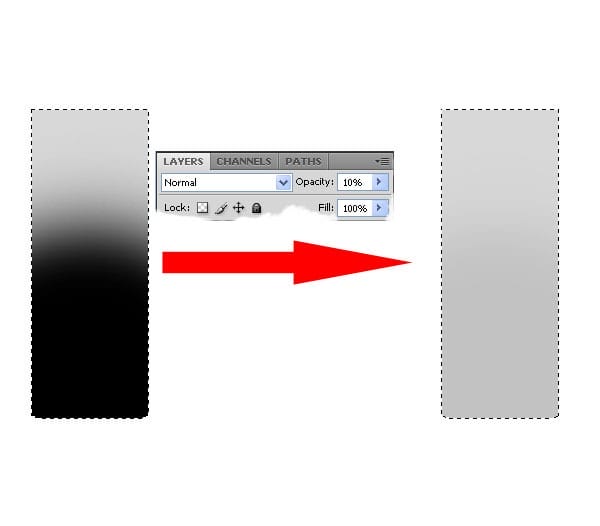
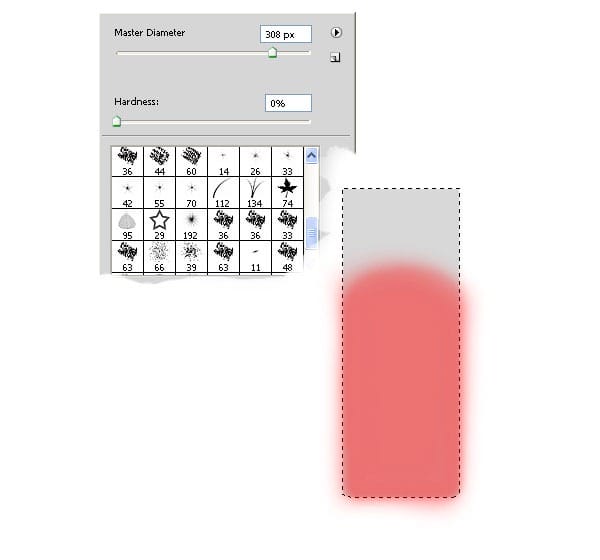
Make new layer and select " face " layer ( Ctrl+Click ) and brush ( 308px ) with black color and set the opacity to 10% .

Step 3
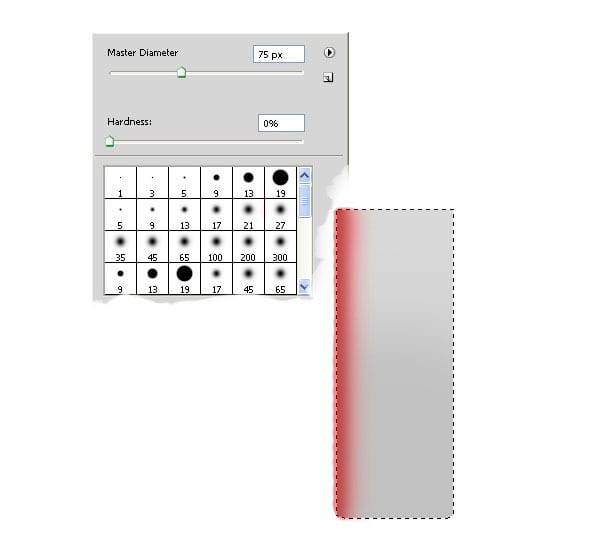
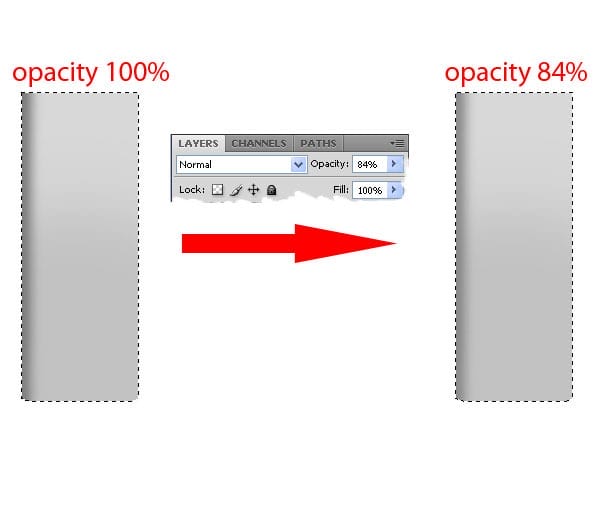
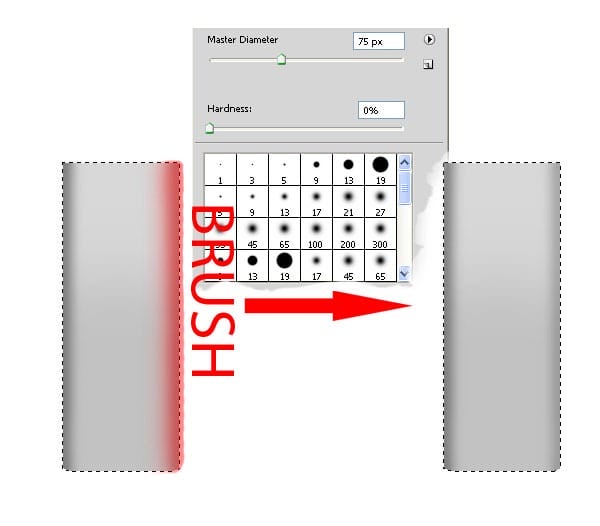
Make new layer and put the brush ( 75px ) on the left edge with black color and set the opacity to 84% .
Step 4
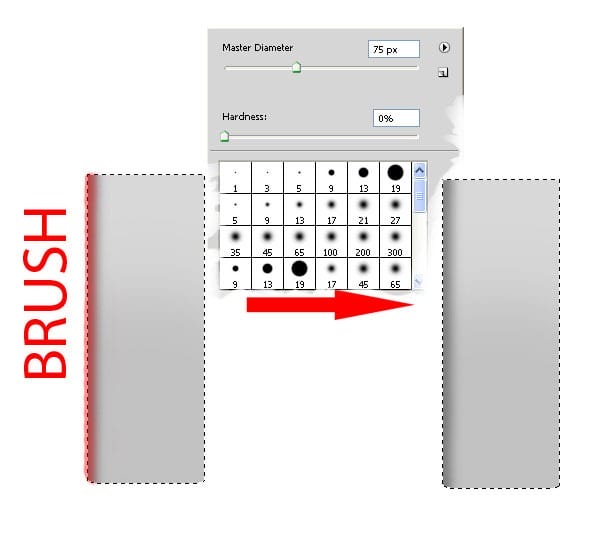
Now again put the brush on the left edge but make it little . Make new layer and put the brush ( 75px ) on the right edge with black color and set the opacity to 57% .
Step 5
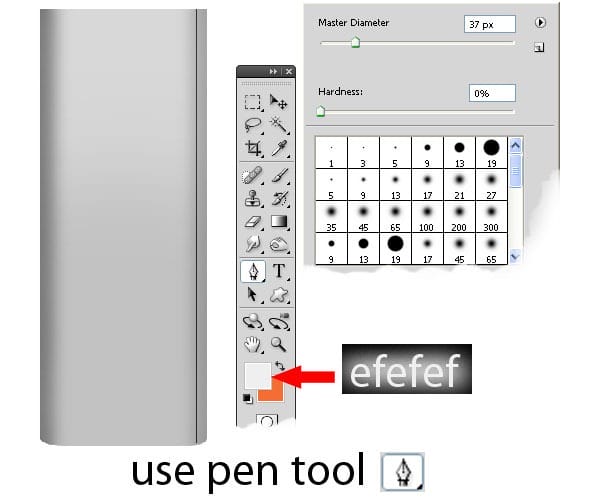
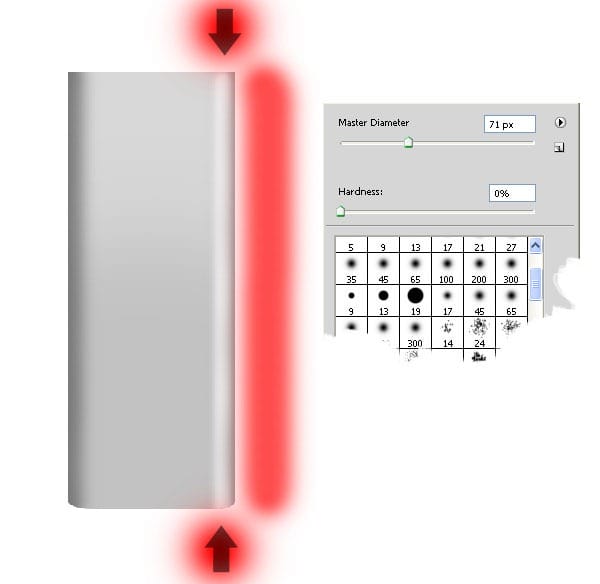
Make new layer and make a path using PenTool ( P ) like in the picture and stroke path with #efefef and brush size ( 37px ) , erase Eraser Tool ( 71px ) a bit on the edge like in the picture.
Step 6
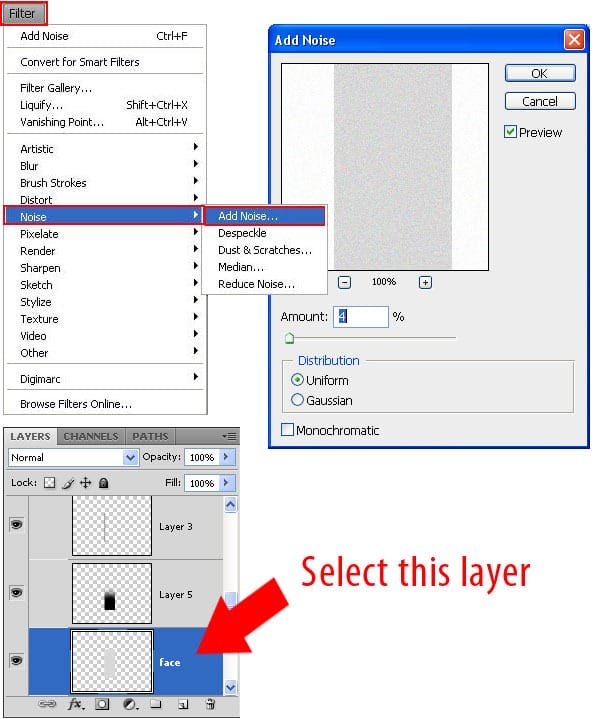
Select " face " layer ( Ctrl+Click ) an go to Filter – Noise – Add Noise and set noise in this mode : Amount 4% , Distribution Uniform .
Step 7
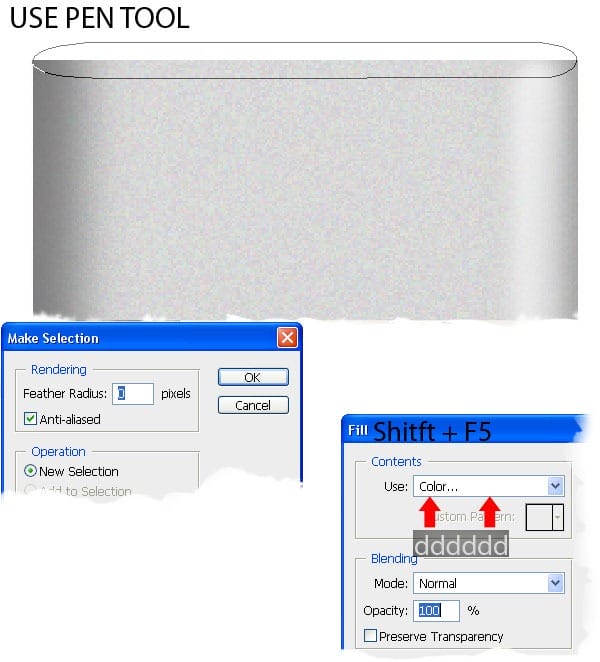
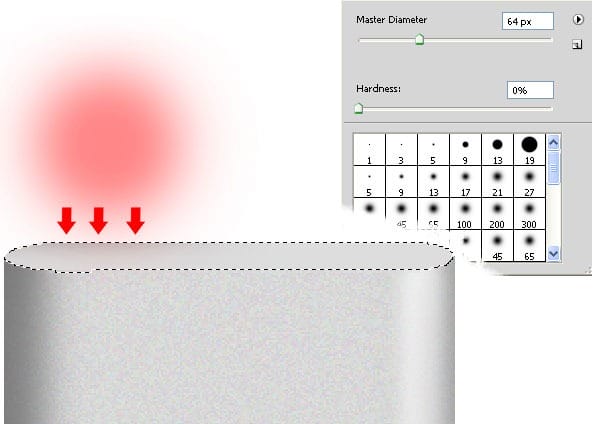
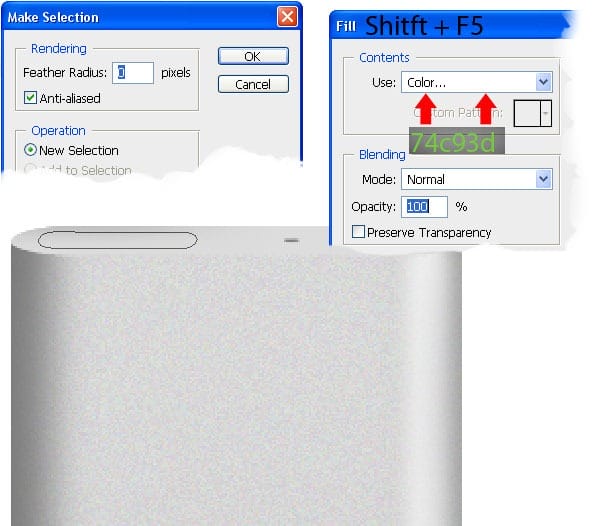
Make new layer and create the same shape as I did using Pentool ( P ) and Fill ( Shift + F5 ) selection with #dddddd color , make new layer and brush little with black an size brush 64px .
Step 8
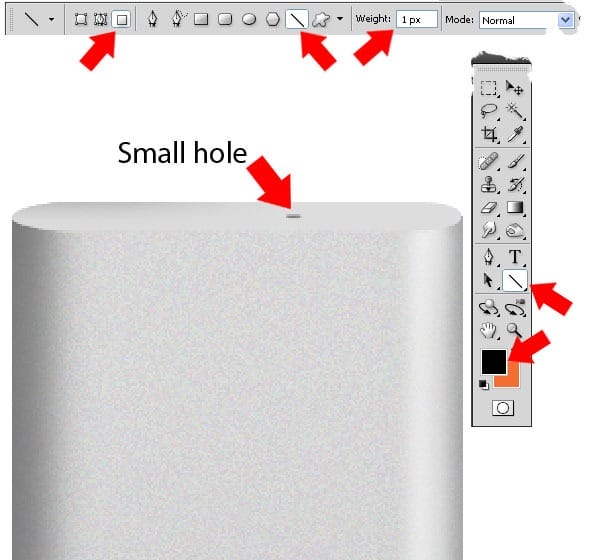
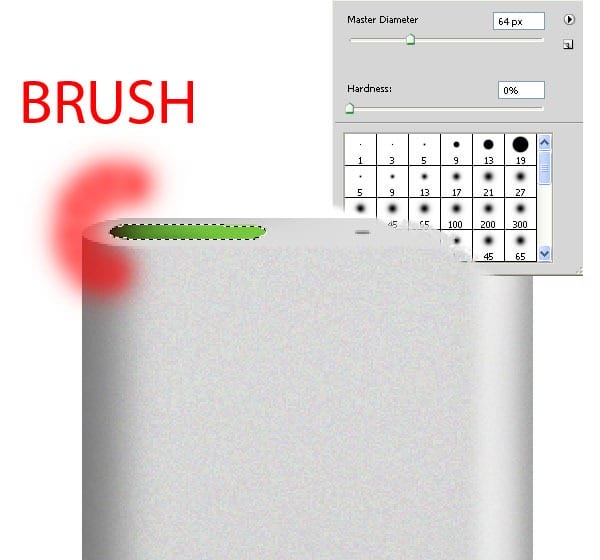
Make new layer and make small hole with Line Tool ( U ) use the settings from the image, brush color black . Make new layer and make new path Pen Tool ( P ) like in the picture and Fill ( Shift + F5 ) selection with #74c93d color .
Step 9
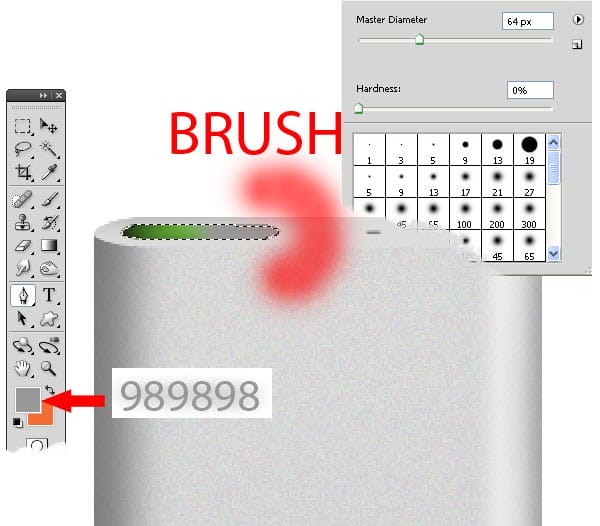
Make new layer and brush ( 64px ) the left corner with black . Make new layer and brush ( 64px )the right corner with #989898 color .
Step 10
Make new layer an with black brush ( 64px ) little the right corner . Make new layer and make new selection with shape of the photo and Fill ( Shift+F5 ) selection with black . Apply a Gradient Overlay Layer Style (Right click on the layer – Blending Options>Gradient Overlay).
Gradient set at this mode :
- Blend Mode : Normal
- Opacity : 100%
- Style : Linear – Align With Layer
- Angle : 0
- Scale : 100%
- Gradient :
1 – Color # 535b5e Location : 0%
2 – Color # fefefe Location : 25%
3 – Color # 4a5154 Location : 50%
4 – Color # fdfdfd Location 75%
5 – Color # 535b5e Location 100%


Step 11
Make new layer and make a circle with Elliptical Marquee Tool ( M ) and Fill selection ( Shift + F5 ) with black . Apply a Gradient Overlay Layer Style (Right click on the layer – Blending Options>Gradient Overlay).
Gradient set at this mode :
- Blend Mode : Normal
- Opacity : 85%%
- Style : Linear – Align With Layer
- Angle : 0
- Scale : 150%
- Gradient :
1 – Color # 535b5e Location : 0%
2 – Color # 4a5154 Location : 25%
3 – Color # fefefe Location : 50%
4 – Color # 4a5154 Location 75%
5 – Color # 535b5e Location 100%


Step 12
Make new layer and make a line with Line Tool ( 1px ) and use settings like in the picture .

Step 13
Make new layer and create the same shape as I did using Pentool ( P ) and Fill ( Shift + F5 ) selection with #c4c4c4 color .

Step 14
Make new layer and brush and put the brush ( 64px ) on the edge with #949494 color . Make a new layer and brush the side showed in the picture with #dfdfe1 .


Step 15
Brush side showed in the picture with #dfdfe1 . Make new layer and make the same shape as I did using PenTool ( P ) and Fill( Shift + F5 ) selection with #a6a6a6 .


Step 16
Brush this side ( on photo ) set brush at 64px and use color #e1e1e1 . Make new layer and make new shape ( on photo ) with PenTool ( P ) and Fill ( Shift + F5 ) selection with #e2e2e2 .


Step 17
Brush this part with brush set at 75px and color #fcfcfc . Make new layer and brush easy this side on photo set brush at 37px and color black .


Step 18
Make new path Pent Tool ( P ) and make selection father 0 . Brush lower side 75px and use color #fcfcfc . Set the opacity 84%


Step 19
Make new path Pen Tool ( P ) and make selection father 0 and brush this area with Brush 75px and use color #fcfcfc . Set opacity 69%


Step 20
Make new layer and make 5 small holes with Brush 9px and color #898989 . Make another 5 small holes but this time with black color .


Step 21
Make new layer and make new path (like in the picture down ) Pen Tool ( P ) and make selection father 0 and Fill ( Shift + F5 ) with color #f2f2f2 . Brush 64px this side ( from the picture ) with black and set the opacity at 65% .


Step 22
Make new circle with Elliptical Marquee Tool ( M ) and Fill ( Shift + F5 ) selection with white . Brush 30px side with black set the opacity at 63% .


Step 23
Make new layer and make new path (like in the picture down ) Pen Tool ( P ) and make selection father 0 and Fill ( Shift + F5 ) with color #f2f2f2 . Brush 64px this side ( from the picture ) with black and set the opacity at 70% .


Step 24
Make new circle with Elliptical Marquee Tool ( M ) and Fill ( Shift + F5 ) selection with white . Brush 30px side with black set the opacity at 42% .


Step 25
Make new path with Pen Tool ( P ) down in the left area and make selection and Fill ( Shift + F5 ) selection with color #b5b5b5 . Make new layer and Fill with pattern selected and Transform ( Ctrl + T ) like in the picture . Set pattern opacity at 47% . Brush this side with black and set opacity at 70% .


Step 26
Brush 75px this side with white and set opacity at 26% . Brush with white in center and set opacity 17% .


Step 27
Brush 75px slowly this side with black and set opacity 39% . Make new layer and make new path Pen Tool ( P ) ( like in the picture ) make selection and Fill ( Shift + F5 ) selection with color # deeded . Brush this area with color f9f9f9 . Brush 75px top with color #f9f9f9 and brush the bottom with black .


Step 28
Make new path Pen Tool ( P ) like in the picture and make selection and Fill (Shift+F5) with color #e5e5e5 . Make new path Pen Tool ( P ) and stroke this path with brush ( 25px ) with black and gently wipe the edge . Brush 75px side with color #b9b9b9 .


Step 29
Brush 75px easy this side with black and make opacity 45% . Make new path and make selection with father 0 and Fill ( Shift + F5 ) selection with color #efefef . Brush 75px easy this side with black and make opacity 49% . Brush 75px this side with black and set opacity 45% .


Step 30
Use Line Tool and use settings like in the photo, use color #777777. Make new hole in the net with black and brush 30px and set opacity 31% .


Step 31
Make new path and make selection with father 0.5 and fill selection (Shift+F5) with color #ecedec . Brush 14px easy on wire side with black. Make a path in the middle of the wire like in the picture , stroke path with color #ecedec and brush 5px . Make path like in the picture and make selection father 0 and Fill selection (Shift + F5) with color #f2f2f2 .


Step 32
Brush 75px down side with black and set opacity 53%, brush the up side with black and set opacity 12% . Make new selection like in the picture and brush 75px with color #fcfcfc. Make new path and make selection with father 0.5 and Fill (Shift + F5) selection with color #d9dbda .


Step 33
Brush 25px side with black and set opacity 12%. Make with Line Tool and color #b9b9b9 mark – and +.


Step 34
Make new shape like in the picture and make selection with father 3 and brush 45px with black like I did . Make new shape with Pen Tool ( P ) with father 0.5 and brush on edge with white and set opacity 35% . Make a path and stroke this with brush 5px and color white , erase easy on edge .


Final Results

One comment on “Draw a Realistic iPod Shuffle”
cant seem to find the downloadable PSD!