Find out what Photoshop techniques were used to create this painting. In this Photoshop tutorial, we will walk you through several painting techniques to get you started with painting.
Exotic Fashion Photoshop Tutorial
Setting the canvas
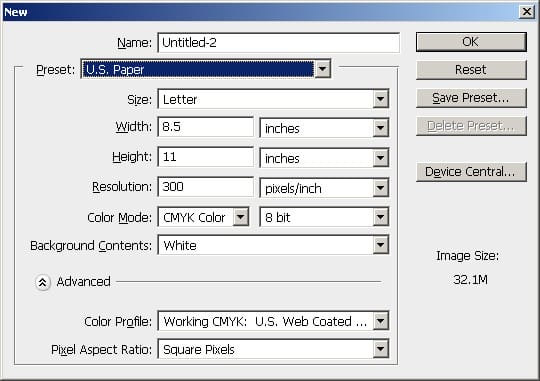
The first step is to create a new canvas; most important and overlooked. Choose what you want your output size to be. The larger the canvas dimensions, the more time and effort will be required to complete the painting. If you’re not entering the width and height in pixels, make sure that you set the resolution to 300 pixels/inch. If you plan on printing this, make sure that you have the color mode set to CMYK color. You should also choose to use 16 bit color if you will not be using many filters and if your computer can handle it.

Creating the layers
Before you paint anything, you’ll need to create two additional layers with the blending mode on Multiply. One of the layer will be used to hold the drawing or sketch and the other will be used for the color and painting. This is the most basic layer setup and is recommended for beginners who just want to get started with painting in Photoshop. More advance users will have groups of layers for each part of the painting.

Painting
When painting, it is very helpful to have a pen tablet such as the Wacom Bamboo. A pen tablet will allow you to create brush strokes that are pressure sensitive.
Enable Pen Pressure
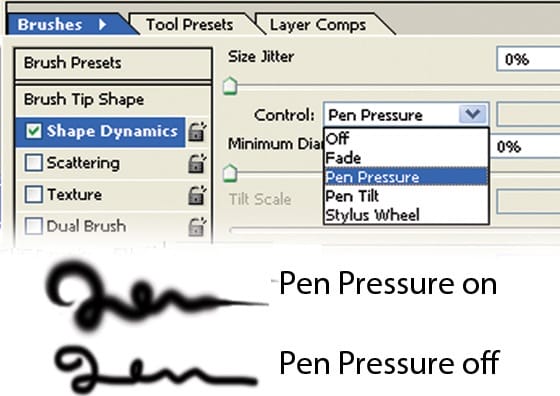
First, select the Brush tool and click on the “Enable Airbrush Capabilities” button in the option bar near the top of your Photoshop window. In the Brush palette, set the control to Pen Pressure or Pen Tilt (if you have a tilt sensitive pen tablet). If you’re using a mouse, set the control to Fade. Fade will simulate natural brush strokes by making the brush size smaller as according to the stroke length.

Face
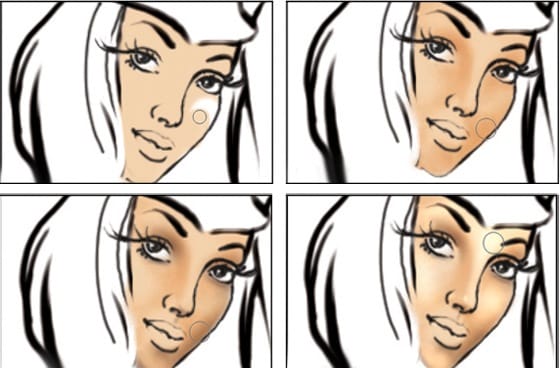
Painting the face is a simple process using the brush, dodge, and burn tool.

First, use the brush tool to paint a base color. Then, use the burn tool to burn the edges. Finally, select the dodge tool to dodge the highlights.

When you’re done, you can use the Smudge tool to refine the edges between the highlights and shadows. In the option bar, you can specify if you only want to smudge the shadows, midtones, or highlights.


Leave a Reply