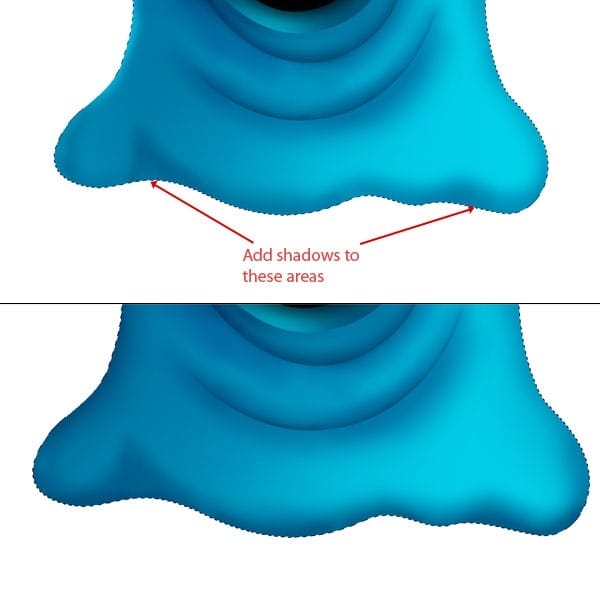
Step 26
Select pen tool and create a path to create lining of lower wrinkle. Next, select a soft brush, change its color to #004e7a and add shadow to the lower wrinkle. Create a selection by pen tool to create lower wrinkle shadow, change the foreground color to #007299, invert the selection and create shadows outside the selection. Similarly add some shadows inside the selection to give wrinkle more realism.
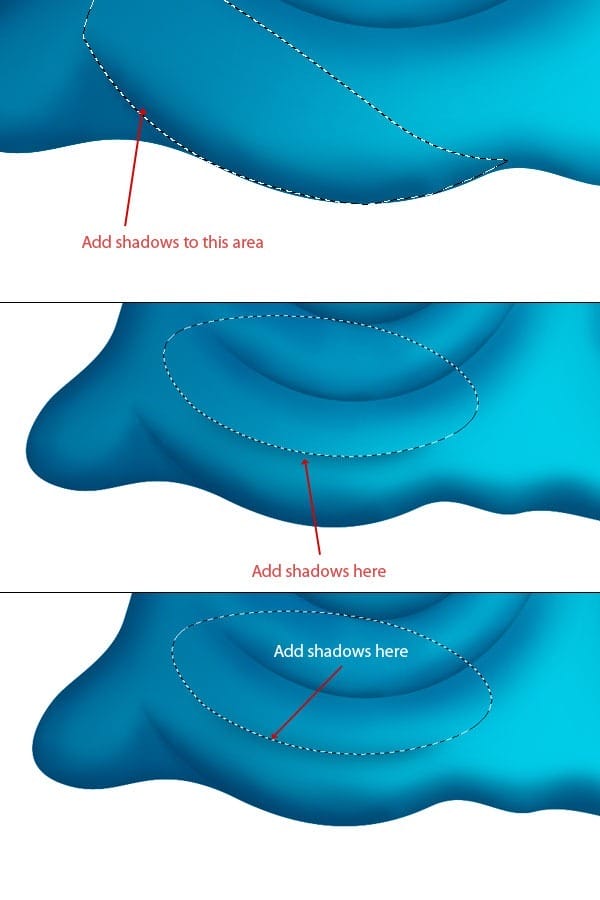
Step 27 – Creating small wrinkles.
To create small wrinkle turn shape layer on, create a shape and press Ctrl + click to get its selection. Select a soft brush of size 200 px & color #0198bd and start creating shadows in small wrinkles.
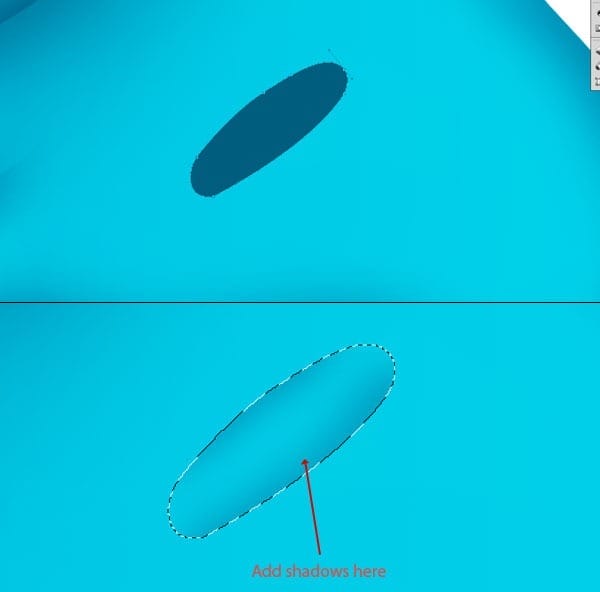
Step 28
Repeat the step-27 and create some more small wrinkles, group wrinkle layers and add layer mask to mask unwanted areas to make wrinkles more prominent.
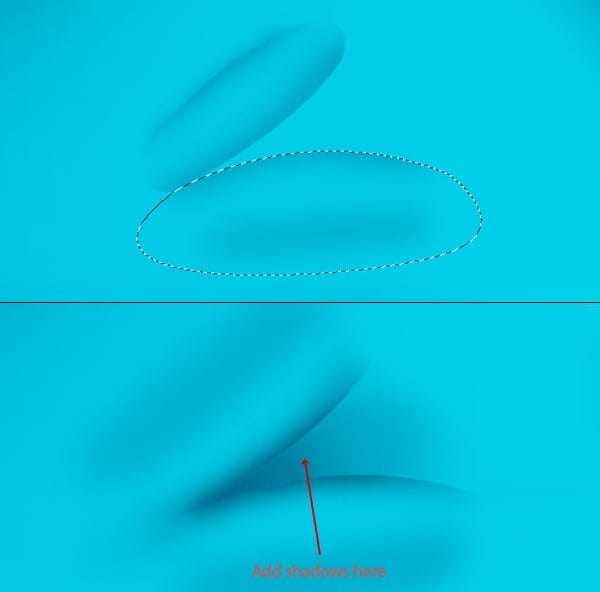
Step 29 – Adding lights.
Now we will add some lights to the character to give it more natural look. Select pen tool and create a shape for main bigger wrinkle, change its color to #ceecf1 and apply gaussian blur of radius 15 px.
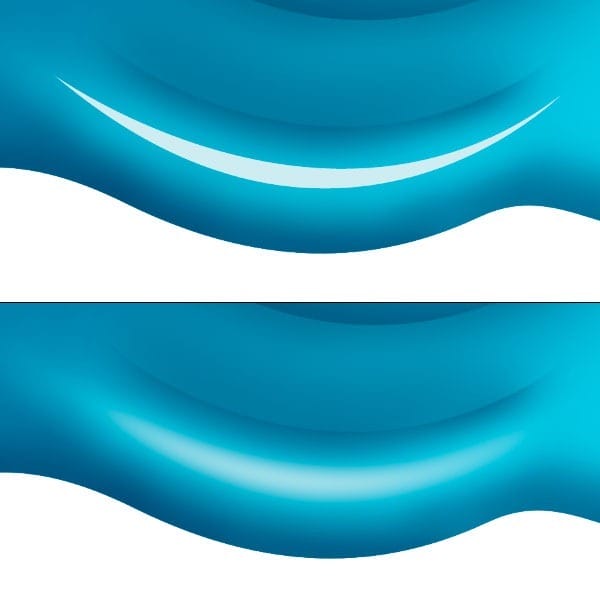
Step 30
Create another shape of color #ceecf1 and add gaussian blur of radius 25 pixels. Next, create a new thinner shape with same color and apply gaussian blur of radius 18 pixels.
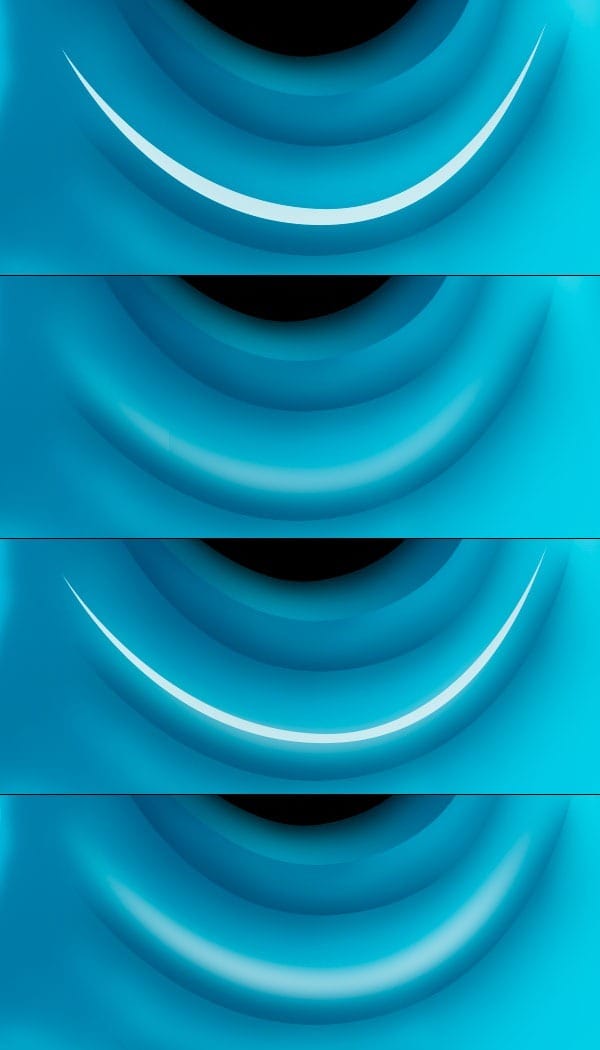
Step 31
Repeat step 29 & 30 to add more lighting to character. Add lights on other wrinkles too, add lighting according to the position of light source.
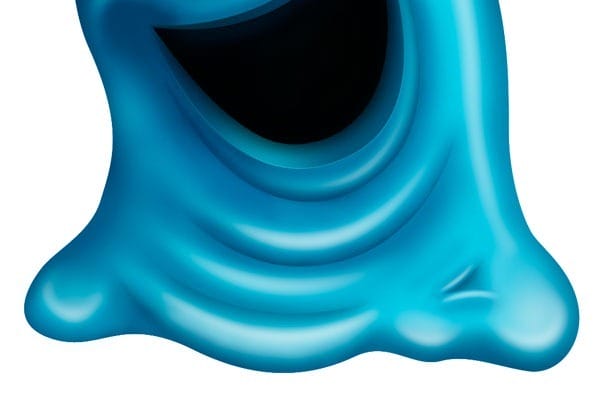
Step 32 – Adding lights to head.
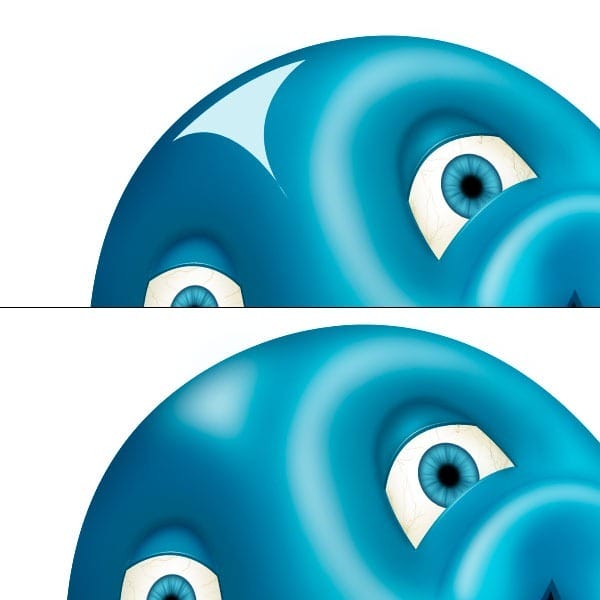
To add light on head, select the pen tool and create a shape of color #ceecf1 then apply a gaussian blur of radius 40 pixels. Next, create another thinner shape around eyes with same color and apply gaussian blur of radius 25 pixels. If everything done properly, then it will look like this.
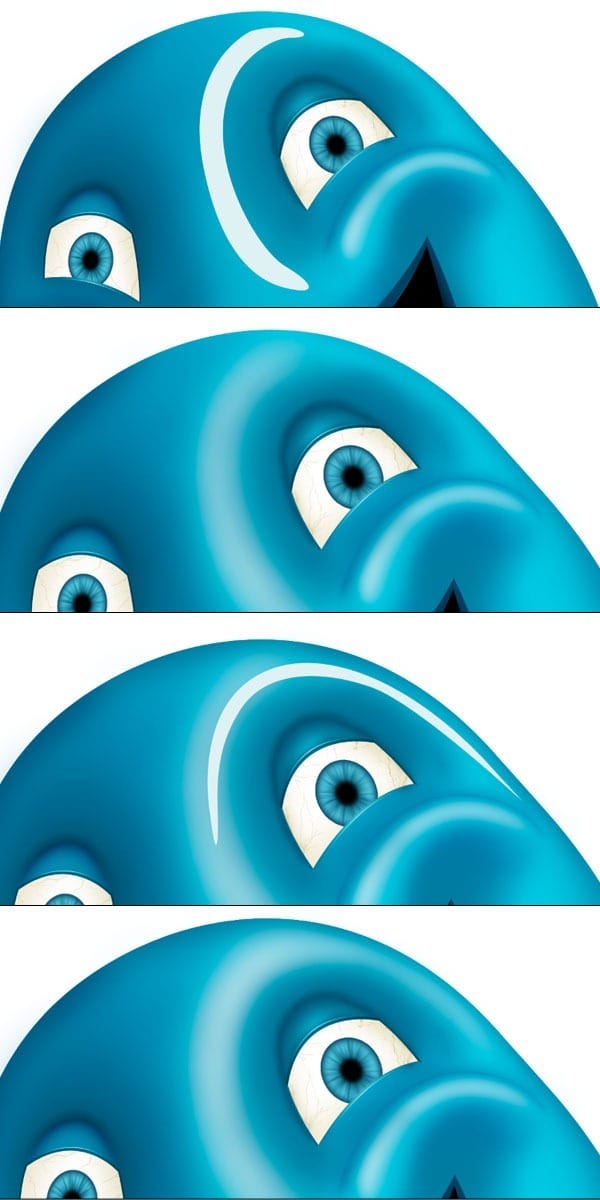
Step 33
Create another shape layer on head of color #ceecf1 and apply a gaussian blur of radius 46 pixels. The result will look like this.
Step 34
Repeat steps 29 & 30 to create lights on the body of character to give character realistic look.

Step 35 – Creating hand.
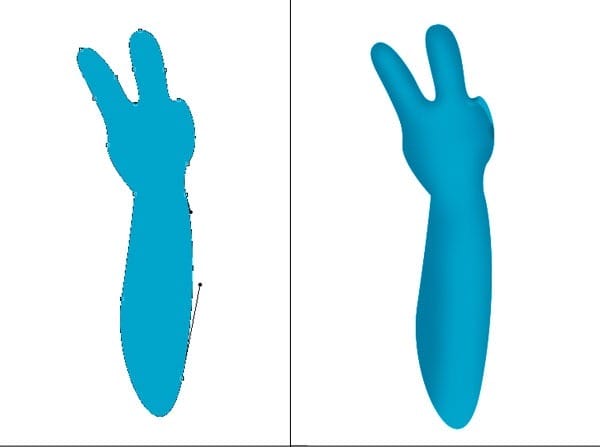
Create a hand shape with pen tool, don’t forget to turn shape layer on. Change its color to #00a4cb, select a soft brush of size 200 px and add shadows to the hand.
Step 36
Now we will enhance the hand by adding details in it. Starting from index finger, create a divider in index finger with color #006384 and apply gaussian blur of radius 3.5 pixels.
8 responses to “How to Create a Cute Gooey Blob from Scratch Using Photoshop”
-
Thanks for the time you spent. really useful
-
Amazing turorial my friend!!Thank you very much!!!
-
I didn’t get to try this yet, but read through the whole tutorial. I can’t wait to try it. I think it’s outstanding and clever use of many basic tools. I got lots of good ideas from it.
-
i hate this tutorial real talk
-
worst tutorial ever fk this shit
-
It is not SS-light-beams.color but it is SS-light-beams.abr that is an photoshop brush file to be import in photoshop to use. If you are using CS5 then you can just double click on brush and it will be loaded in your photoshop.
-
I am sorry if you found some problem while following the tutorial and understanding. I would keep in mind to create more detailed tutorials. Thanks for your feedback.
-
good,
-


Leave a Reply