
Make skin look perfect in one-click with these AI-powered Photoshop actions.

Step 18
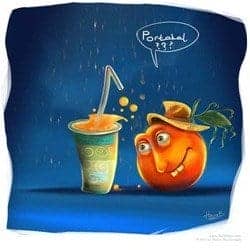
In the detailing of orange, I used light orange color by mixing some more yellows. . First I click on the Brush Tool (B) and choose a very thin, hard brush I take the Brush again and Pen Pressure on Other dynamics. So details, I think that is the part when I usually being satisfied from the painting. I start in the left where there is no light brighter color in the right where the orange are exposed to the light source in a scene of the light. This creates the set color range you want for each section of the picture, but no strong darks yet. After I've applied my light colors with dodge tool, I go back and begin taking darker colors by taking dark orange color. To make it more shiny or something of the sort use the thin brush and add highlights at the sides like in the picture.

So anyway this is the end of the tutorial. I hope this basic steps helped give you a better understanding of my process and how you can apply it to your own technique and illustrations. Always keep practicing, be creative and enjoy my tutorials J İf you have any questions, please let me know and I am going to try my best to answer you questions. Thanks for reading.

One comment on “Paint “Mark the Cute Orange” in Photoshop”
Can portakal :)